
A great big Happy Summer to all of you!
Disclosure: This post may contain affiliate links. As an Amazon Associate, I earn from qualifying purchases at no additional cost to you. See full Disclosure Statement HERE.
I hope you are all off to a wonderful start!
This post is very fitting since my family & I are enjoying an amazing New England getaway:).
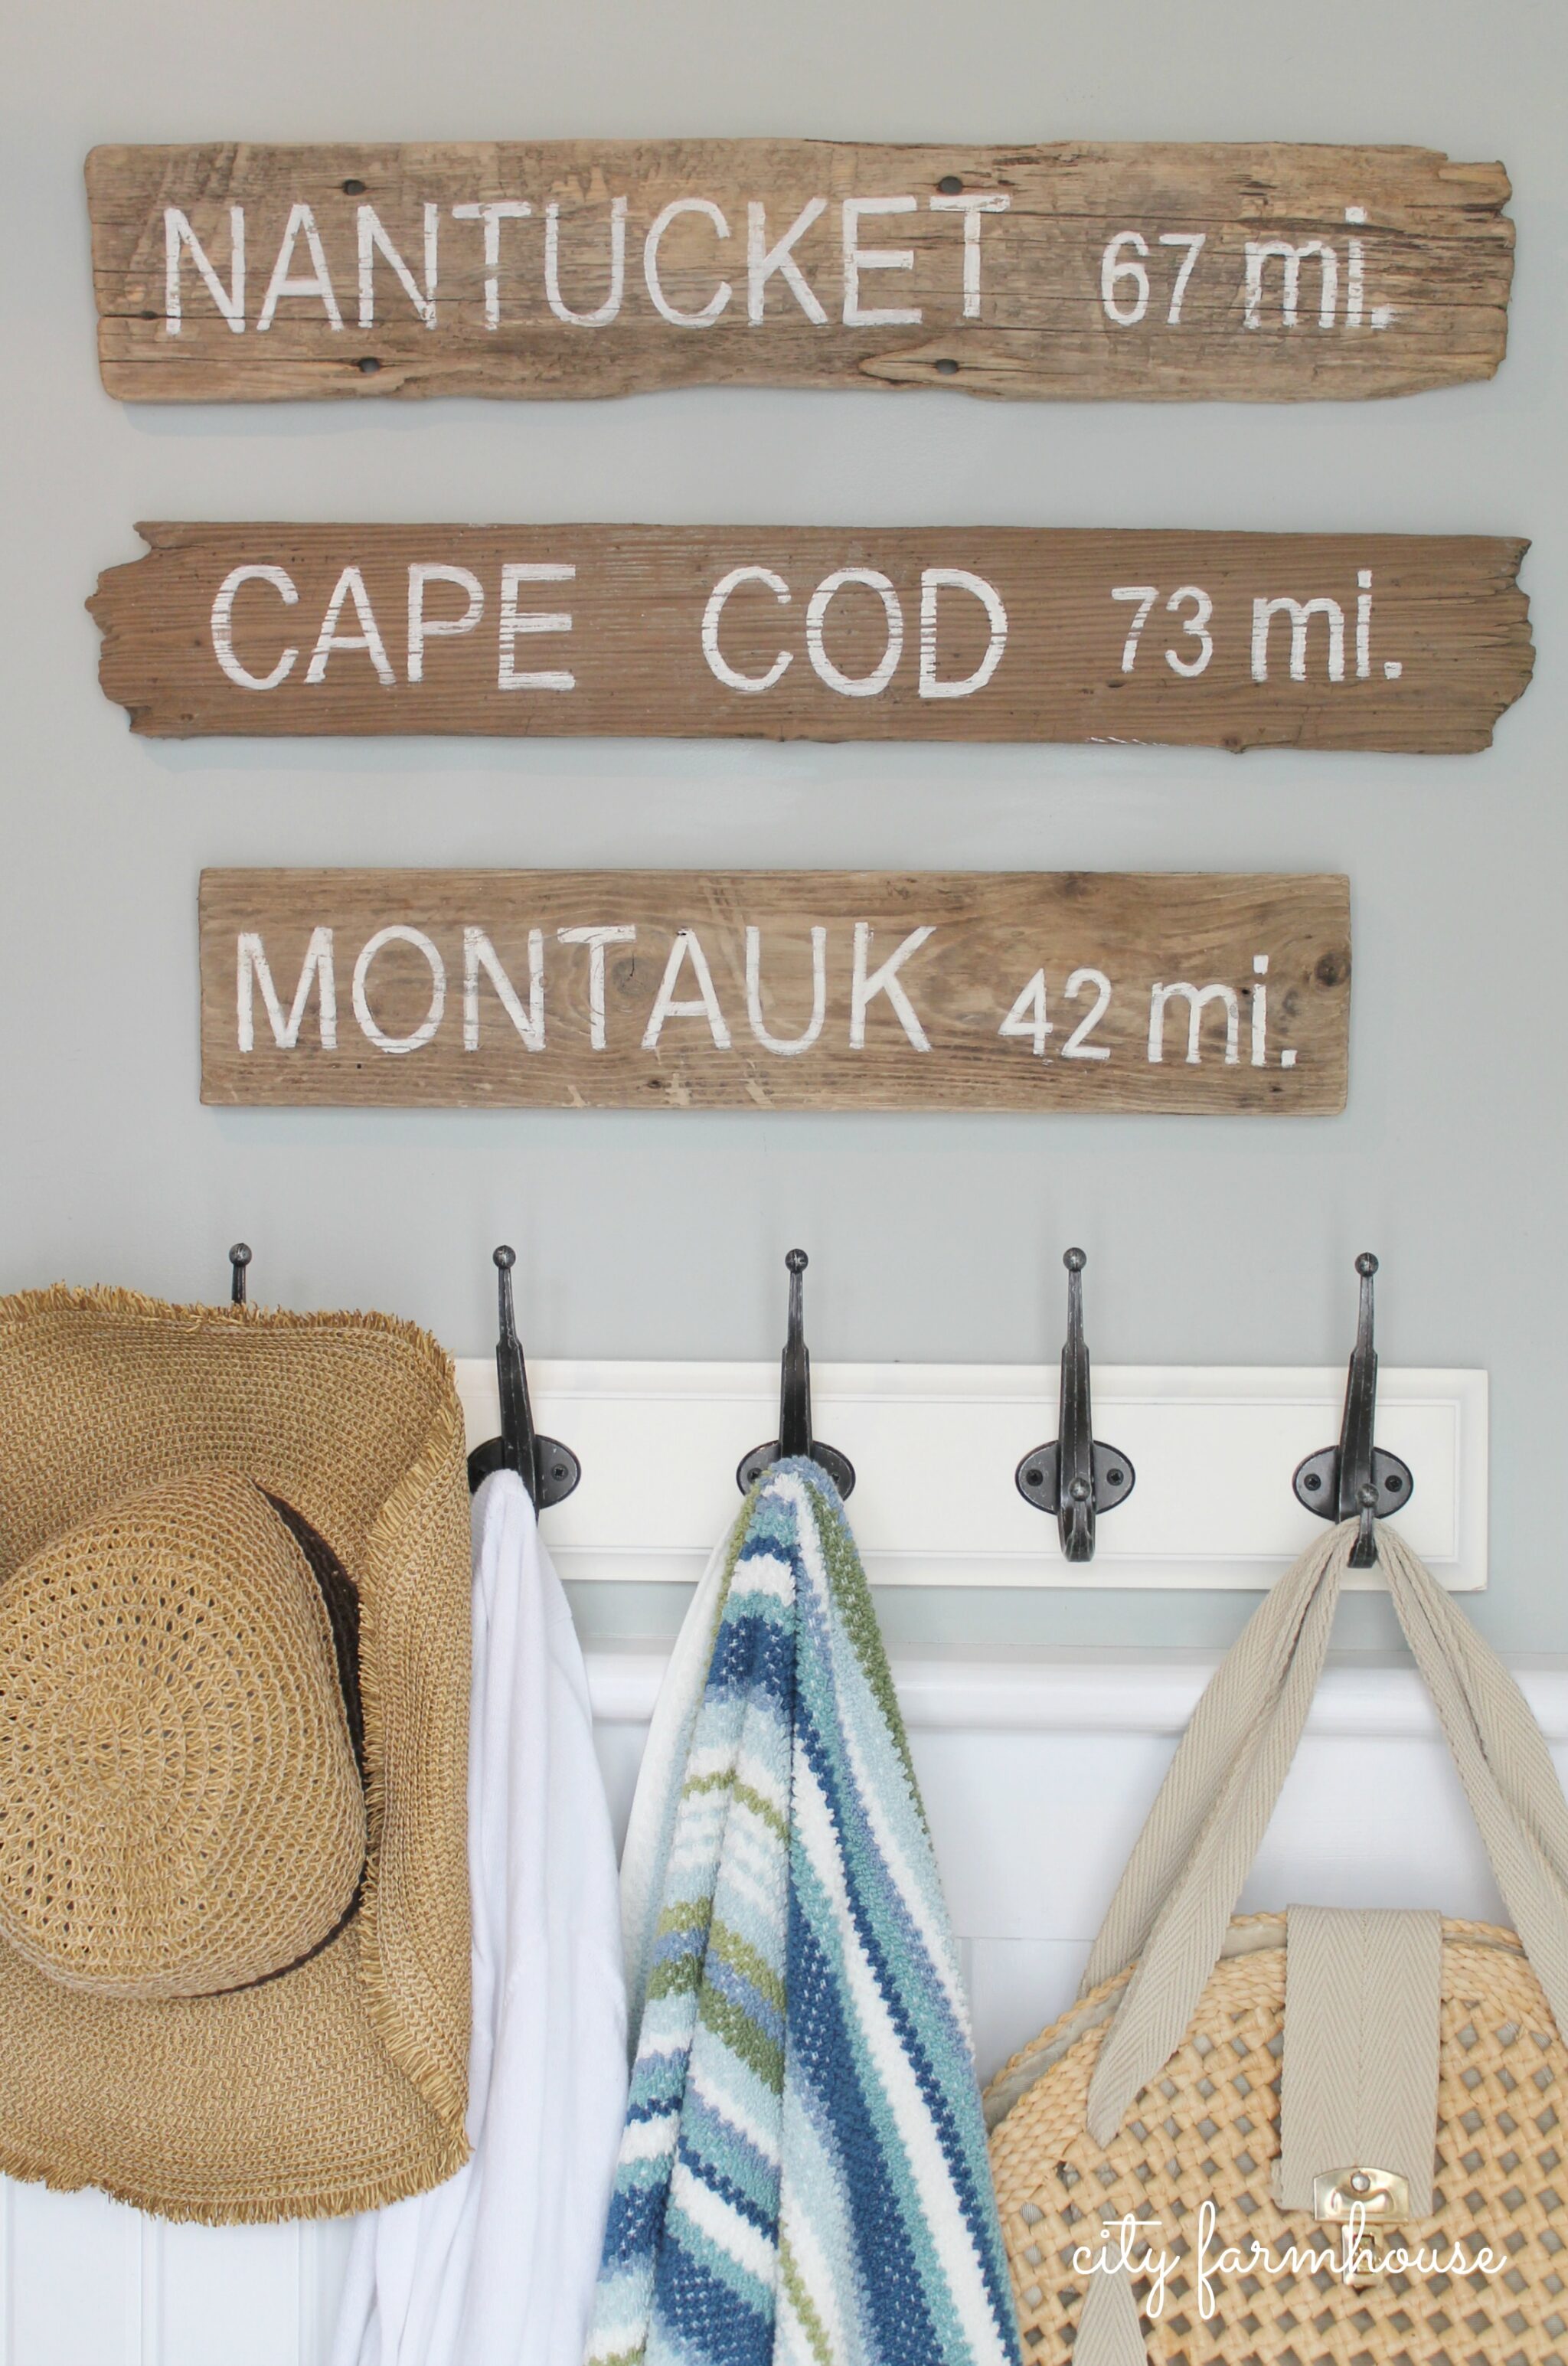
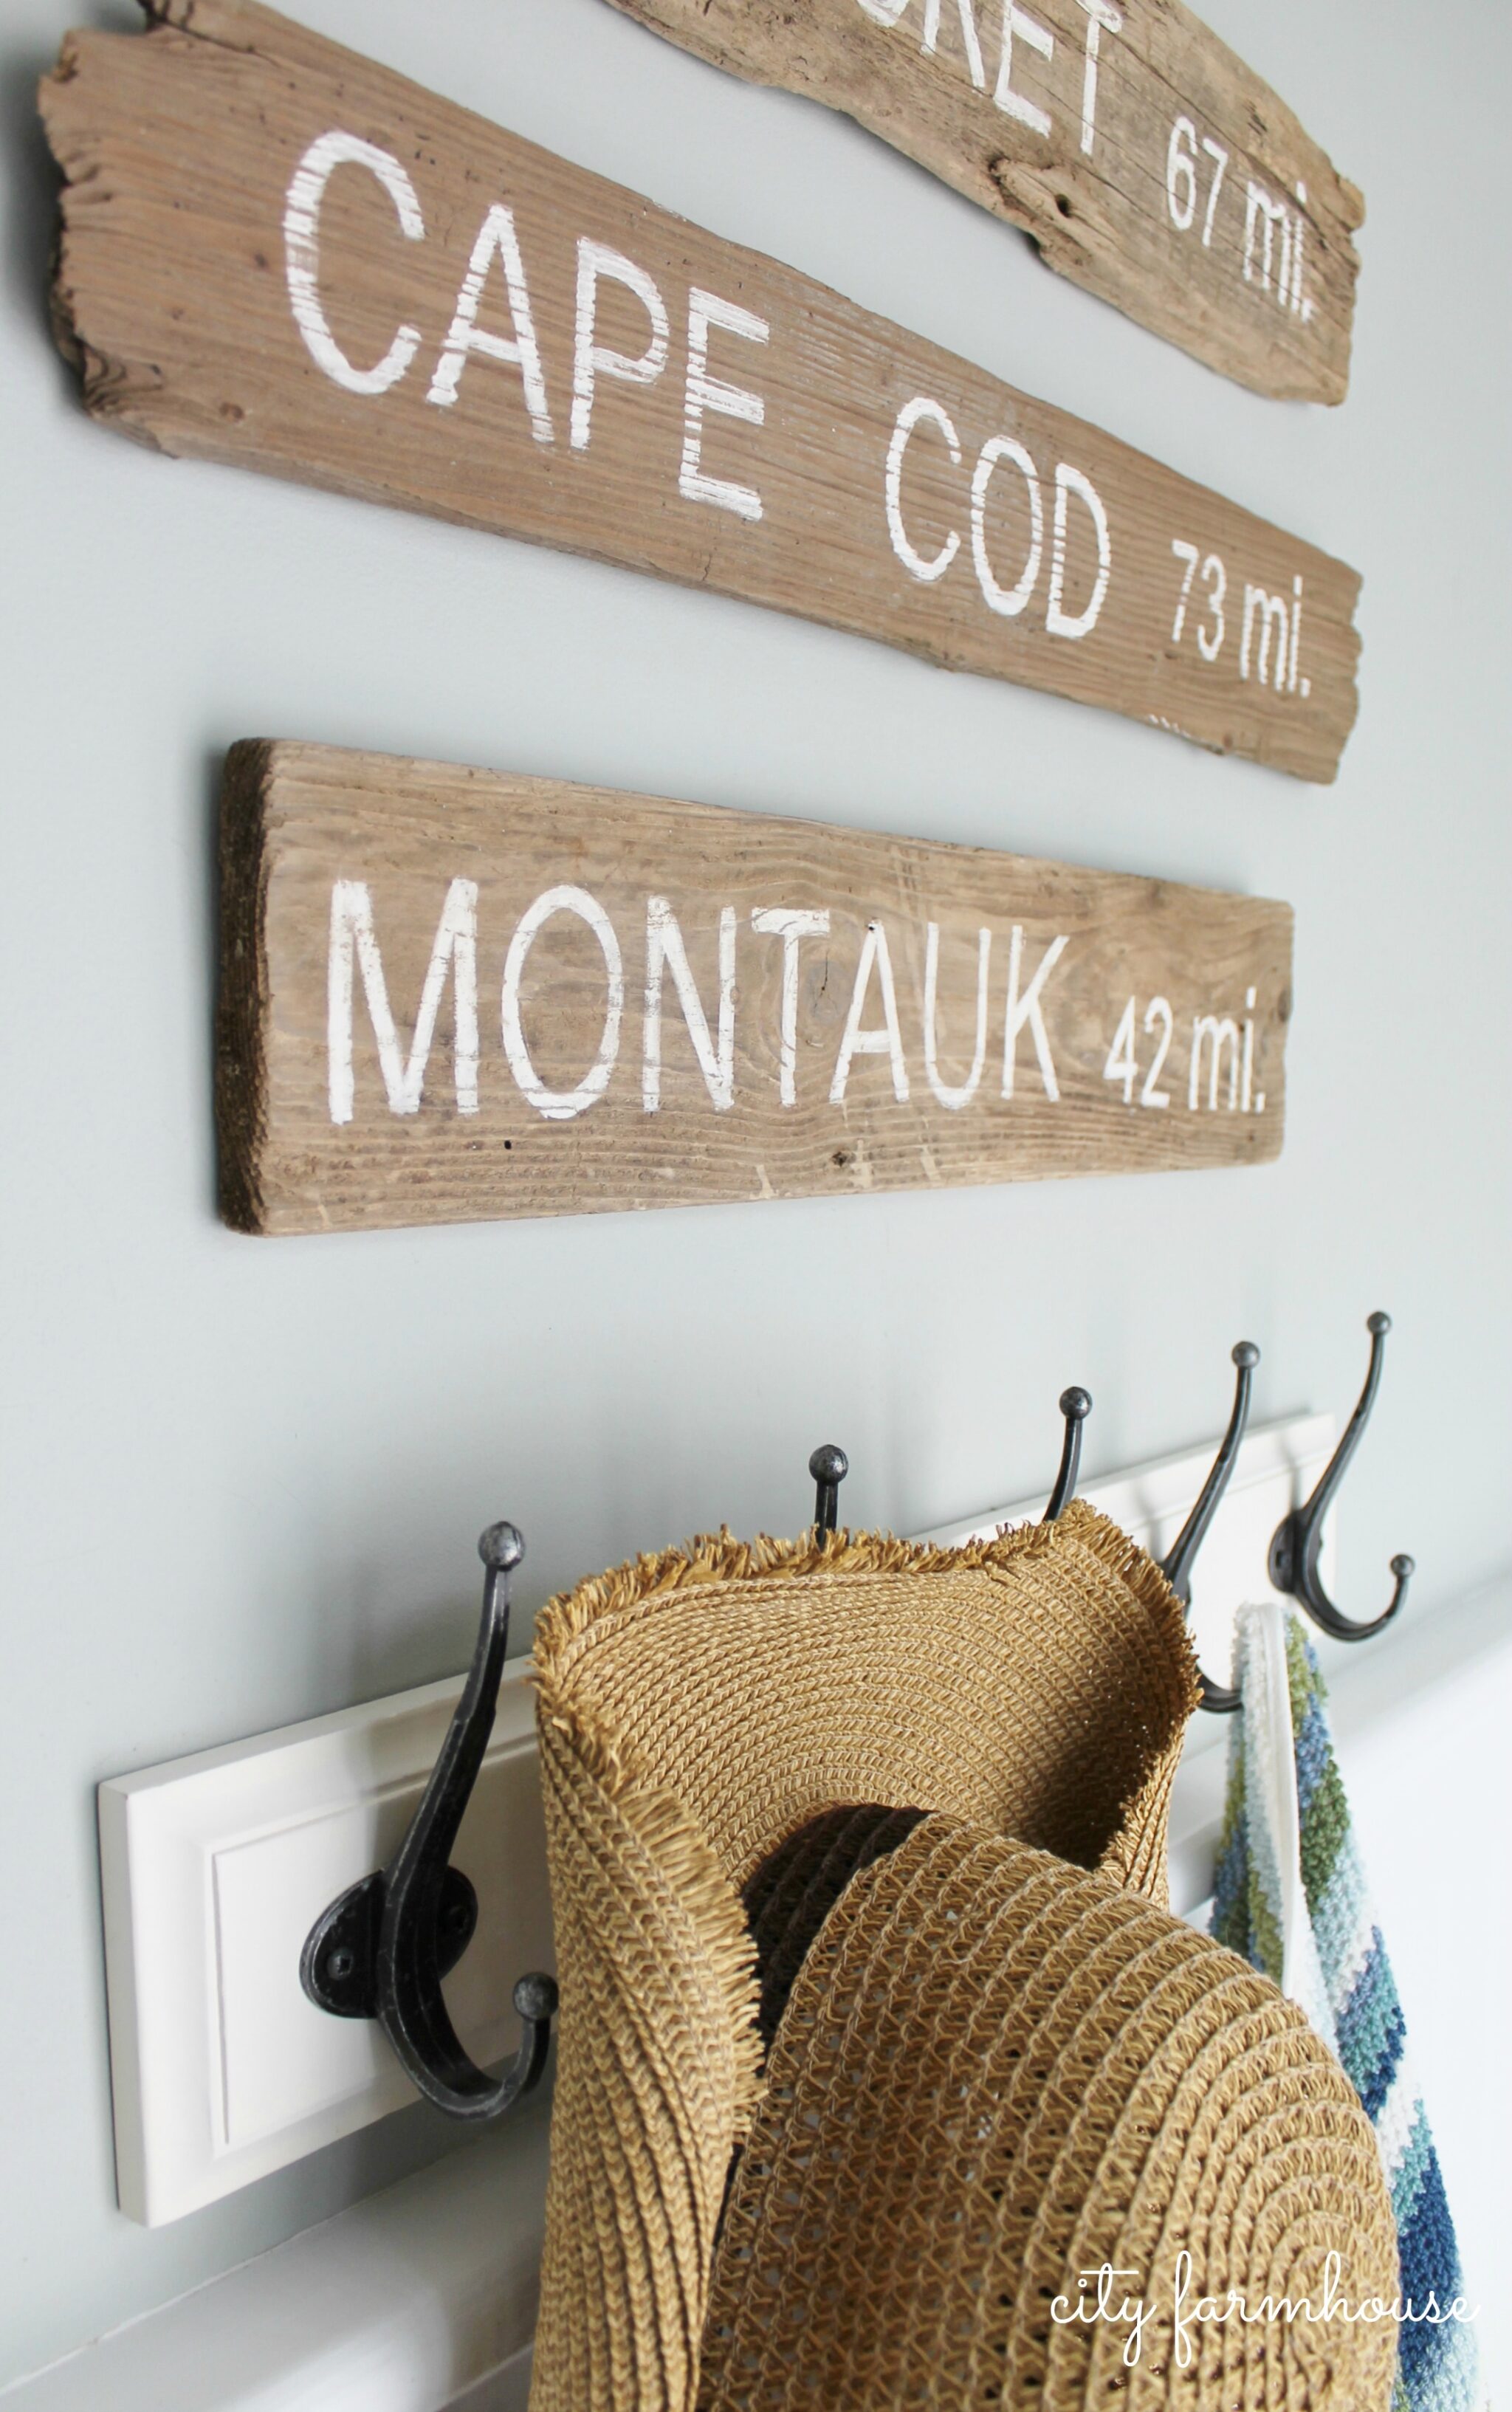
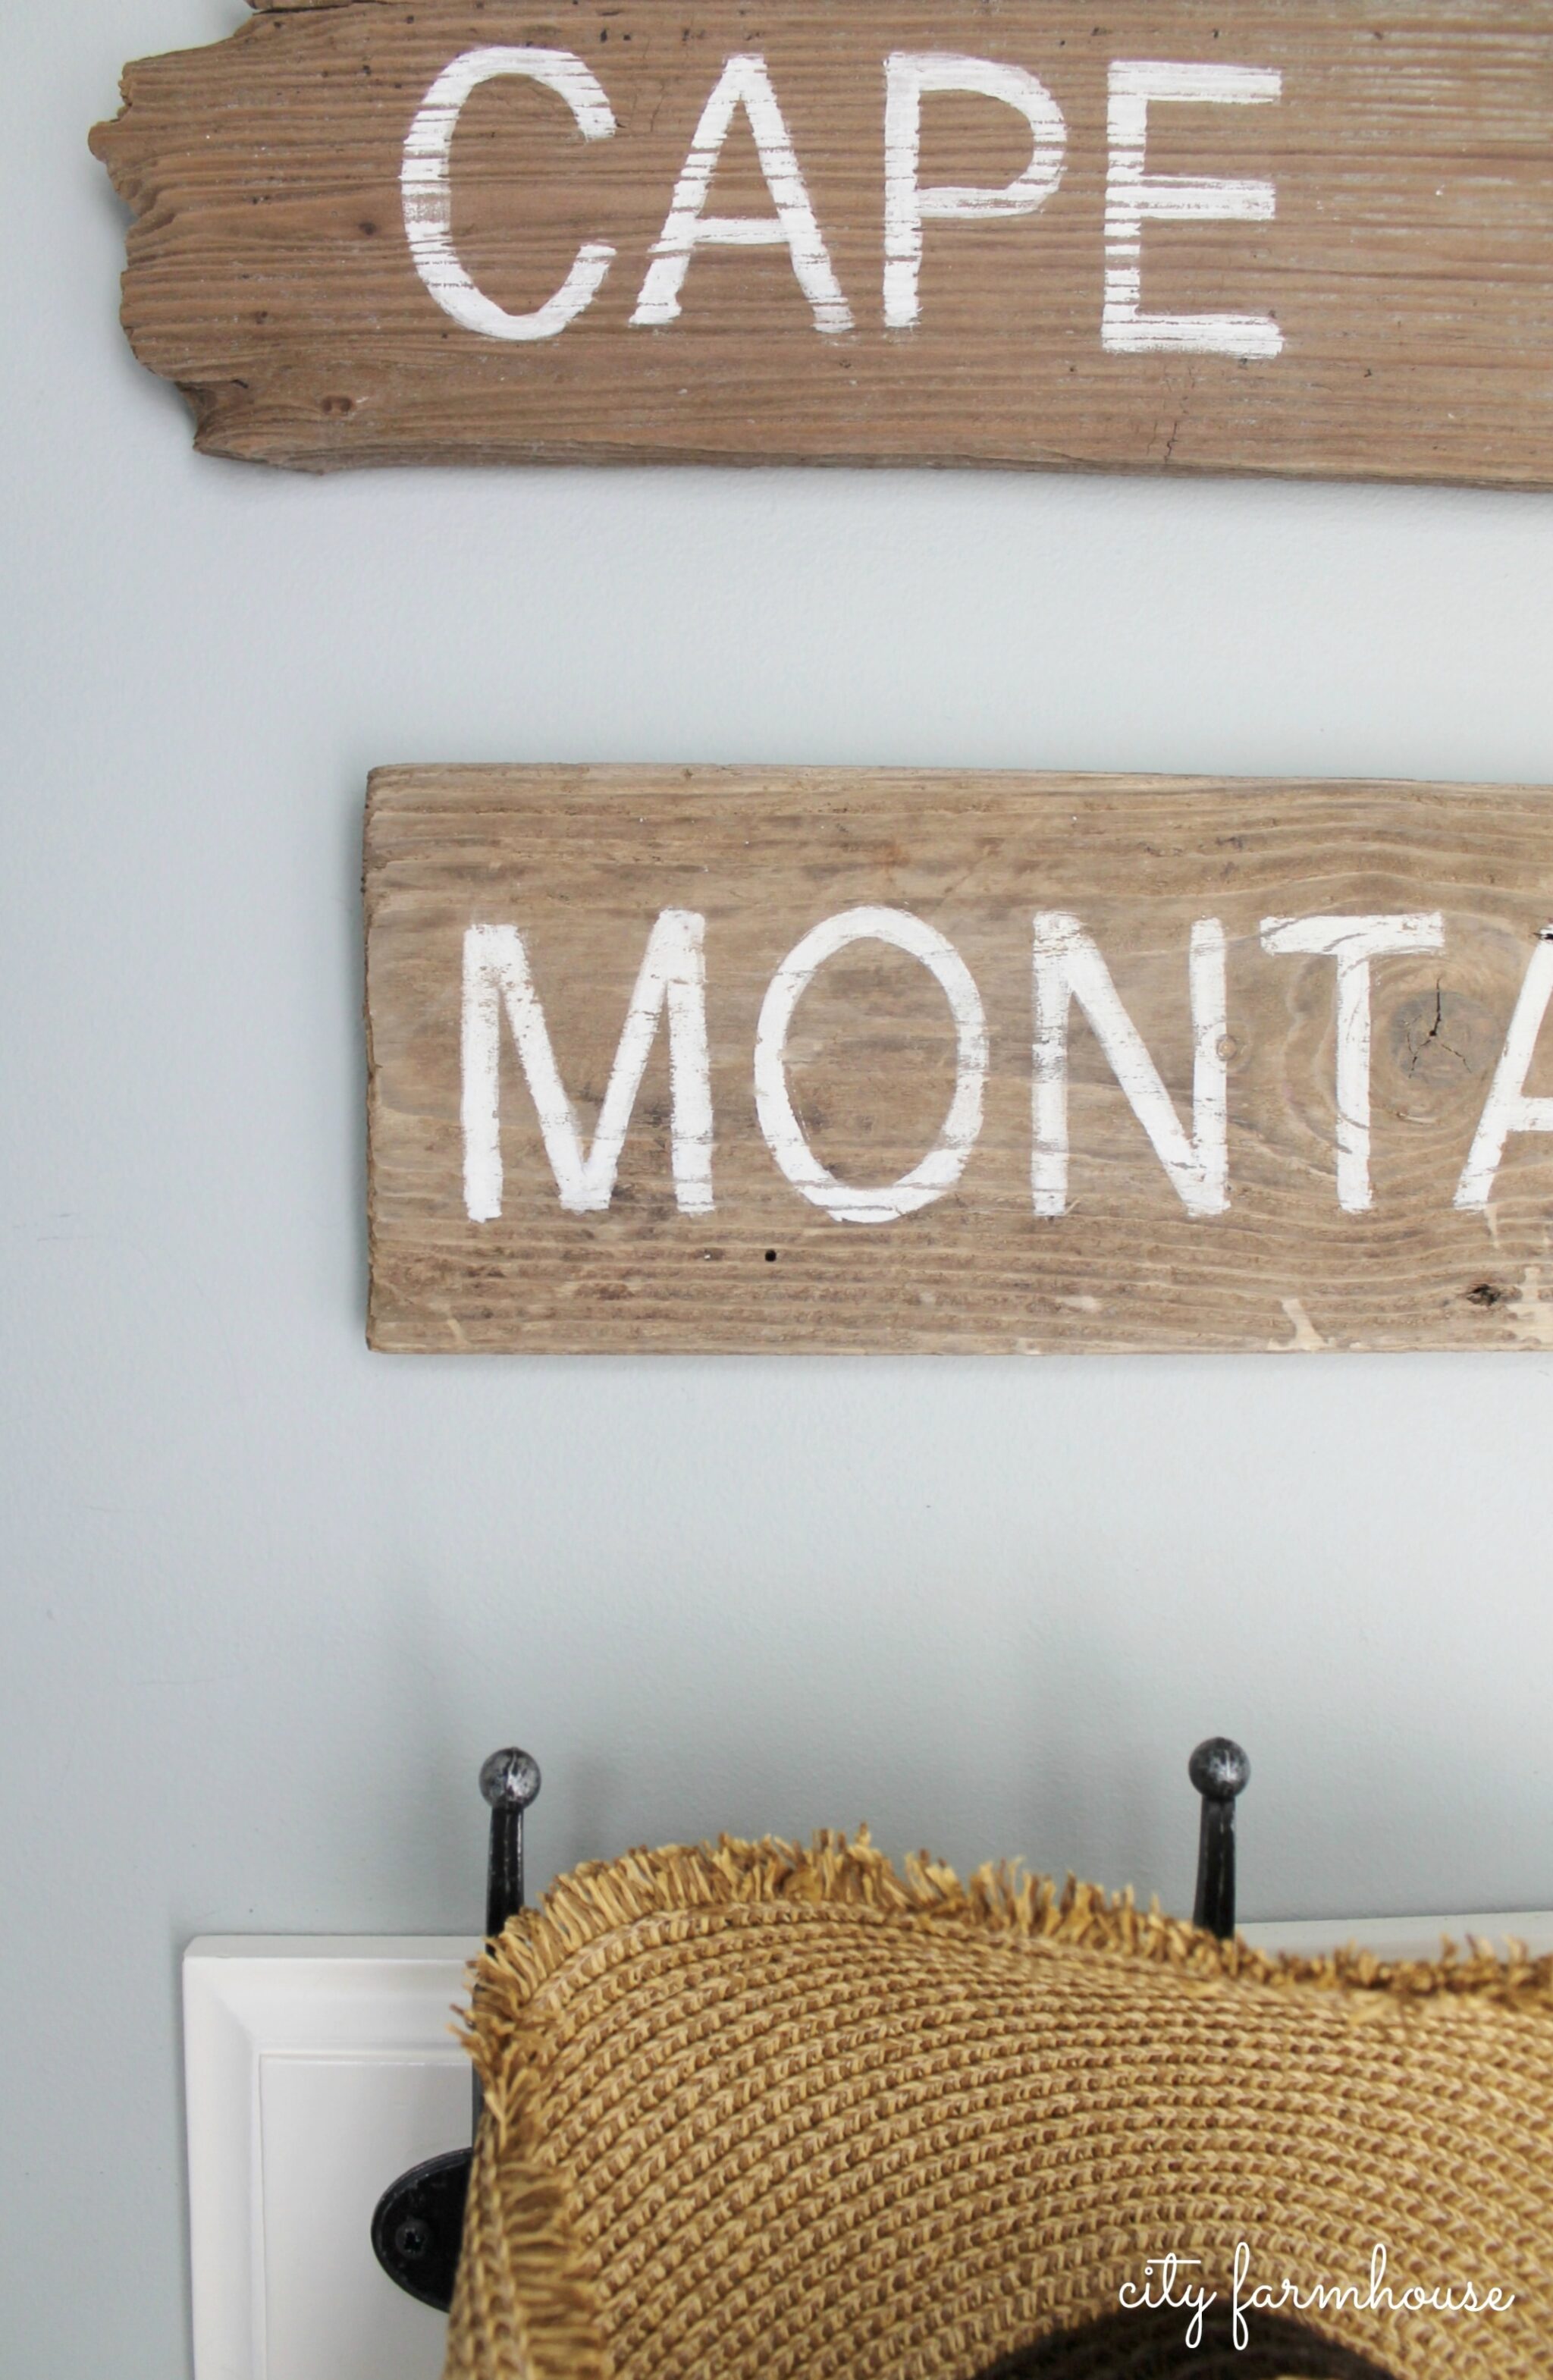
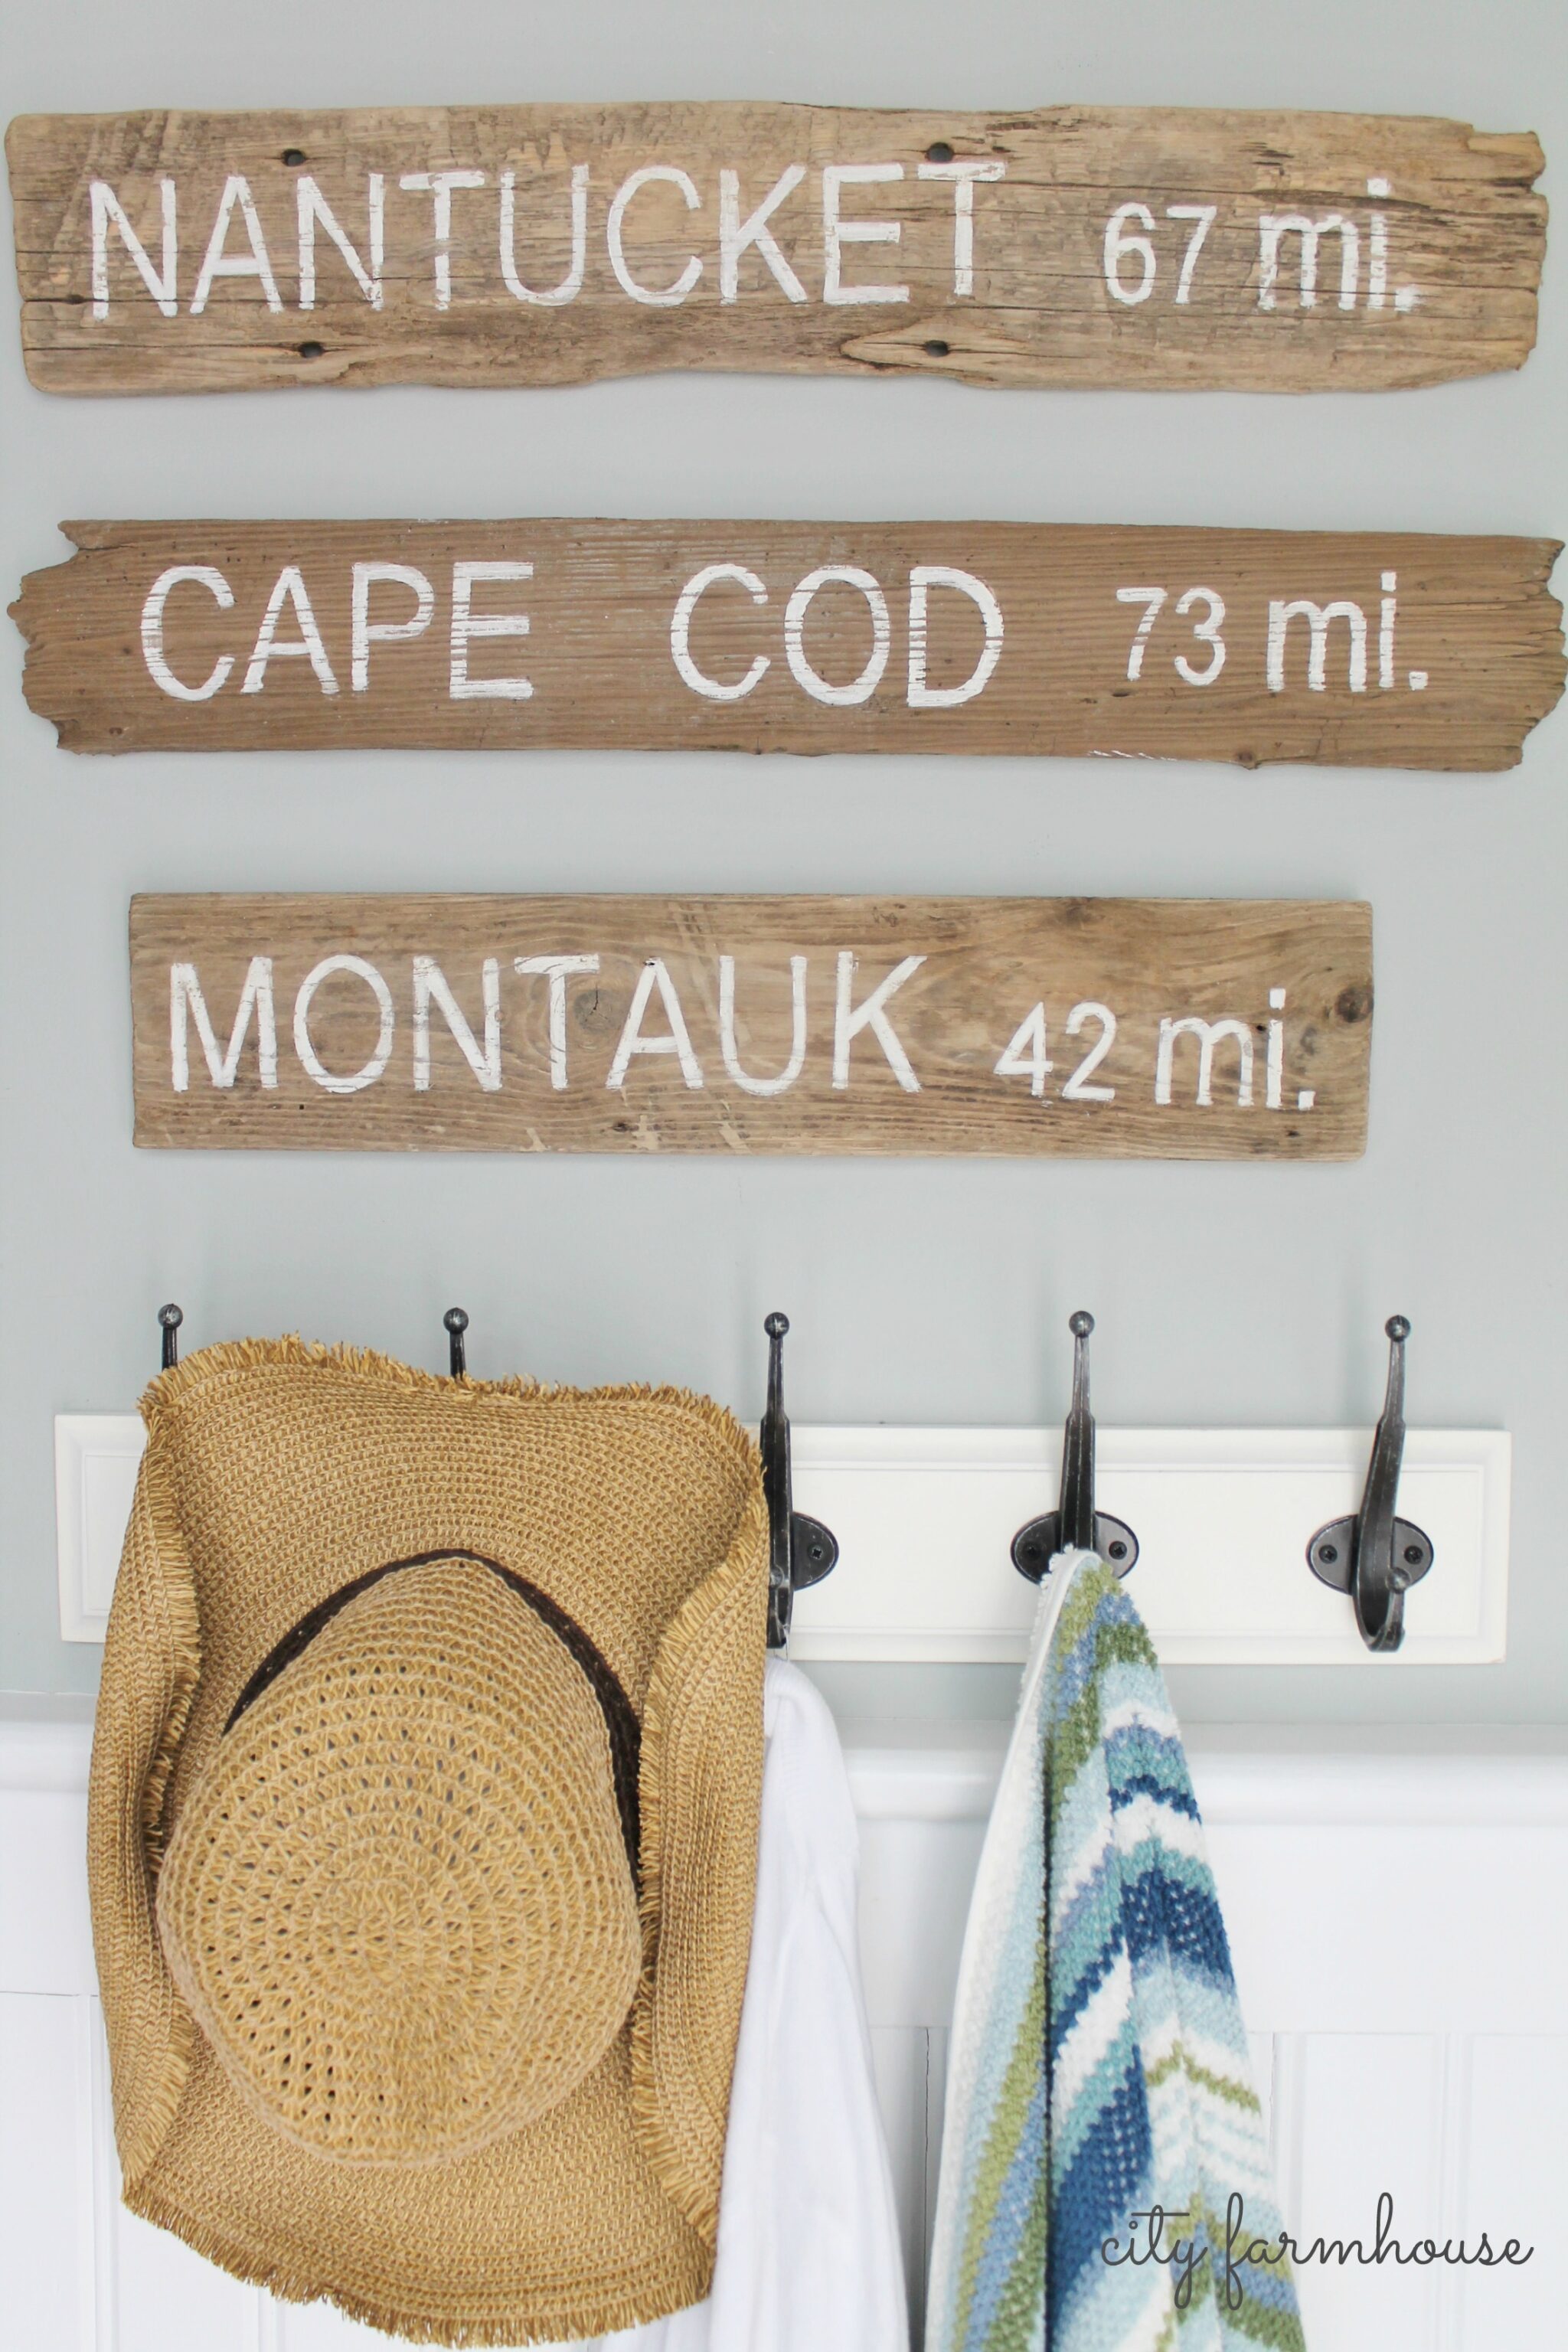
I love signs-
in just a few words they can capture a moment, a feeling of a special place or time.
Living coastally I am always looking for original & unique ways to seamlessly incorporate a
“beachy” look into my home, especially during the summer months:).
Signs always seem to do that,
they are easy to make and always seem to spark conversation.
When I saw THIS image, instant inspiration.
Simple, yet meaningful(we live in the NE) & FUN!
Of course I had to put my own twist on it,
so I went rummaging through my scrap wood
&
found some left over driftwood from Hurricane Sandy.
I used a simple technique to hand paint the letters & voila….
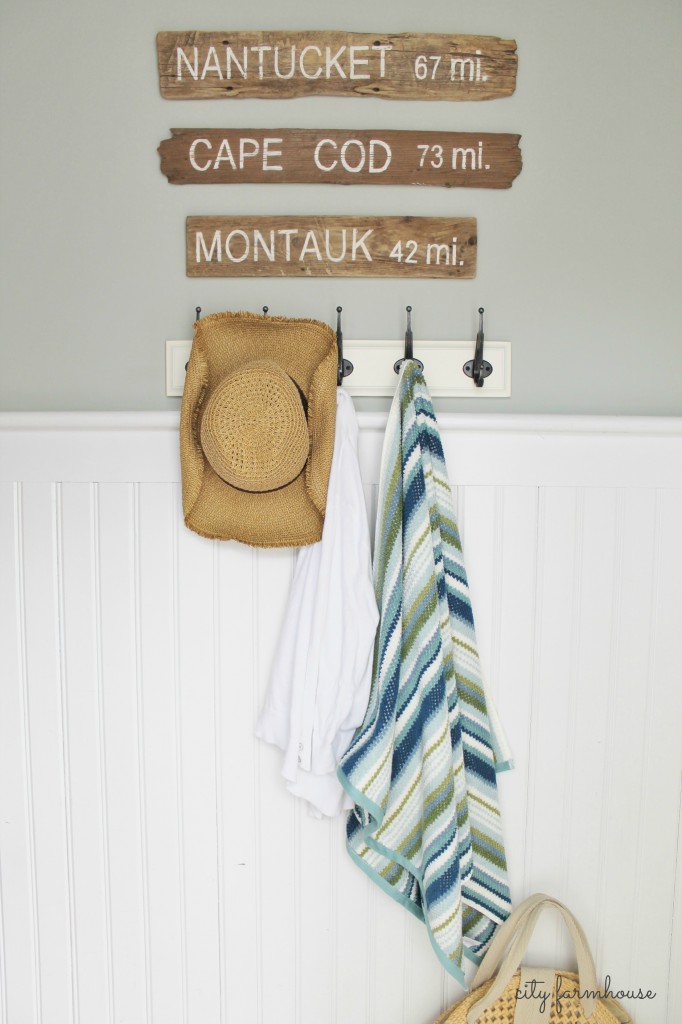
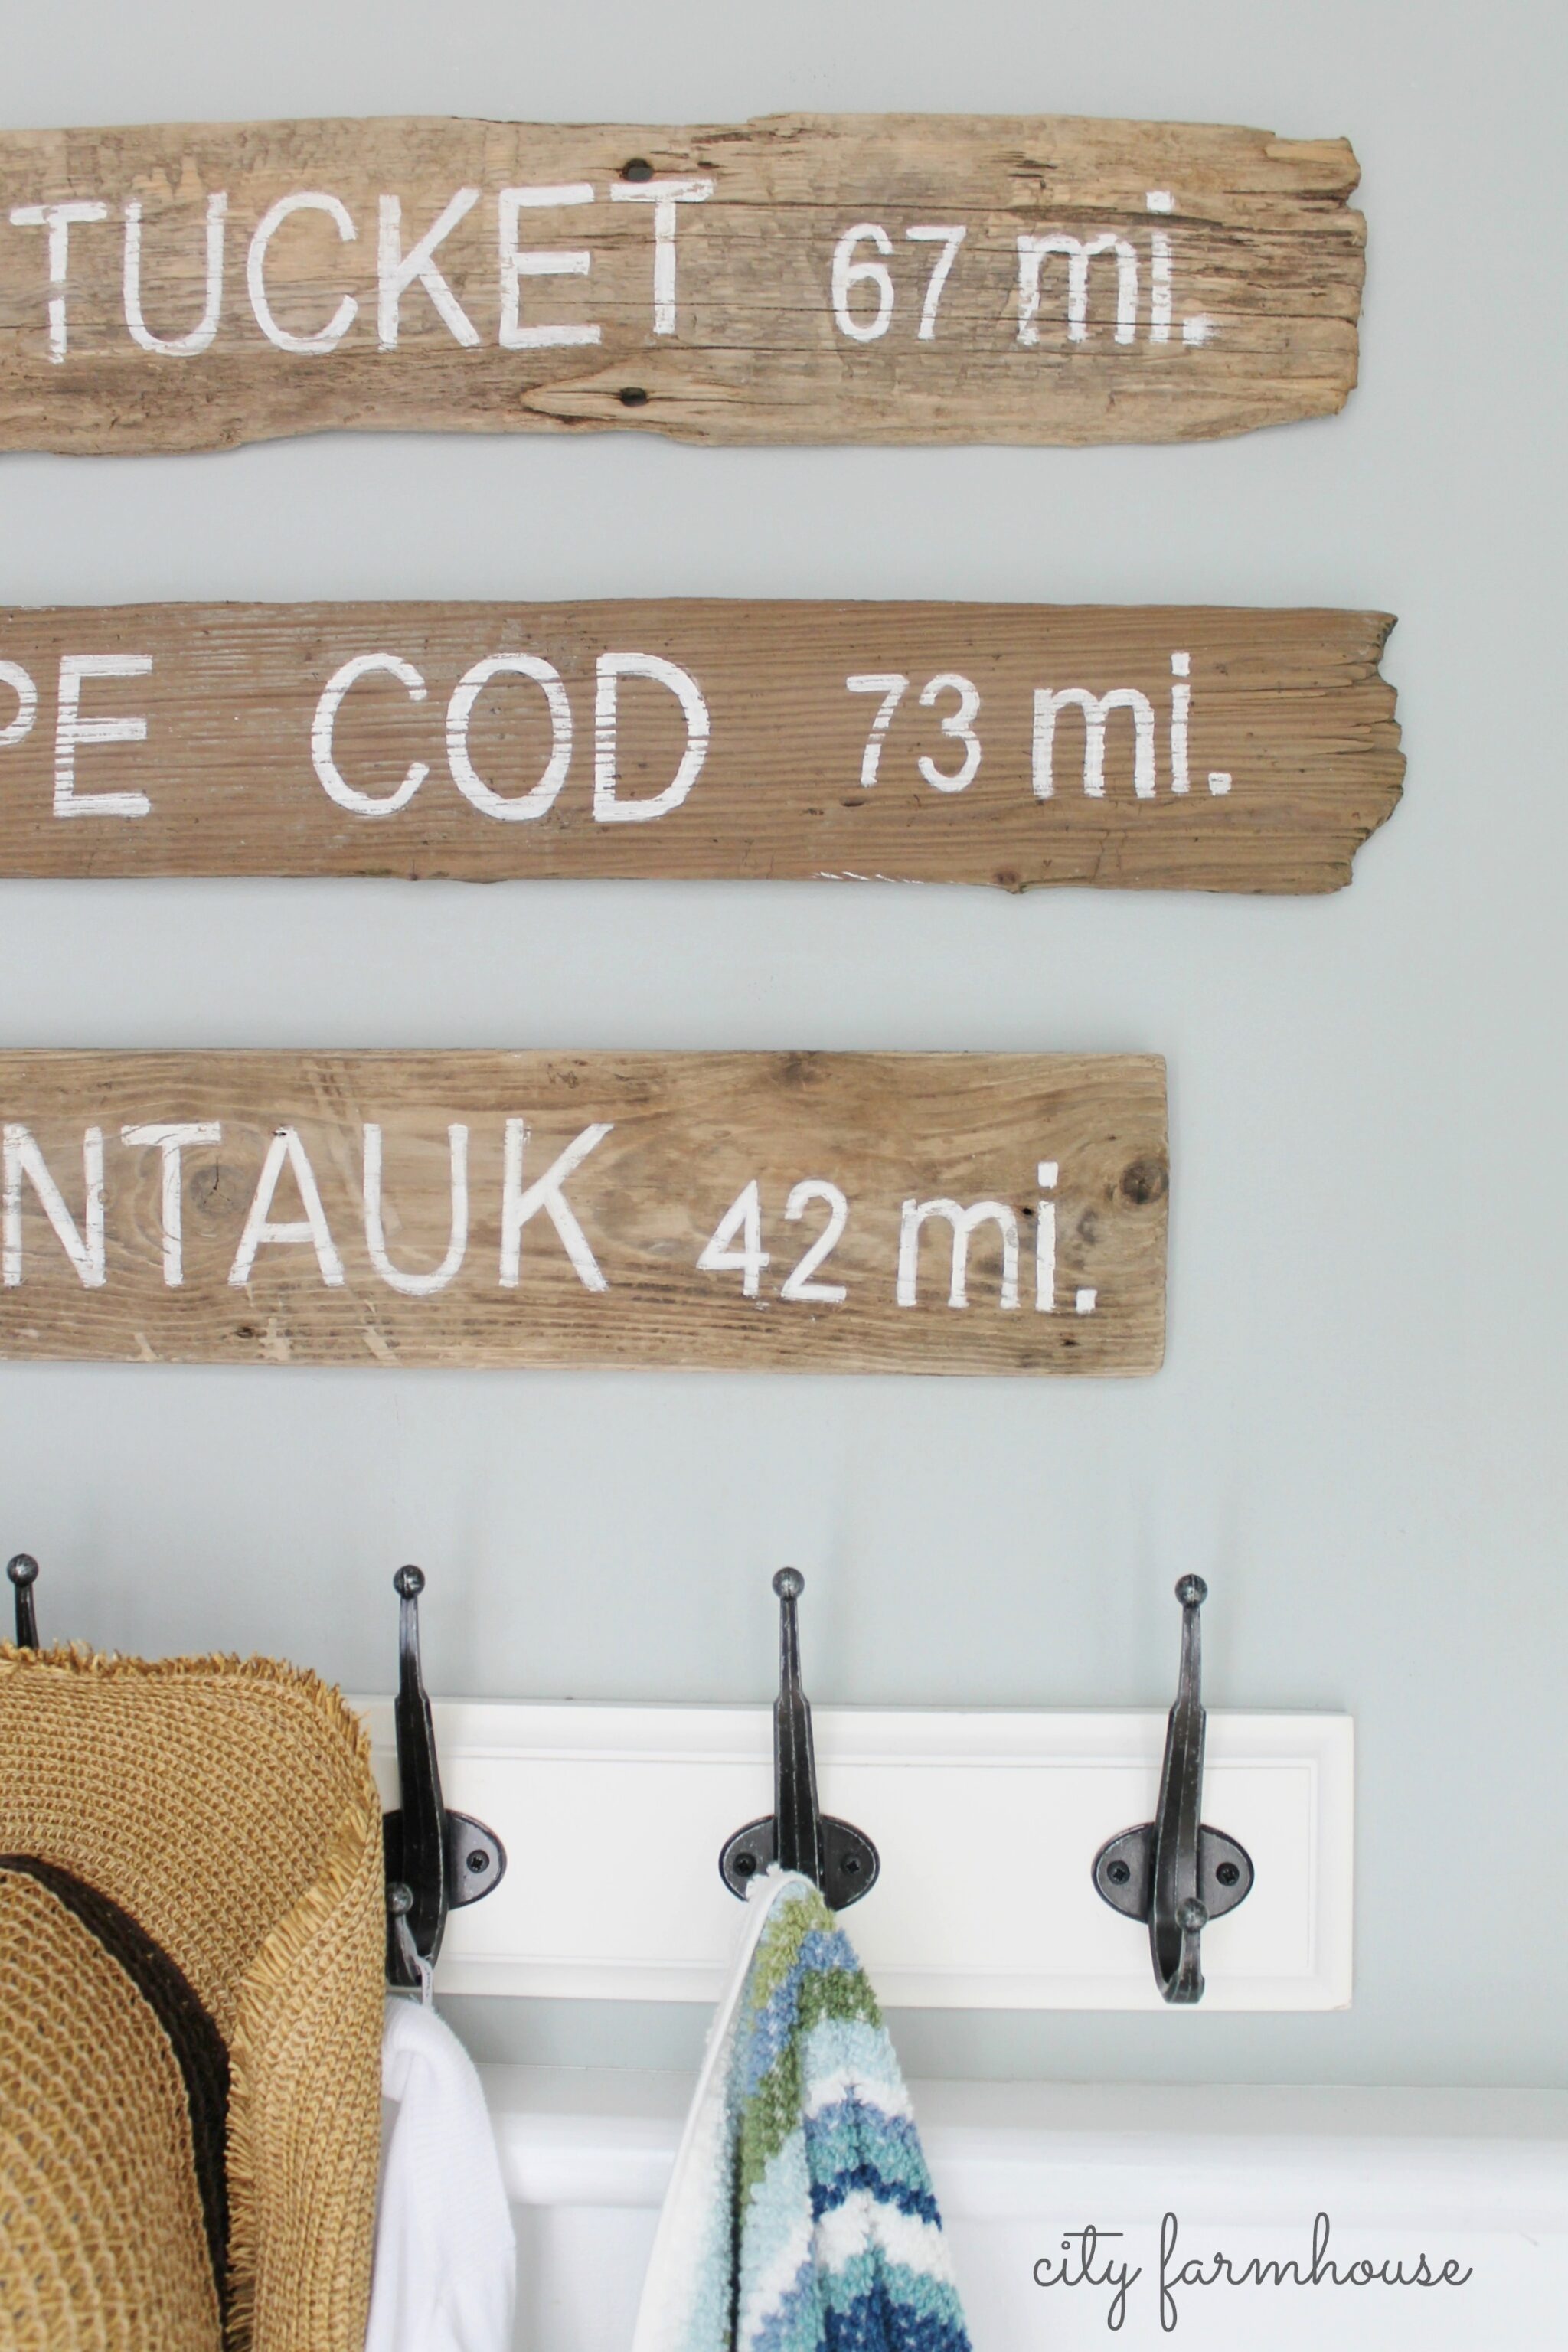
A Pottery Barn Inspired Coastal Sign Trio.
This is my simple & easy tutorial….
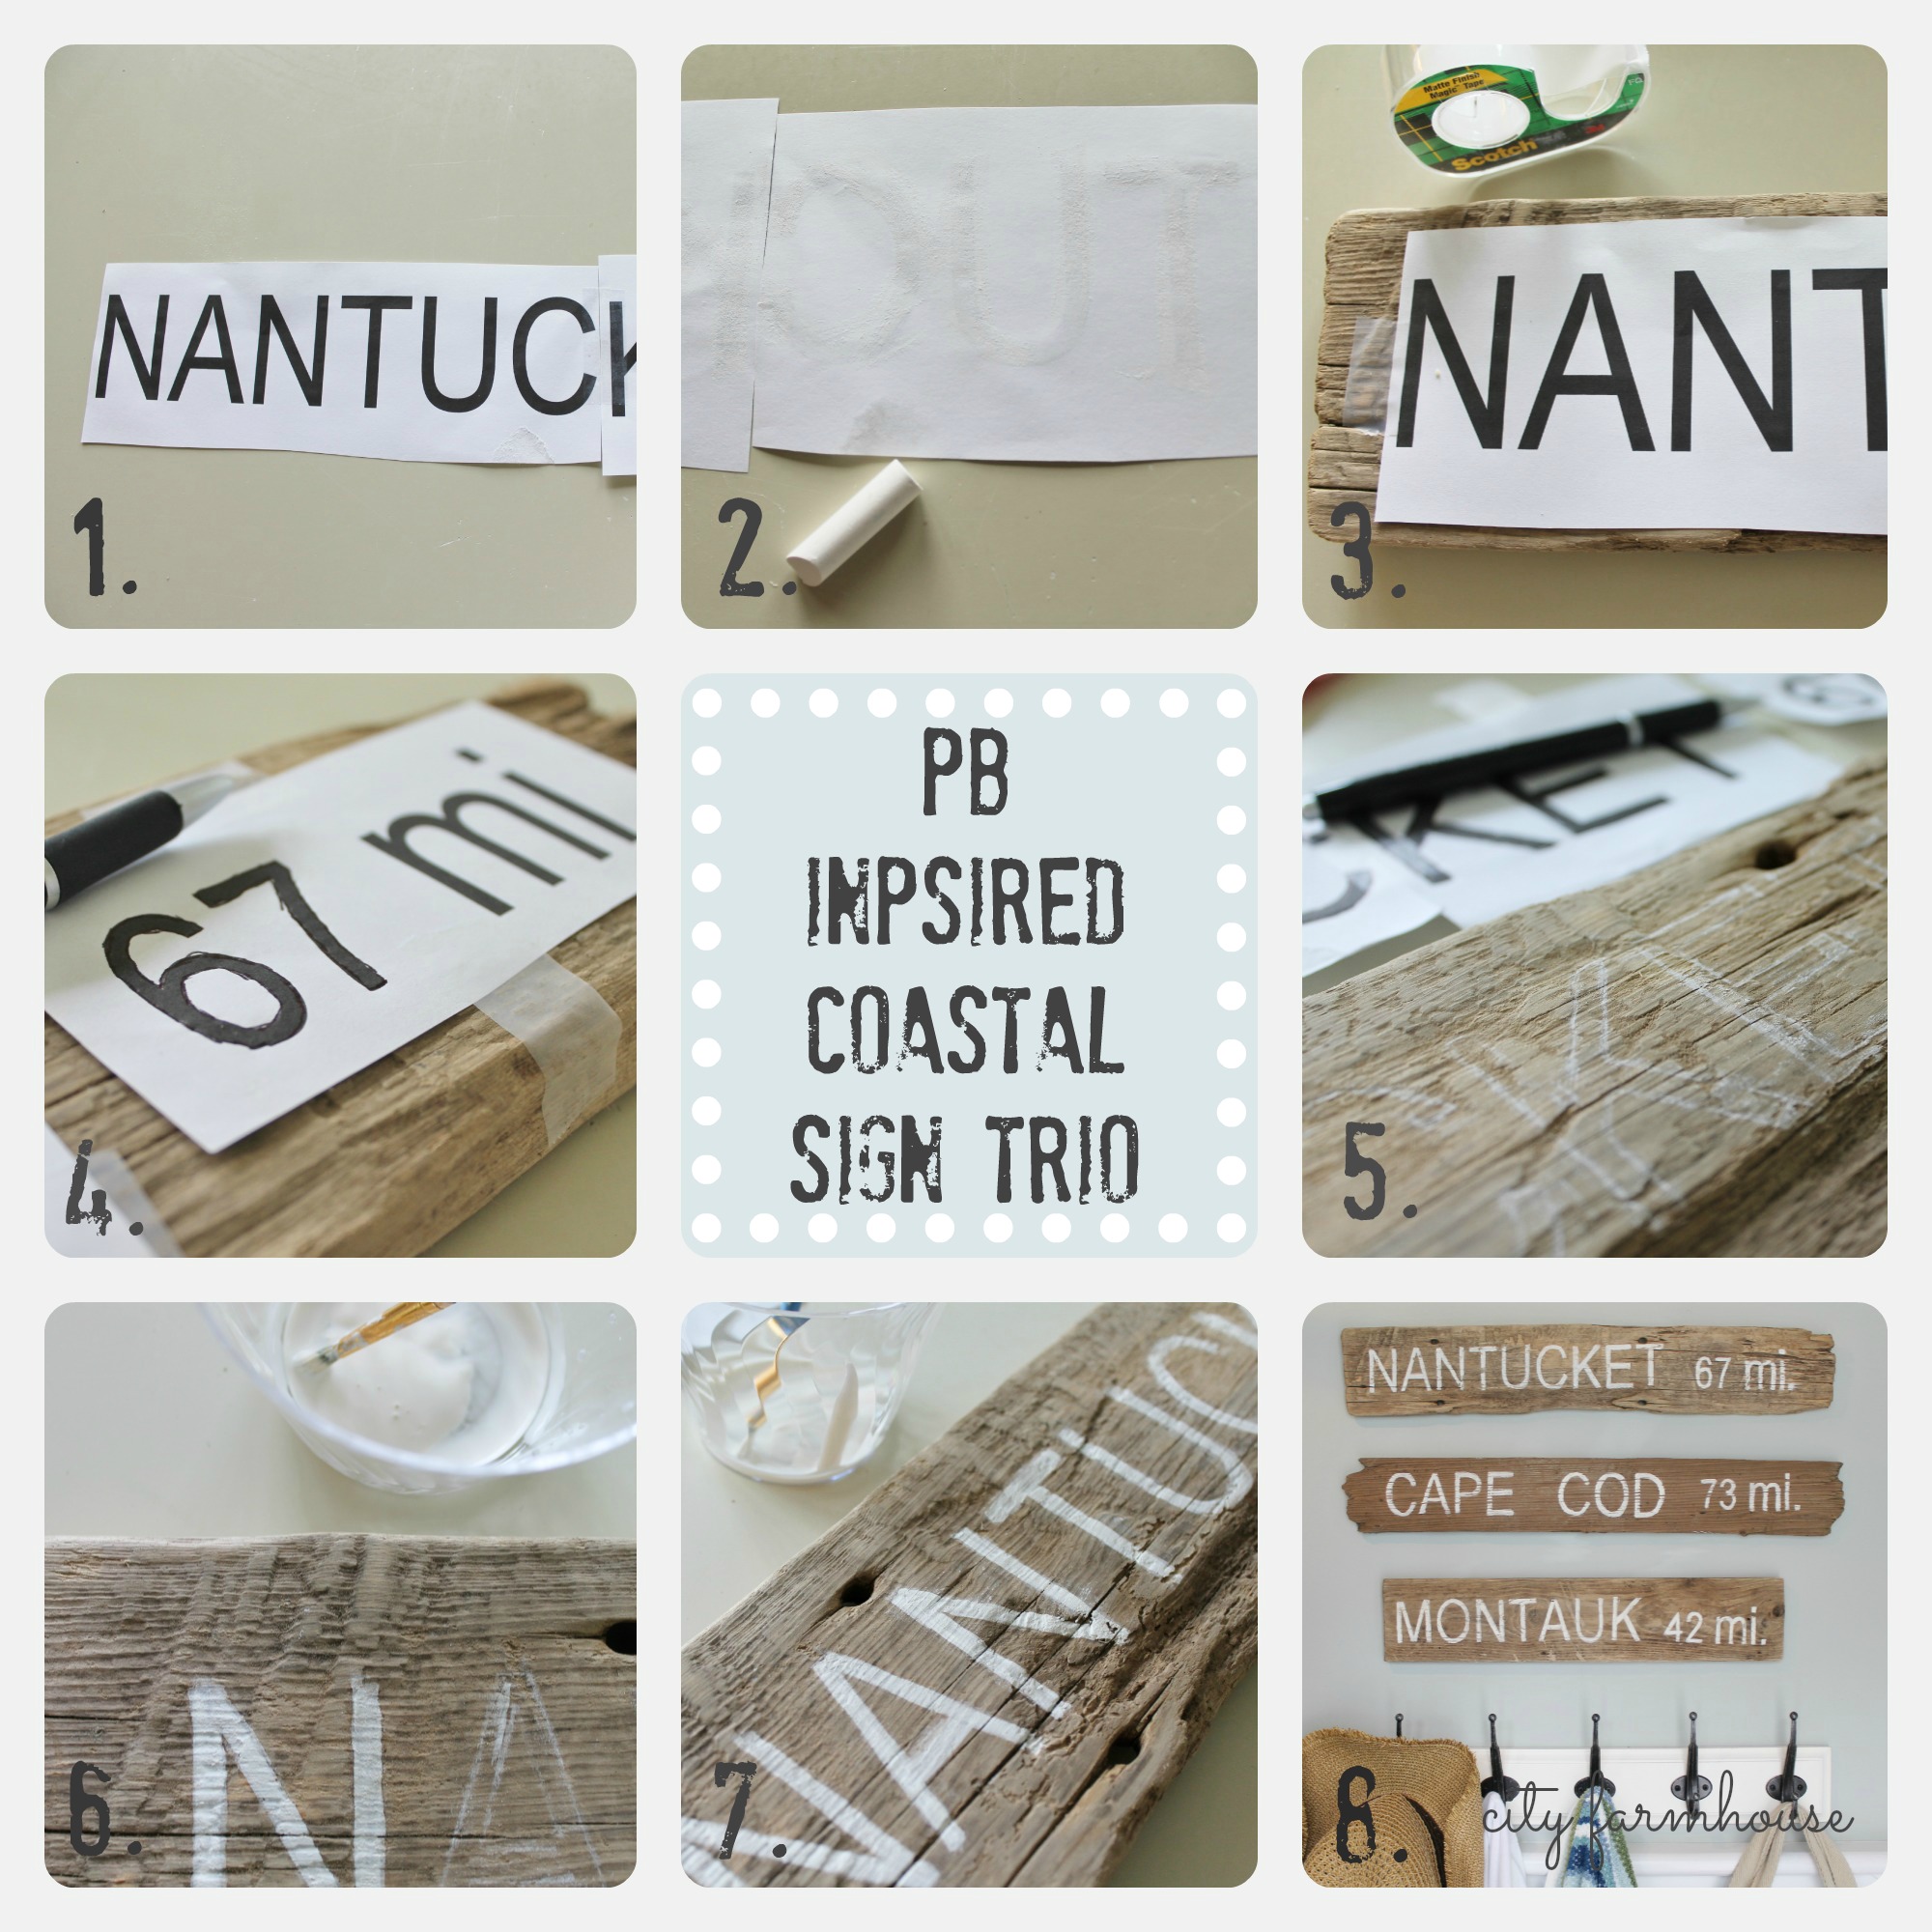
1. Print your words and tape them together if need be.
2. Trace over each letter with chalk.
3. Tape to wood.
4. Using a pen trace over the outside of each letter.
5. Pull off paper & make sure you have each letter clearly outlined.
6. Using a small brush, paint(craft or house) & a few drops of water paint the interior
of each letter.
7. Paint the entire sign, let dry & sand lightly.
8. Hang & enjoy!
Tips-
Pallet wood also works well for this project.
You can also replicate using places that are important to you & your family:).
 This project is also great for kids, they can stencil or free hand a word & hang in their room.
That way they are making their space personal & who wouldn’t want that:)?

What do you think?
Not bad for a project that only cost a few dollars
AND the BEST part is knowing
there is a story of survival behind the wood.
If you liked this project,
then you may like these as well….
 How To Build The Easiest Farm Table
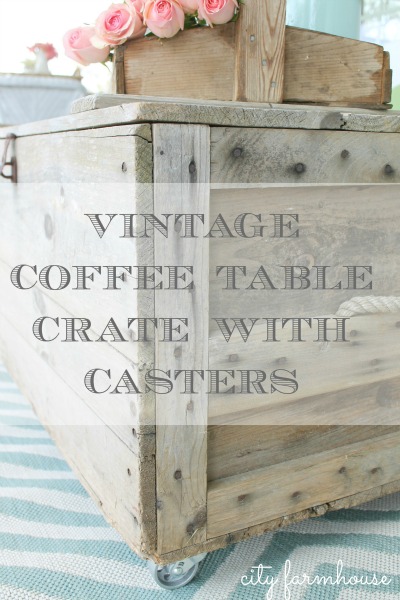
How To Turn A Crate Into A Coffee Table
(This project was originally posted on Jennifer Rizzo as a contributor post)
**********************************************
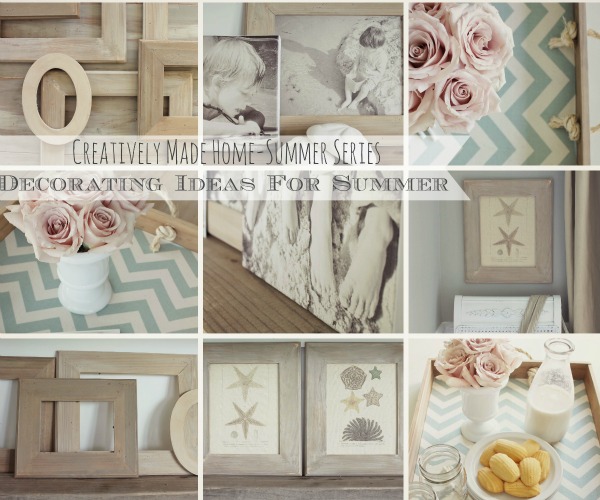
My e-course Inspired Decorating Ideas For Summer Begins July 8th, you can register HERE.
It will feature 4 original tutorials related to decorating & design that will carry over to every part of your home,
you don’t want to miss this, the best part is it is $10:).
Sharing at
See you back here tomorrow for our weekly Linky Party-Inspiration Exchange,


You make me want to find some driftwood too next week. So pretty!
I hope you do Julia!! Found a huge piece this am:). Have a great time friend!
I hope you do Julia!!! I hope you all have a great time!
I love these Jen! I have big plans to make some for my bathroom with local lakes around here, love your driftwood version. 🙂
Thanks Kelly! I really loved your last post, sharing tomorrow on FB:).
What is the paint color of the wall that these signs are on? I love it!
Hi Amanda, It is Restoration Hardware Silver Sage, thank you!
Love this!! Can’t wait for your e-course!!
Hugs,
Jamie Better With Age
Thanks Jaime, excited to share your home:)!
I love your signs and can’t wait to try out this technique! Pinning 🙂
~Katie @ Upcycled Treasures
Thank Katie! Love your site, you have great ideas, always love what you create too:). Jen
LOVE those! And thanks for the tutorial. Never would have thought of the chalk idea.
I love your signs, Jen! They are the perfect finishing touch on that wall!
How did you hang them?
Love, love, love. I’m a New England transplanted in Kentucky. These signs make me homesick. I really love how you did your letters. I did a sign and I used a pencil on the back and traced them that way. Left a lot of lead smear as I went over the letters. I will definitely have to try this method. Thank you.
Jen, nothing against Pottery Barn but your signs are about 100 times better! 🙂 I love them. ~ Dori ~