
Hi!
Disclosure: This post may contain affiliate links. As an Amazon Associate, I earn from qualifying purchases at no additional cost to you. See full Disclosure Statement HERE.
Emily here from The Wicker House and today I want to share with you some
DIY Picture Ledges that I built.
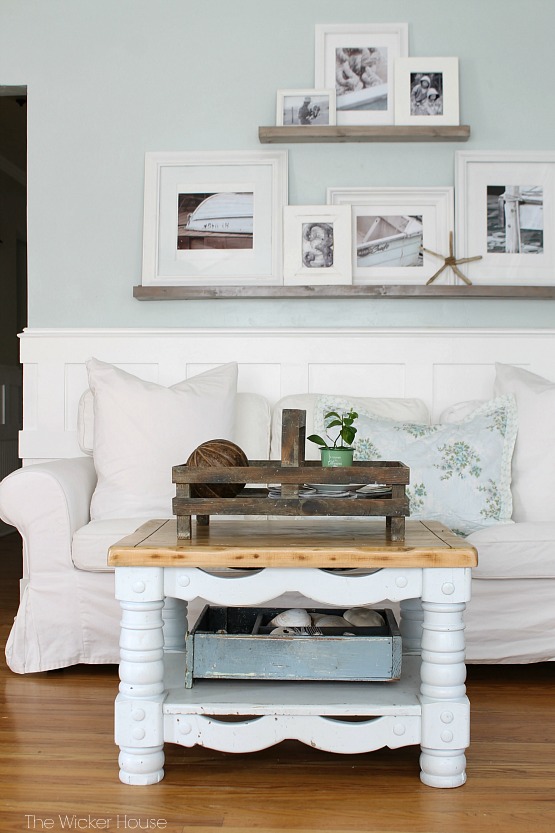
I recently painted our living room (Post Here) and when I was done I was left with a big blank wall.
I knew that some picture ledges would be just the thing.
This way, I am free to switch my pictures around whenever I wish without worrying about messing up a whole wall arrangement, which is what I had going on previously.

This project, even though it looks like something big, was actually super simple to make.
I first went to Lowes and picked up three 8 foot long boards; one 1 X 4 and two 1 X 2’s.
I then had Lowes cut the wood at 5 1/2 feet with the remainder being 2 1/2 feet.
Total cost was about $11.00.

To assemble my ledge, I used wood glue and glued 1 of the 1 X 2’s onto the 1 X 4 and the second
1 X 2 was glued to the front of the 1 X 4.
Which sounds more complicated then it actually was, so please just refer to the picture below.
After It was glued together I secured it with screws.
(please note that I used bigger screws to attached the pieces together and not the small nails shown).

Next, I stained the wood using these two stains. I first used the gray driftwood stain and then layered it with the special walnut. The result was a pretty weathered-wood look.

Before hanging my ledges, I laid them out on the floor along with my frames.
This was so that I could measure the distance I wanted them to be apart.

Painters tape was applied to the front of the ledges for measurement.

I then removed the tape and applied it to the walls which really helped with placement.

I used really long screws to attached the ledges to the wall.

I also used a leveler to make sure that my shelves were straight.

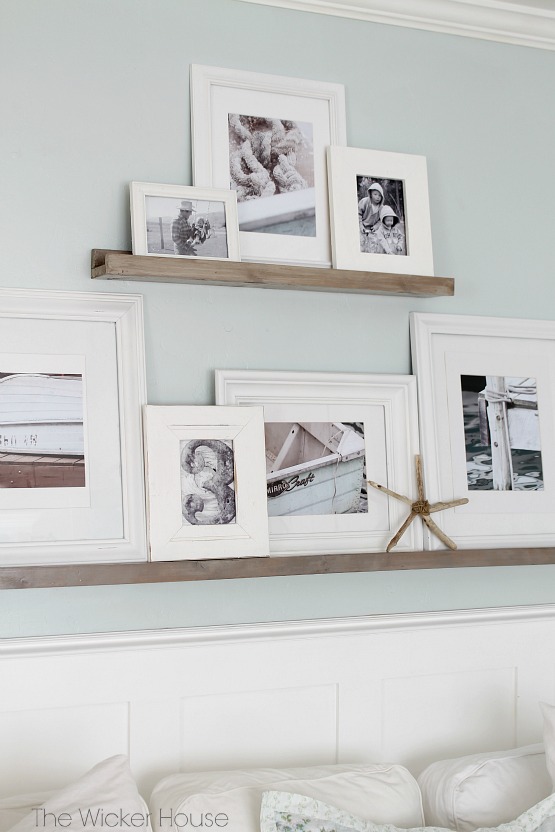
Once the ledges were hung, I filled them up with some of my favorite pictures.
All of the boat pictures were a free download from Freckled Laundry and can be found HERE.

One of my favorite pictures ever has got to be this one of my boys on a camping trip when they were little. Those sweet little faces are so precious to me.


Also on the ledge is one of my driftwood starfish (tutorial can be found HERE).

I think I’m going to have a lot of fun rearranging the pictures on these ledges.
Thanks Jen for having me on your blog today,
Emily


This is exactly what I’ve been wanting for our gallery wall project. I love the look of these and you make it look so easy! Thanks for the tutorial.
I know Angie, Emily hit this one out of the ball park:). Good Luck!!!
Love this! When she says she layered the stains, so you know if she let the weathered stain dry completely and then added the special walnut stain? Would love to know more about the staining process! thanks!
Hi Angie, I would think she let it dry first. If I find anything else out I will let you know. Thank you!!! Jen
This is gorgeous!
I love it too Jamie, its a great project!!!
I would love to know what brand and color the wall is behind your project??
I love it! So relaxing and soothing. Your posts are very good and usually have such creative aspects.
Thanks for a reply!
Susan
Hi Susan, it is True Value-Old Fashioned. Thank you, Emily is so talented!!! Jen
I really like that !! So cool!!
I love it too Shawnna! Thank you, Emily will love to hear that!
I love this project too! I also would love to make the driftwood starfish! Thank you for the tutorial! I would also like to ask Emily where she purchased her slip covered sofa….I’ve been looking for a slipcovered queen sofa bed for a couple of months and I cannot find one with a comfortable mattress! I need it for a small Cape Cod beach house.
What size screws did you use?
So beautiful. I just fall in love with your DIY picture ledges. I will do it someday.
Hello! How do you make the front ledge look nice when you screw the pieces together? Thanks!
How did you secure the shelves to the wall?
I would like to know how you secured the shelf to the wall?