
Happy Memorial Day friends!
Disclosure: This post may contain affiliate links. As an Amazon Associate, I earn from qualifying purchases at no additional cost to you. See full Disclosure Statement HERE.
I hope you are all enjoying your long weekend!
So last week began the
Inspire Me DIY Challenge,
myself & 12 of my creative friends got together to inspire each other & YOU
to tackle projects that either hadn’t been started or maybe needed to be finished.
We shared our progress in Instagram
& tagged them with #inspiremediy.
Did you join in the fun?
All of your projects were amazing, I loved seeing them on IG!!!

This challenge really did inspire me,
I got so many things done!!
I worked on finishing my master bedroom
&
my vegetable & herb garden.
Yay, progress!
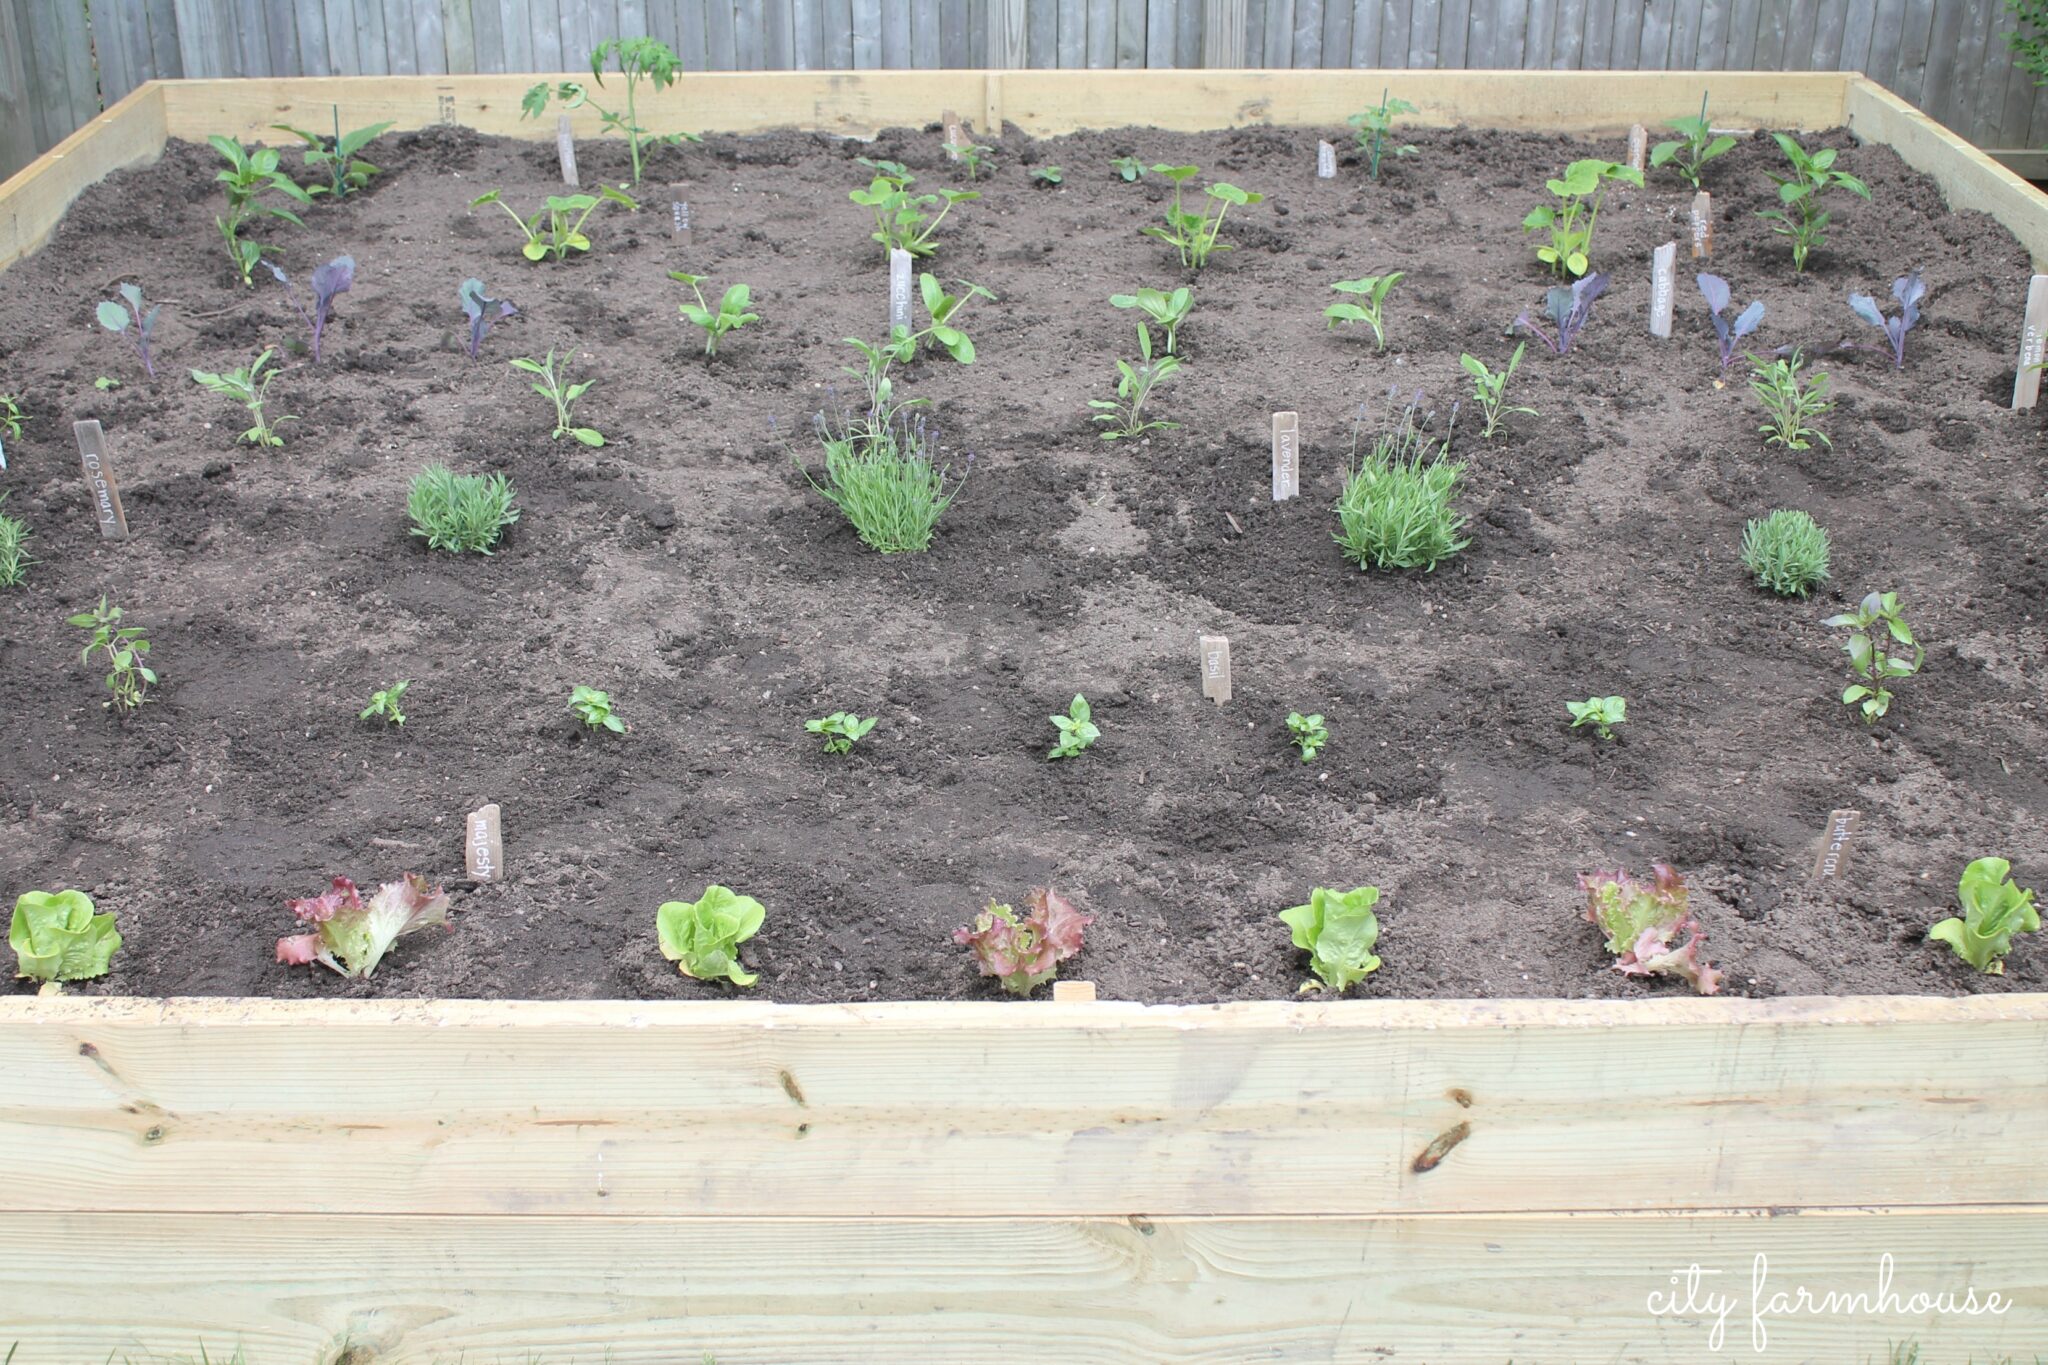
I thought I would share how I made my
DIY Garden Box-
it was so easy & the best part,
no cutting involved!!!
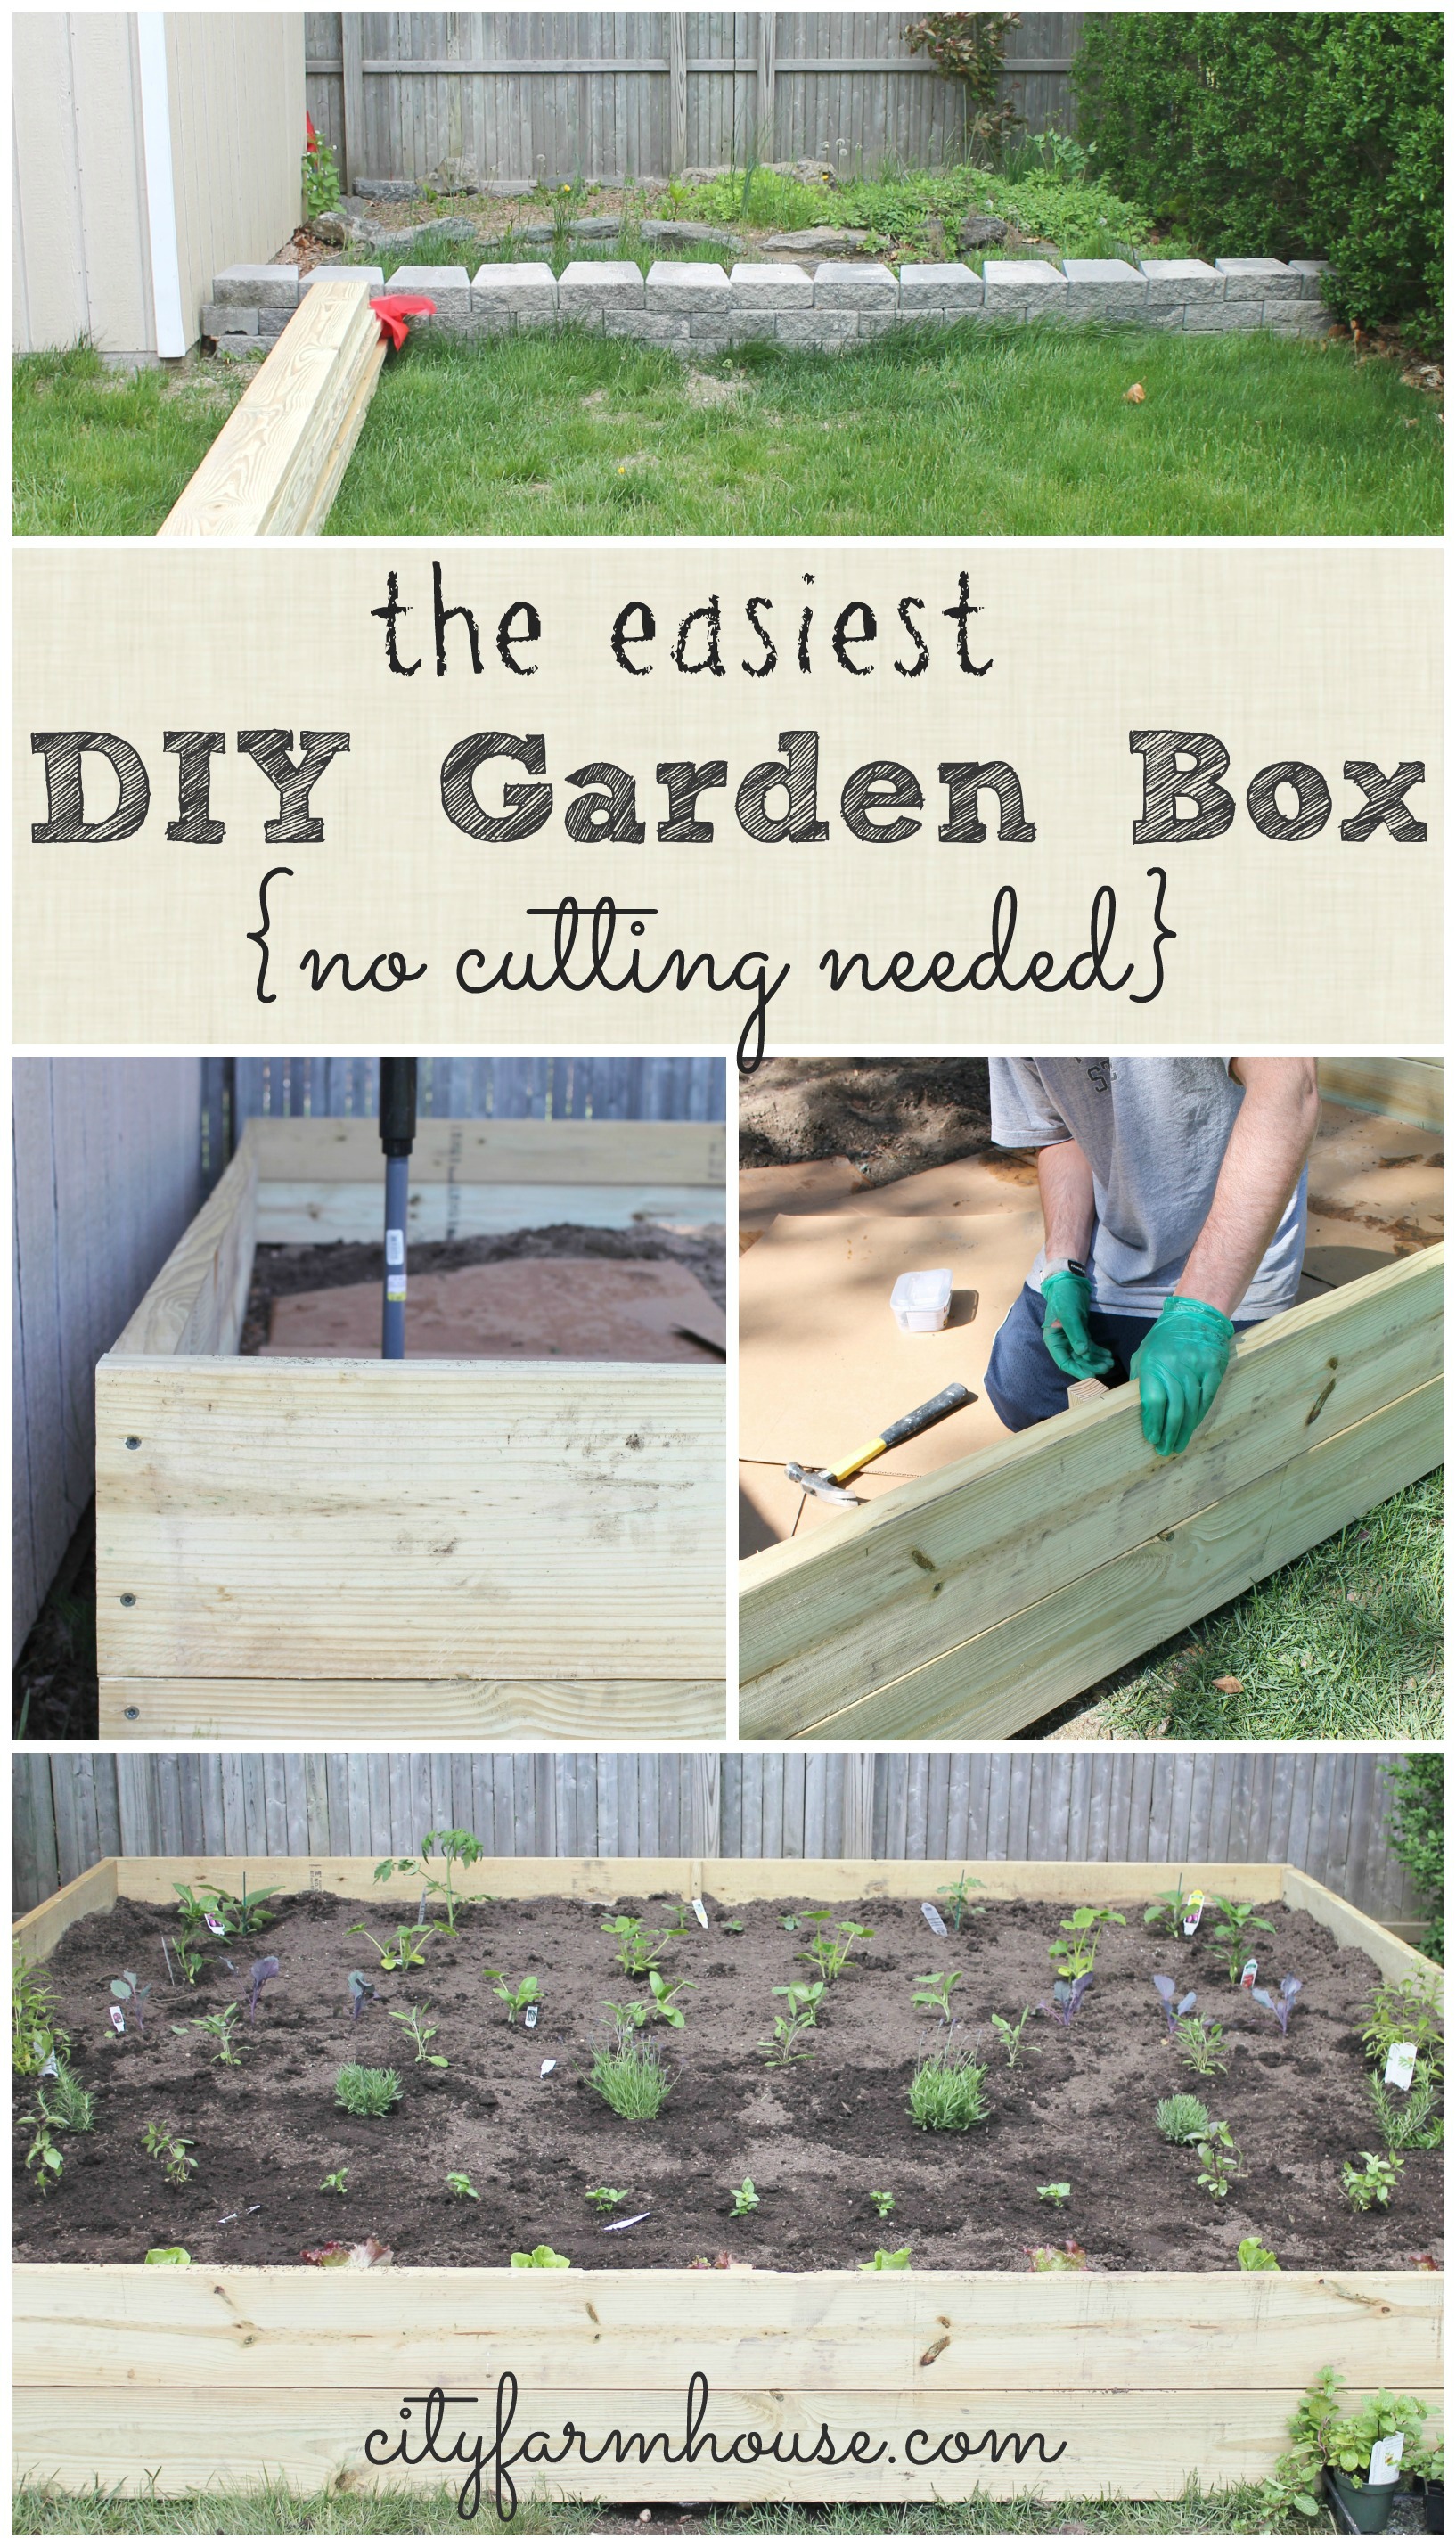
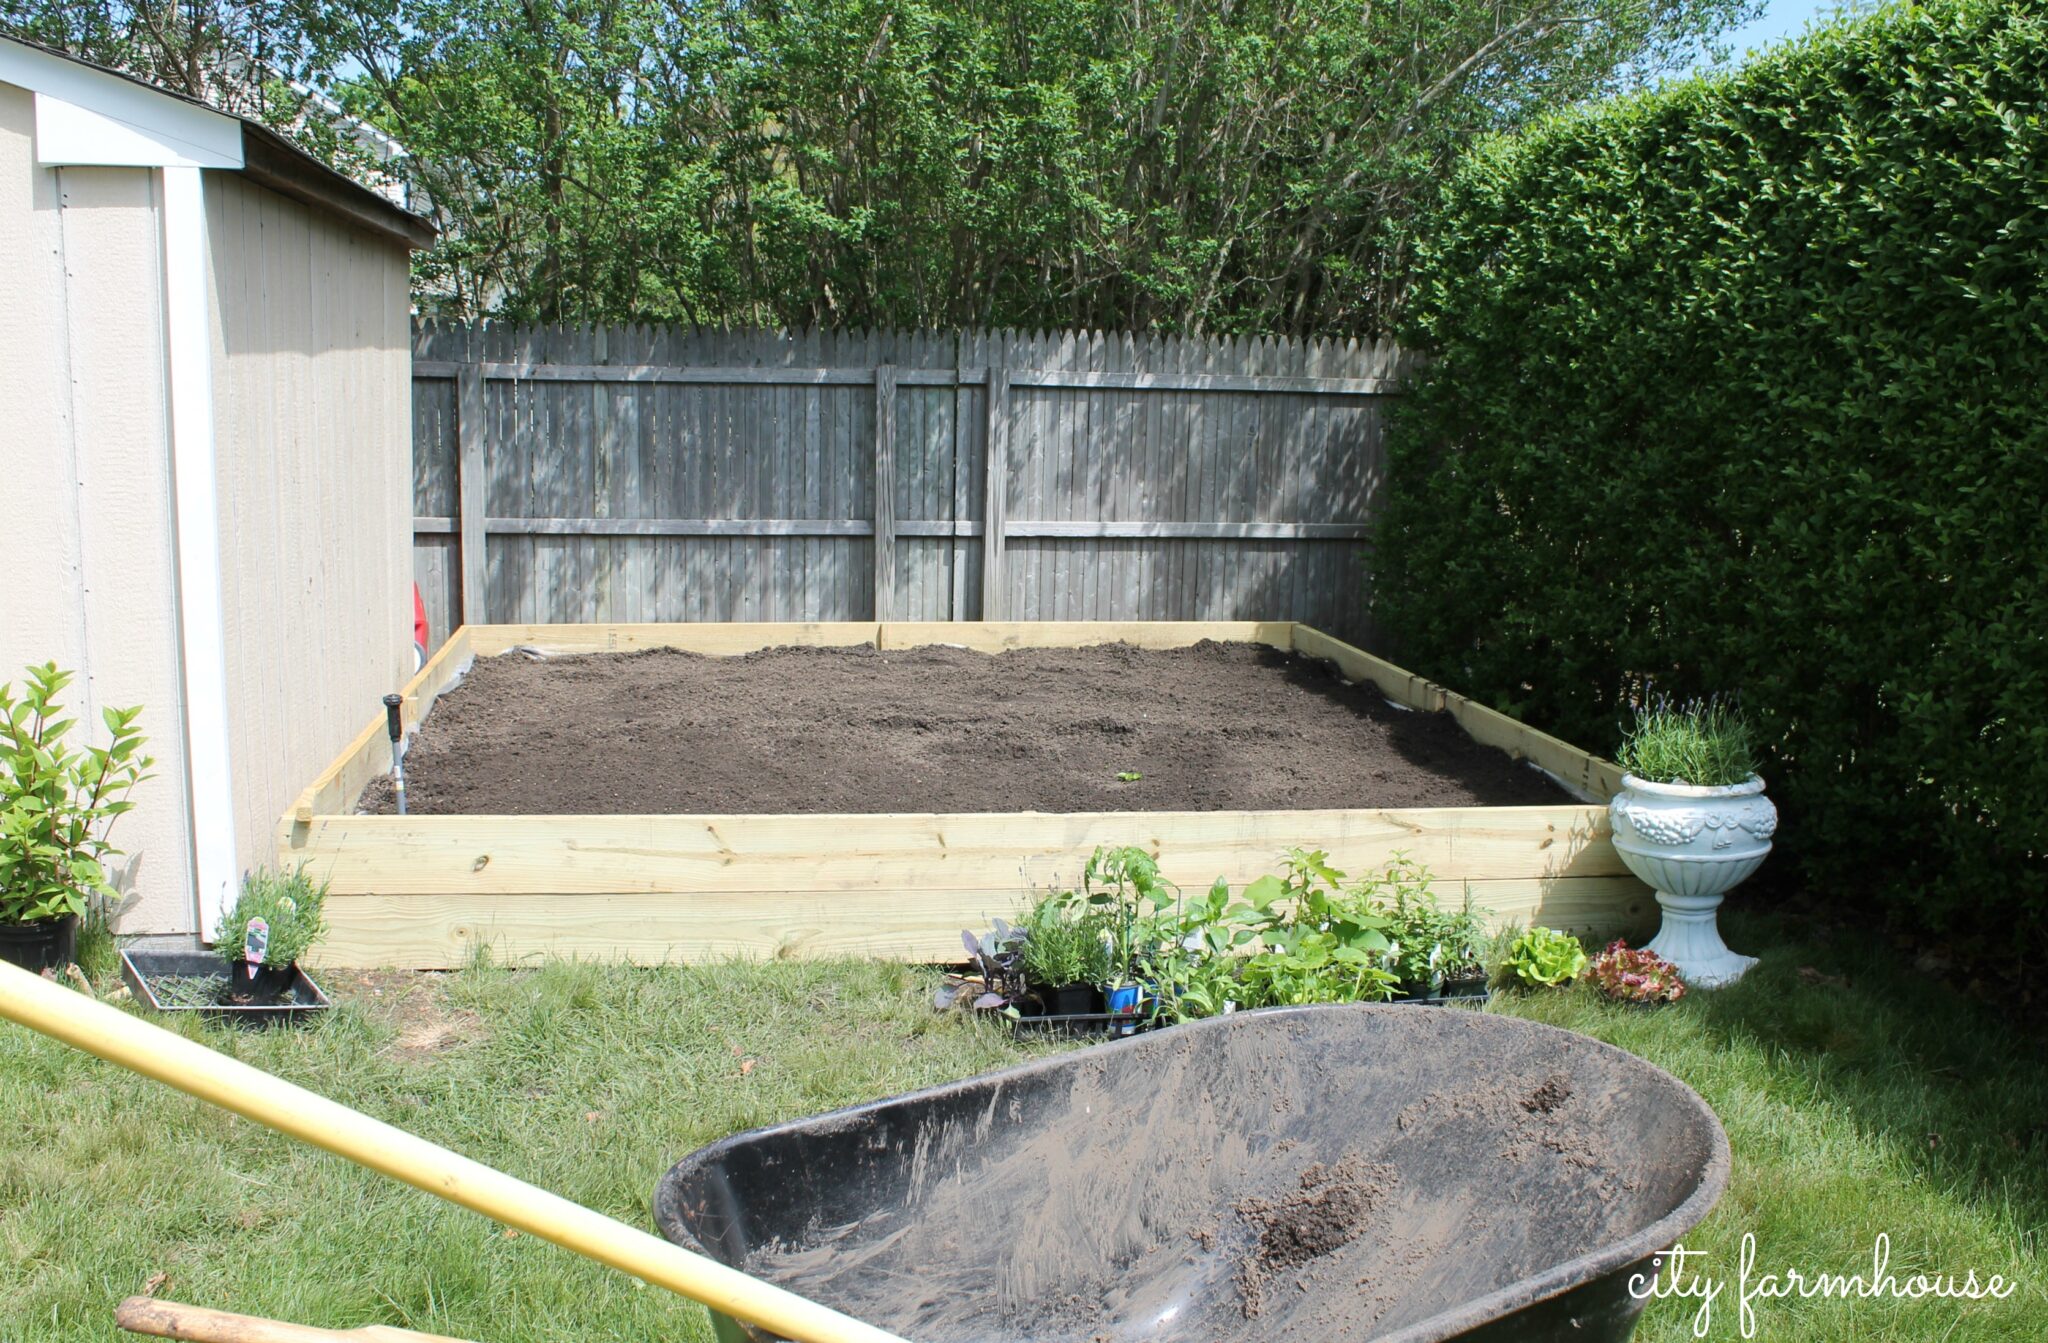
This was the before….

Yikes, what an eye sore.
Our backyard makeover is going to be done in phases.
This DIY Garden Box was #1.
What you will need to make one of your own….
8 lengths of wood
wood screws with bit
compressor drill
a 2 x 2 precut for stakes
large amounts of cardboard
plastic drop cloth
staple gun
soil
peat moss
veggies & herbs

The Frame…
After reading many tutorials,
I decided to go with pressure treated wood,
it is no longer made with arsenic but just to be safe I lined & overlapped
the interior with plastic using a staple gun.
I used 8 lengths of
2″ x 8″ x 8′,
which made a square 8ft x 8ft garden box.
You may not want yours this large.
The trick to keeping this project simple & easy is to use the lengths of wood as they come
& making your box square.
You can do a few 4ft x 4ft boxes
or a 6ft x 6ft.
We just screwed them into each other at each corner.
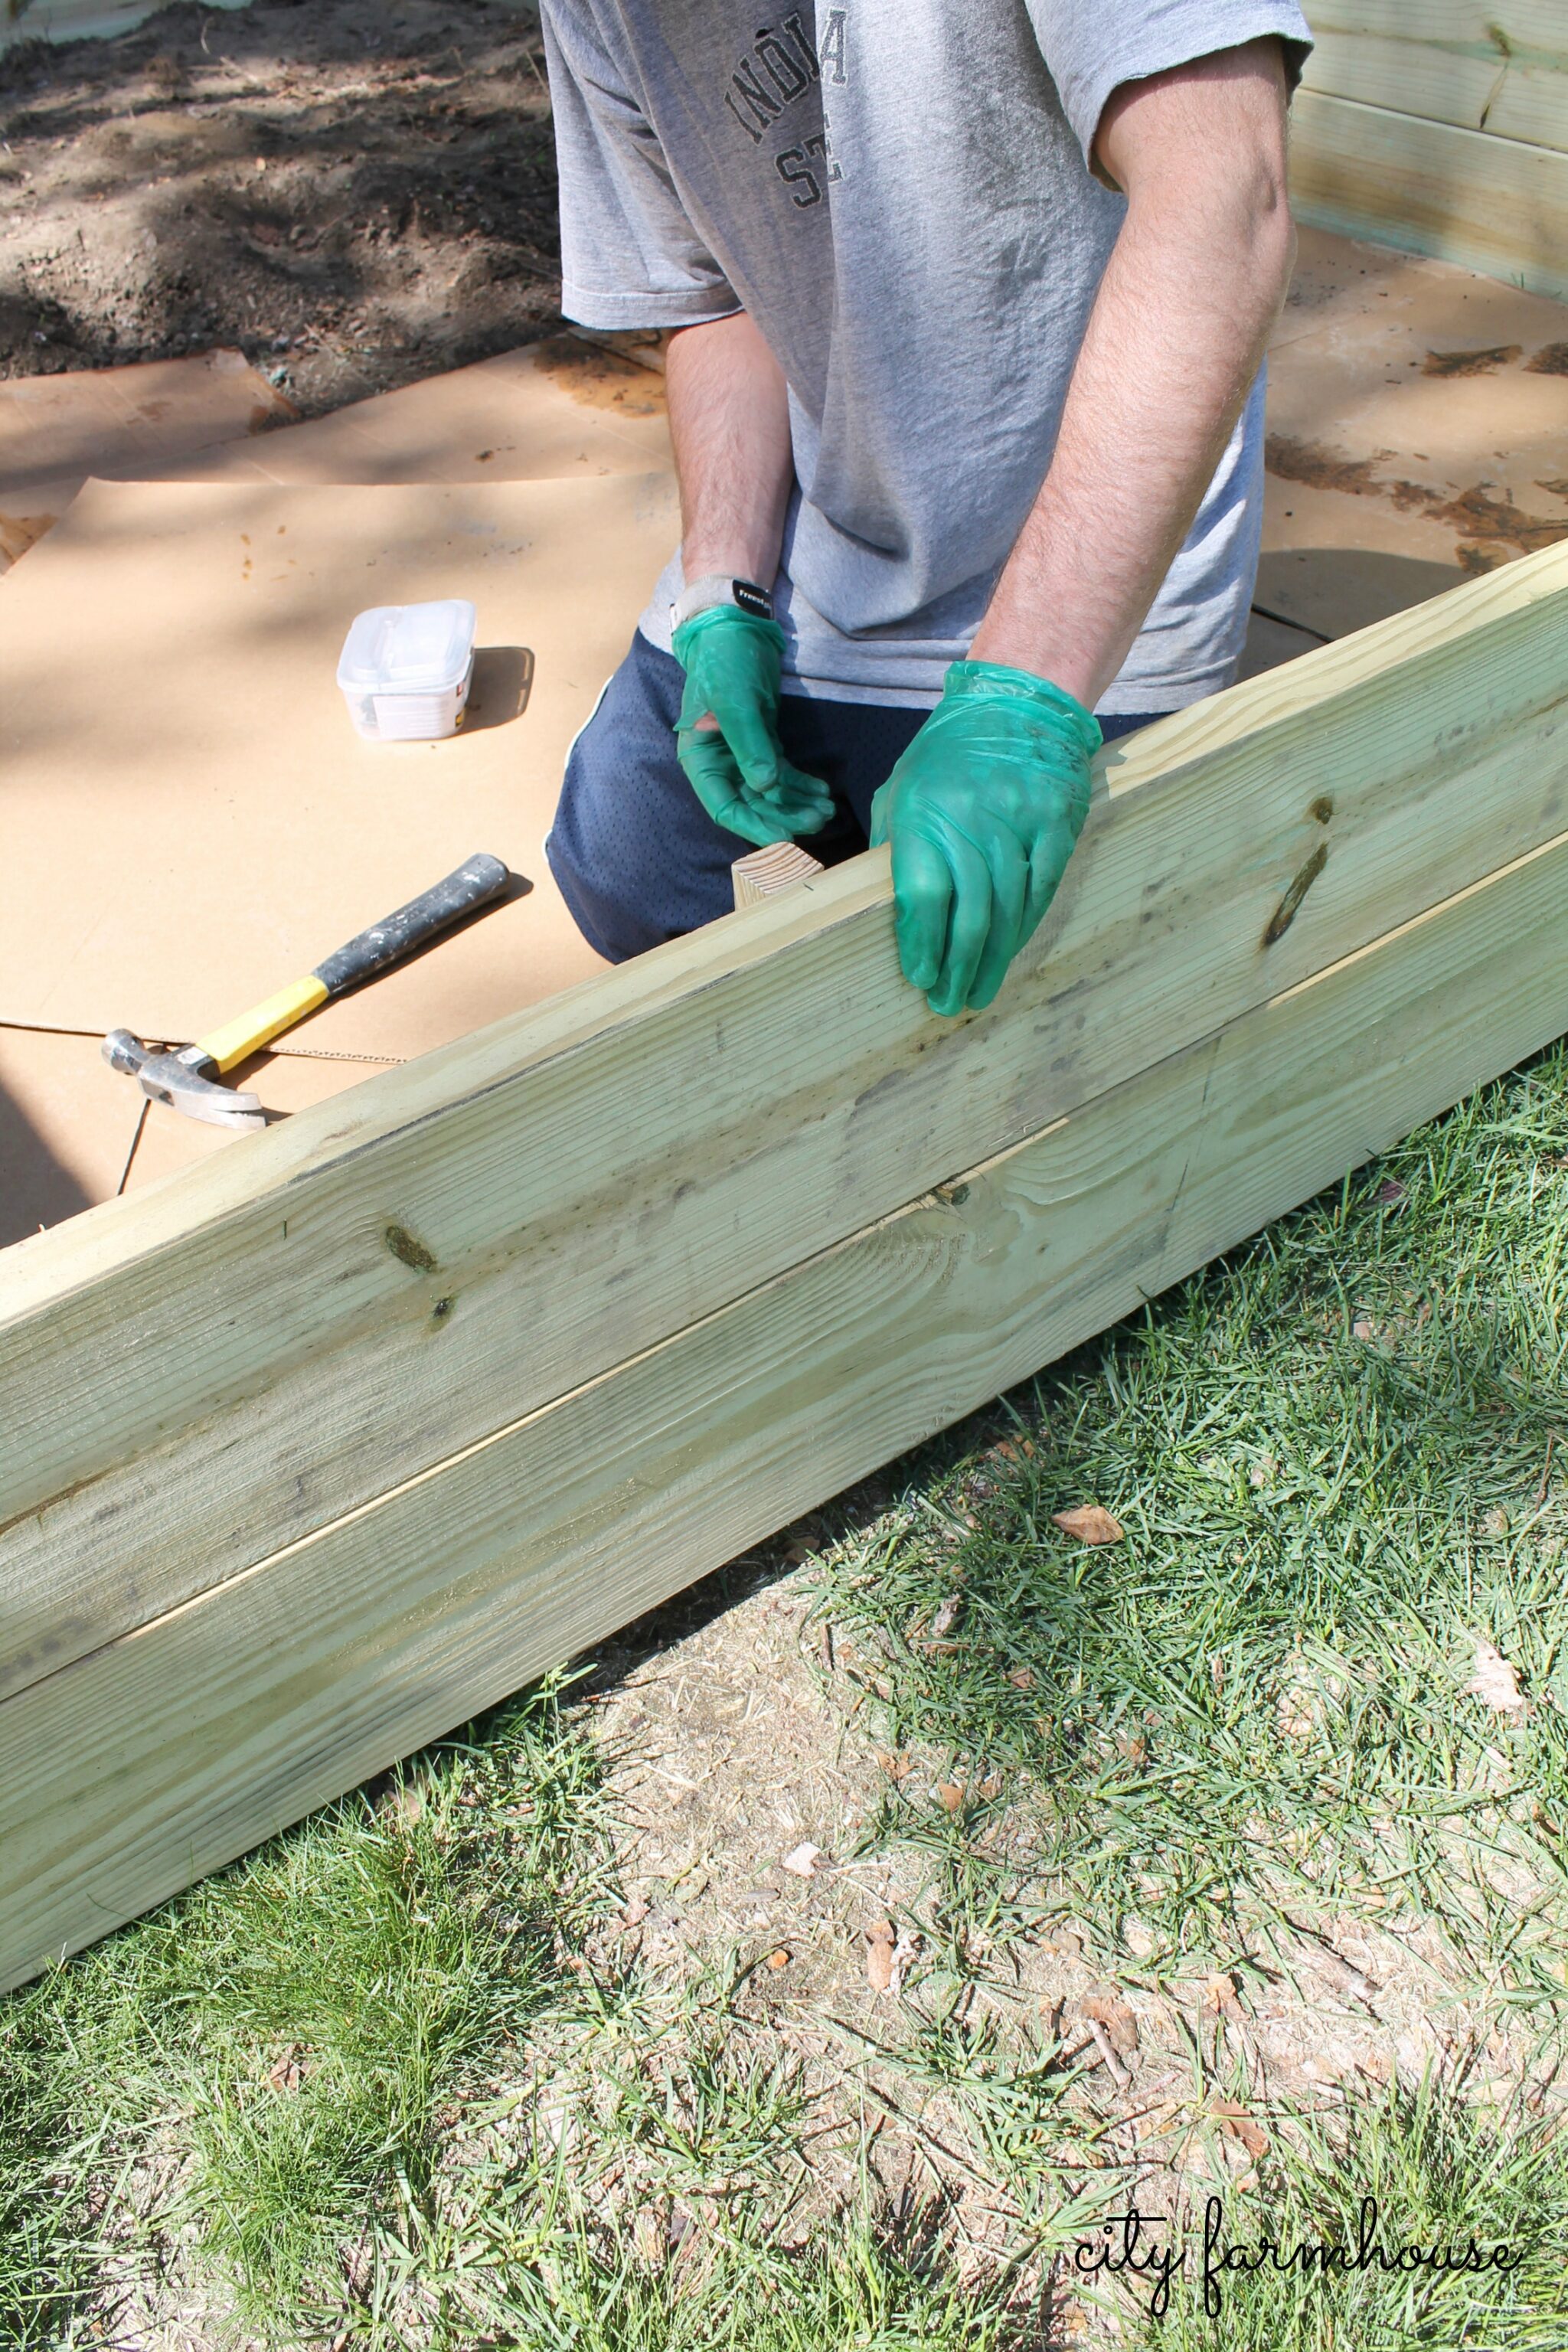
We had a 2″ x 2″ x 8′ cut down into 4-22″ pieces {ask the hardware store to cut this for you}
to use as stakes for extra support in the middle.

Just hammer them in & screw.
My boys helped with this project,
which was so cute to see!
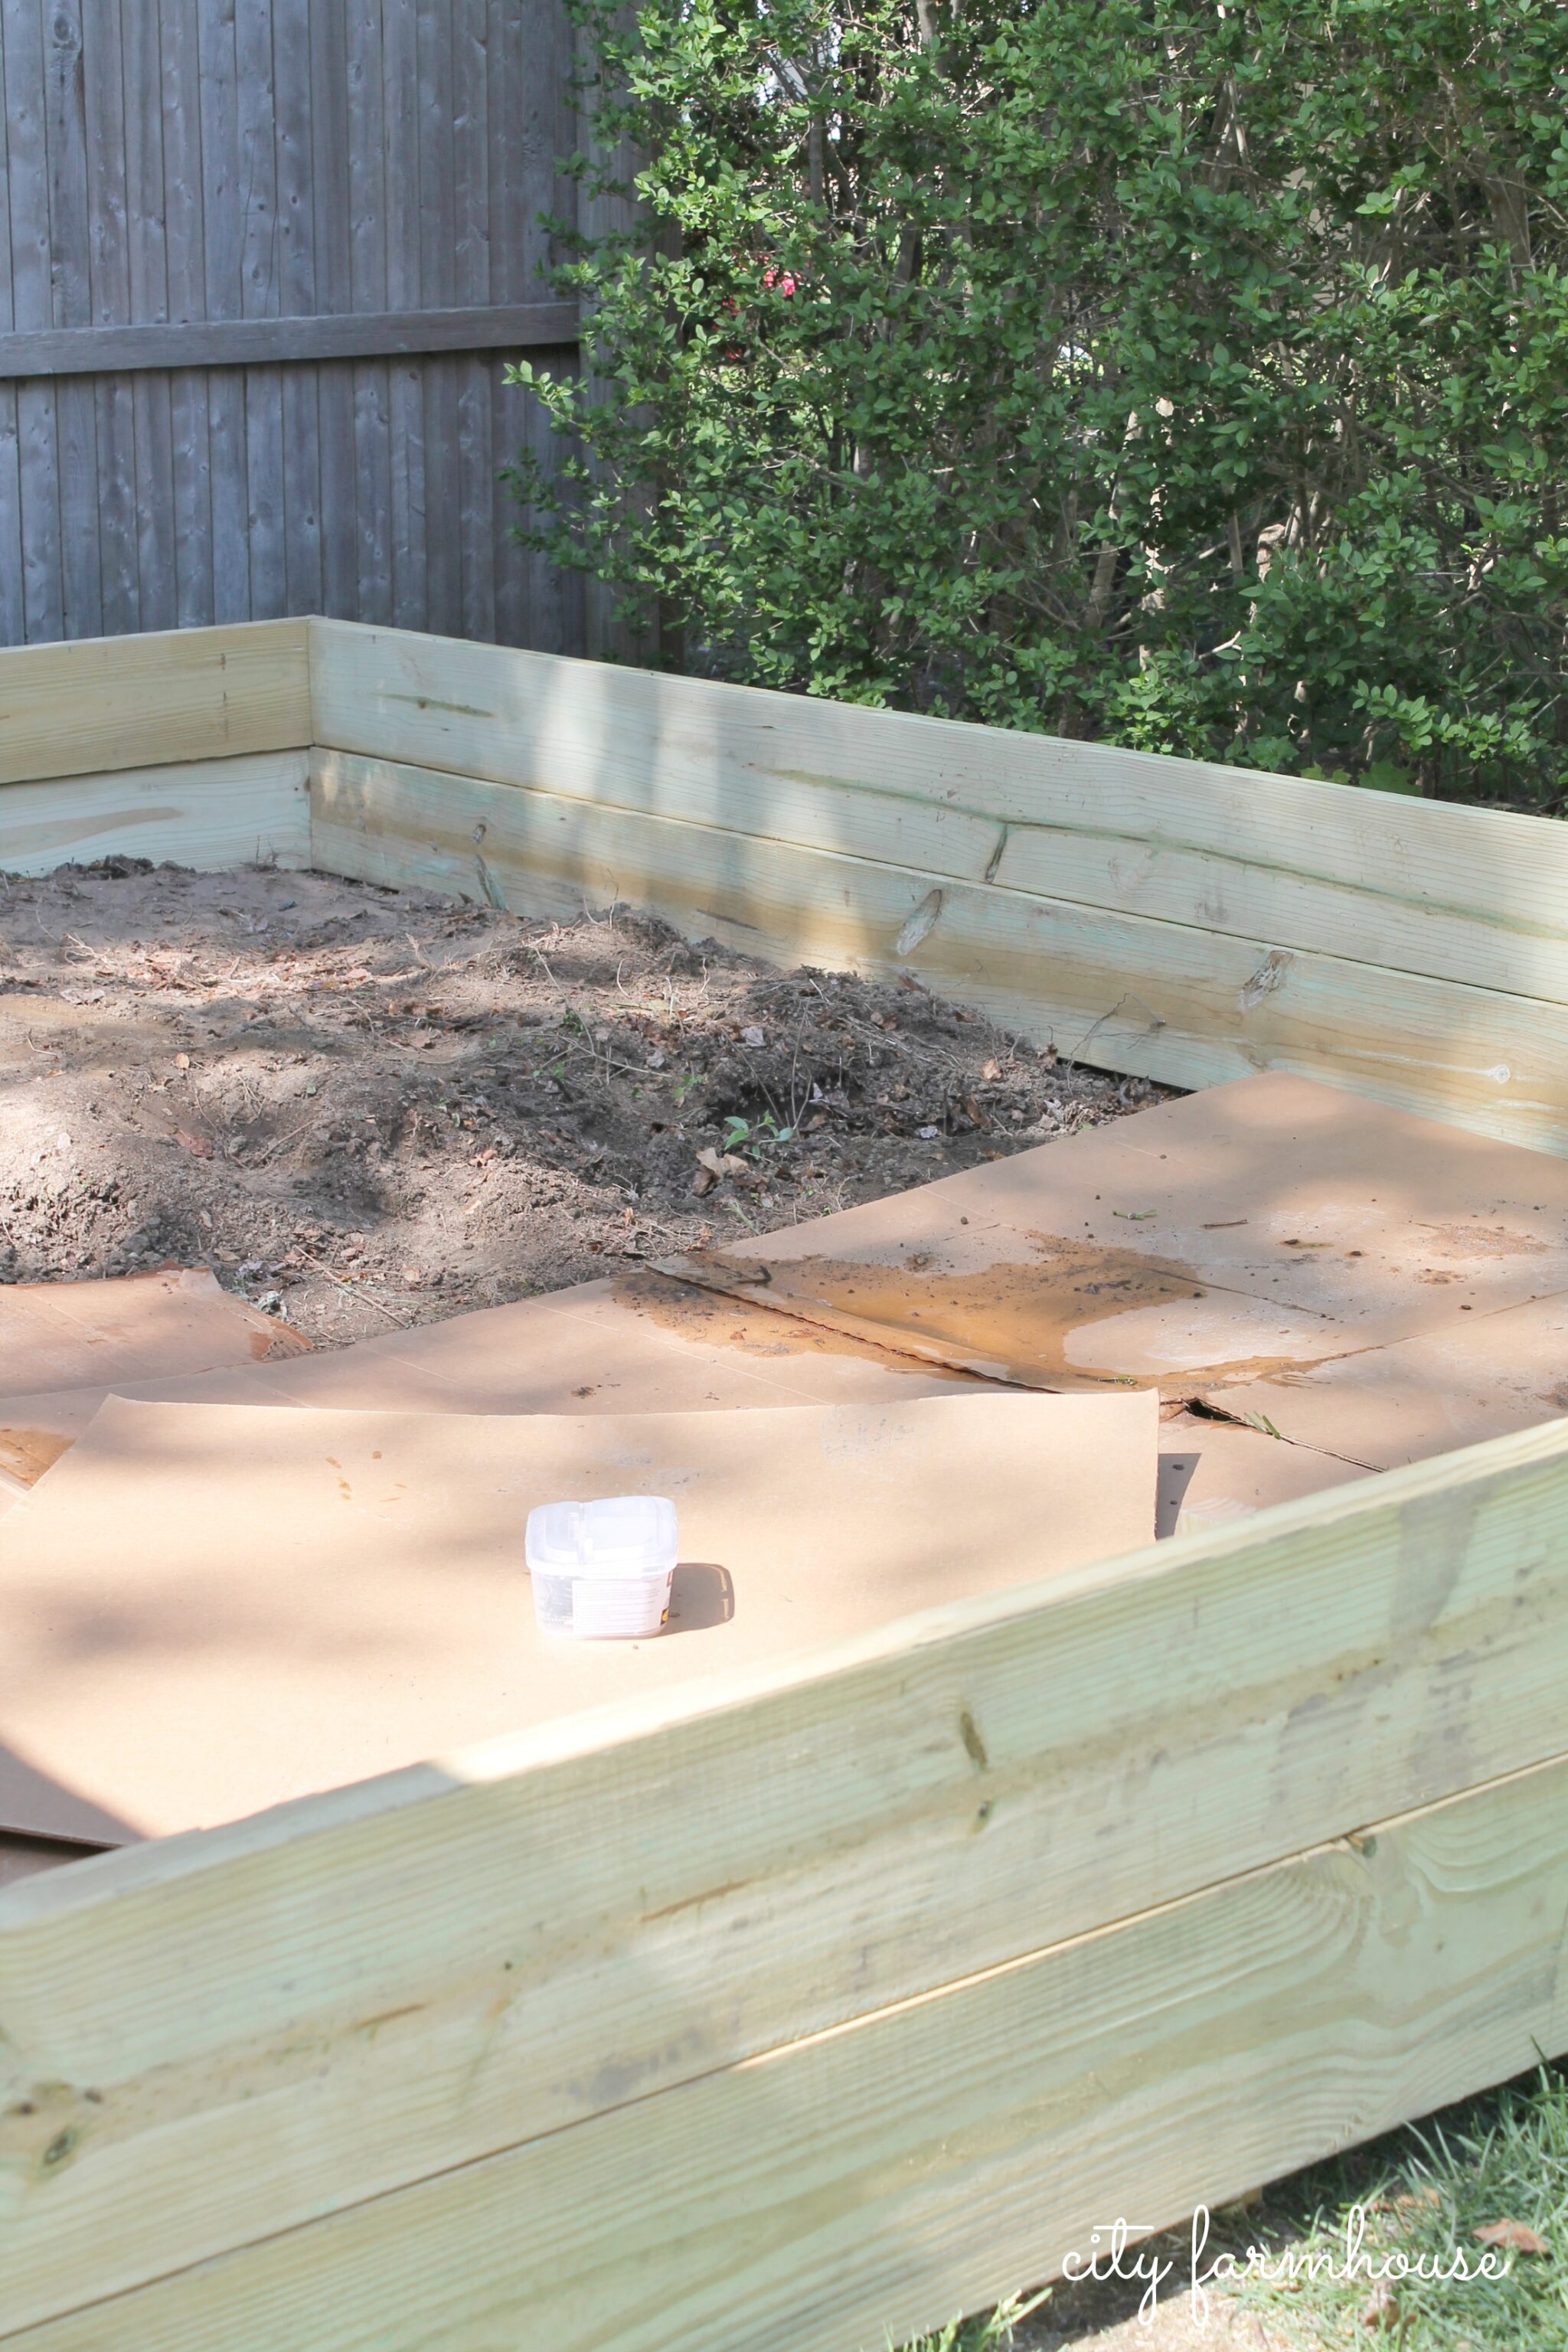
We layered cardboard down to kill the grass.
Soak it for a good hour, then lay the soil on top.
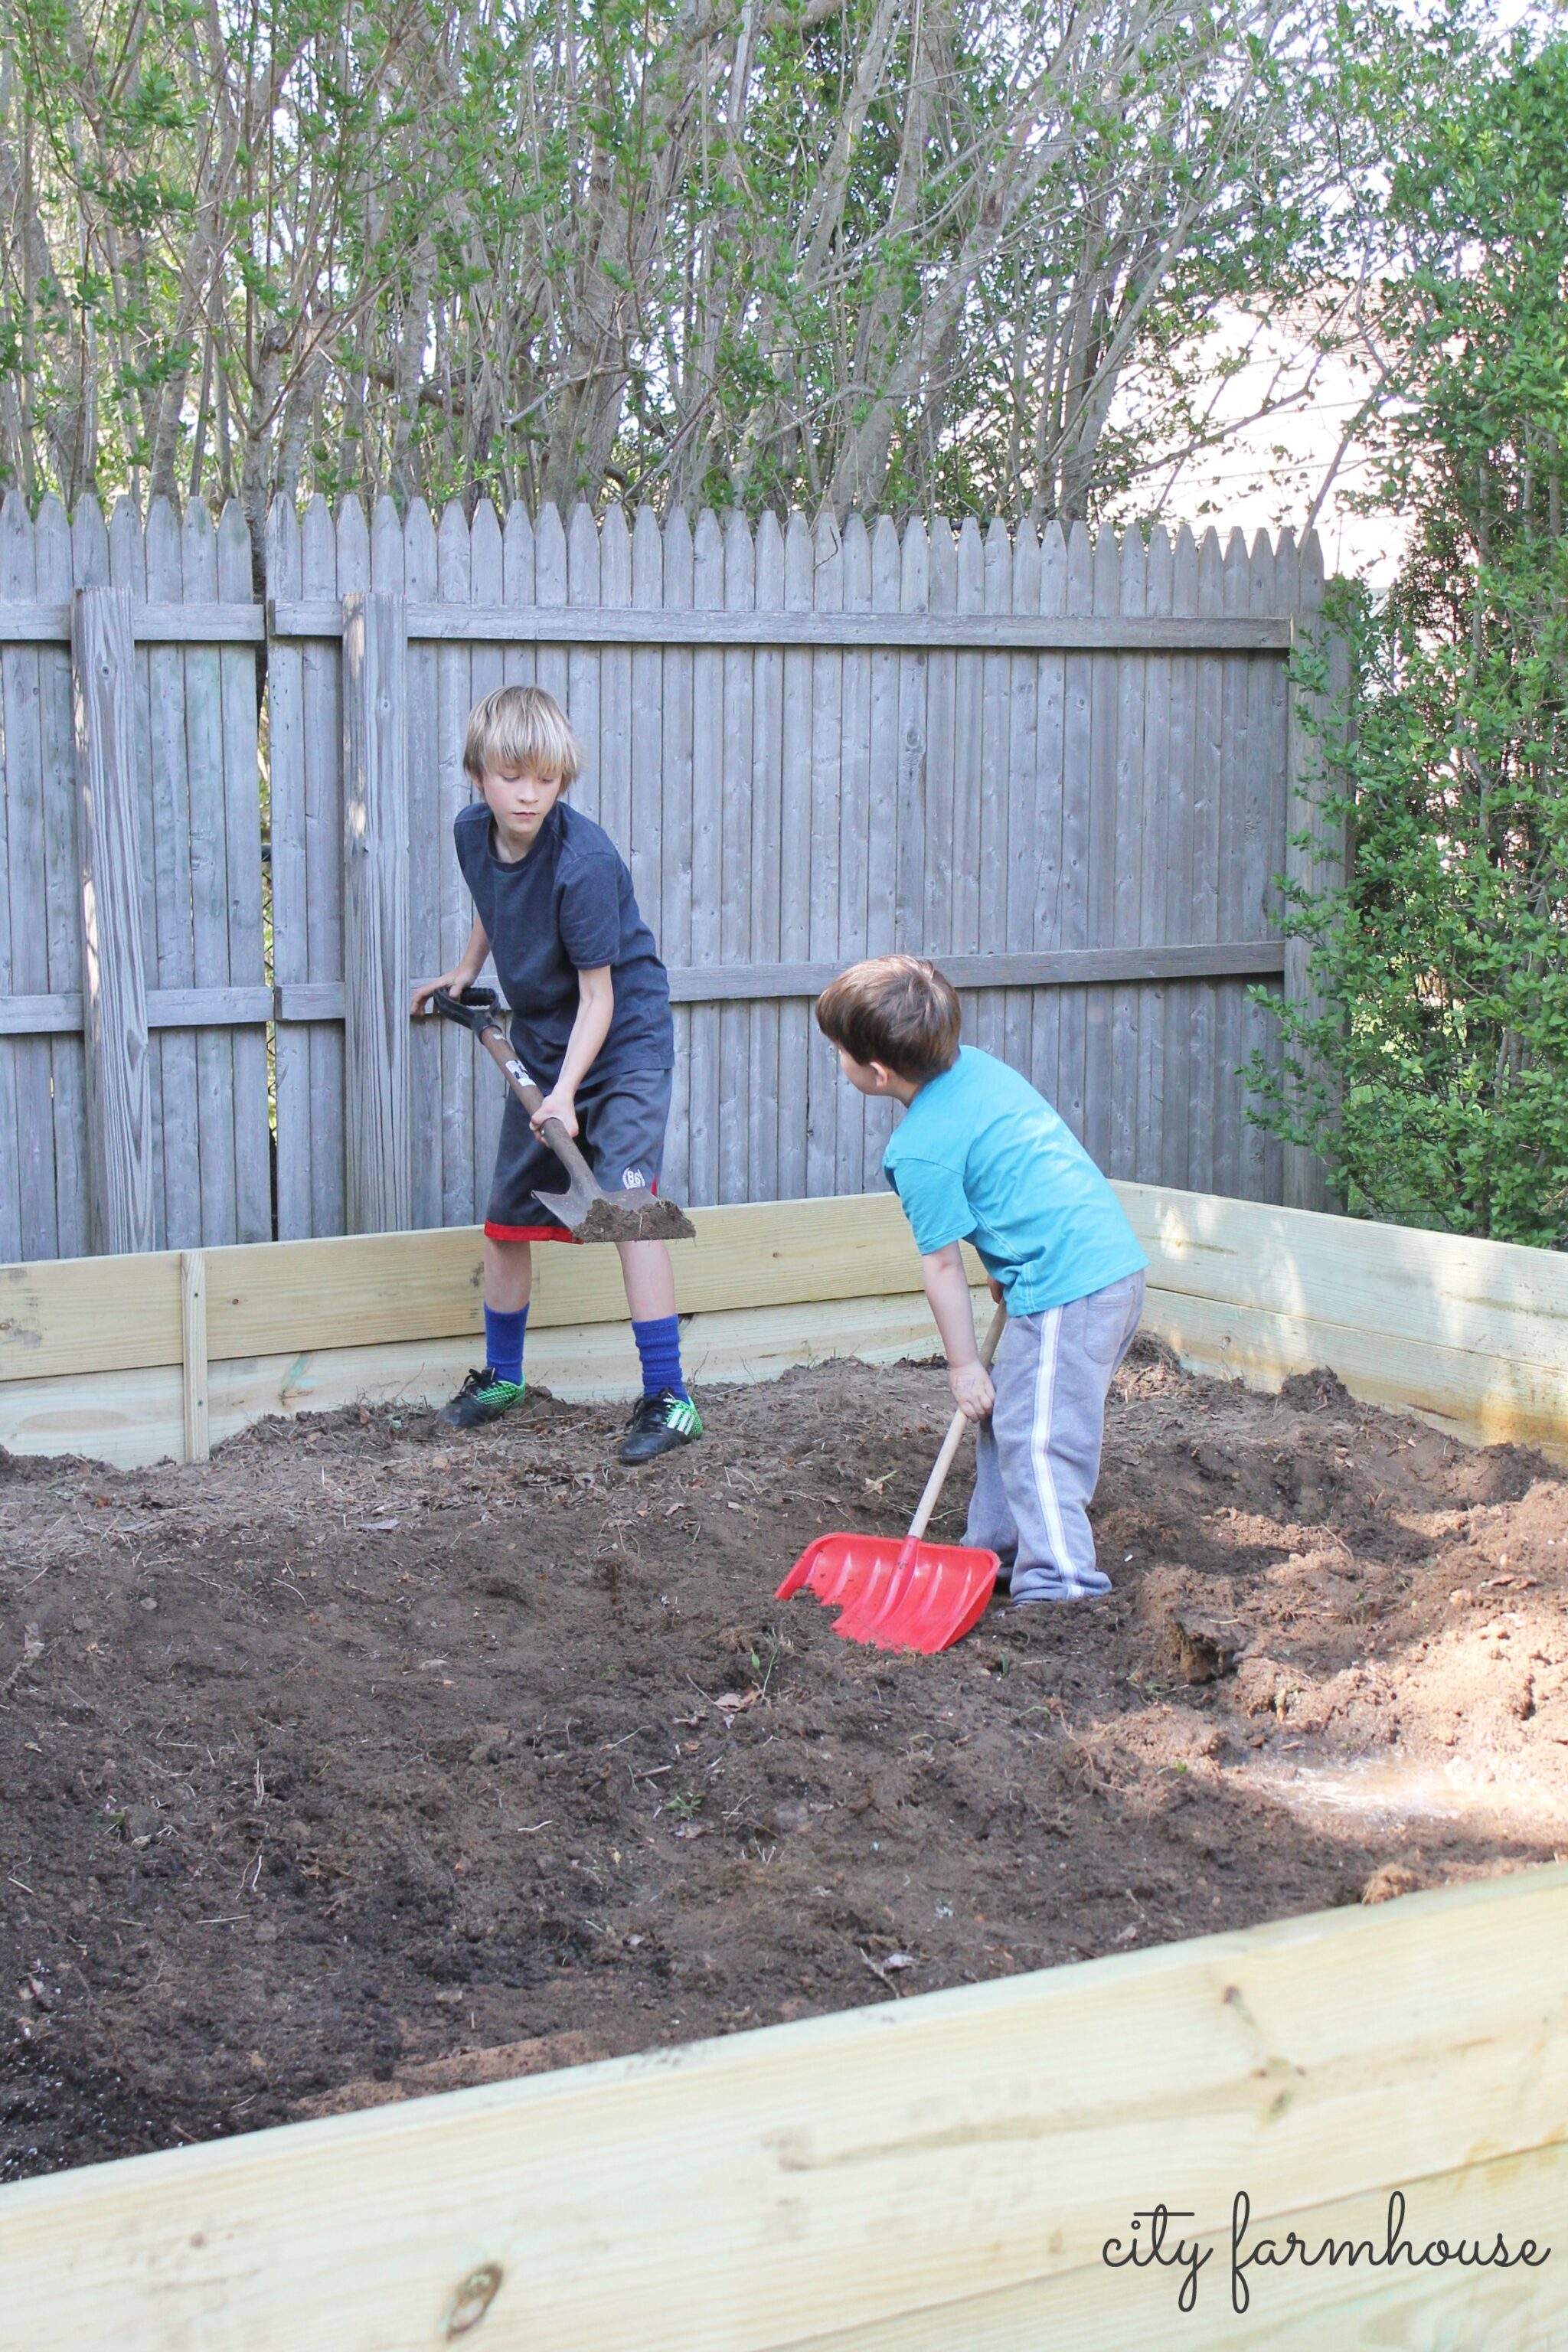
The soil….
this is the labor intense part.
Last week I had 4 yards of soil dropped off,
thinking I was going to fill this bad boy all in the time my little guy was at pre-school.
Boy was I wrong:).
This was a huge job for 1 person.
Do you ever get into a project & just want it done?
That was me, I was determined.
At the end of the day I was so tired & dirty,
but I did it:).
I layered in the peat moss to the soil & mixed together.
When you are ready for your soil just plug in your numbers HERE to get
the amount you need.
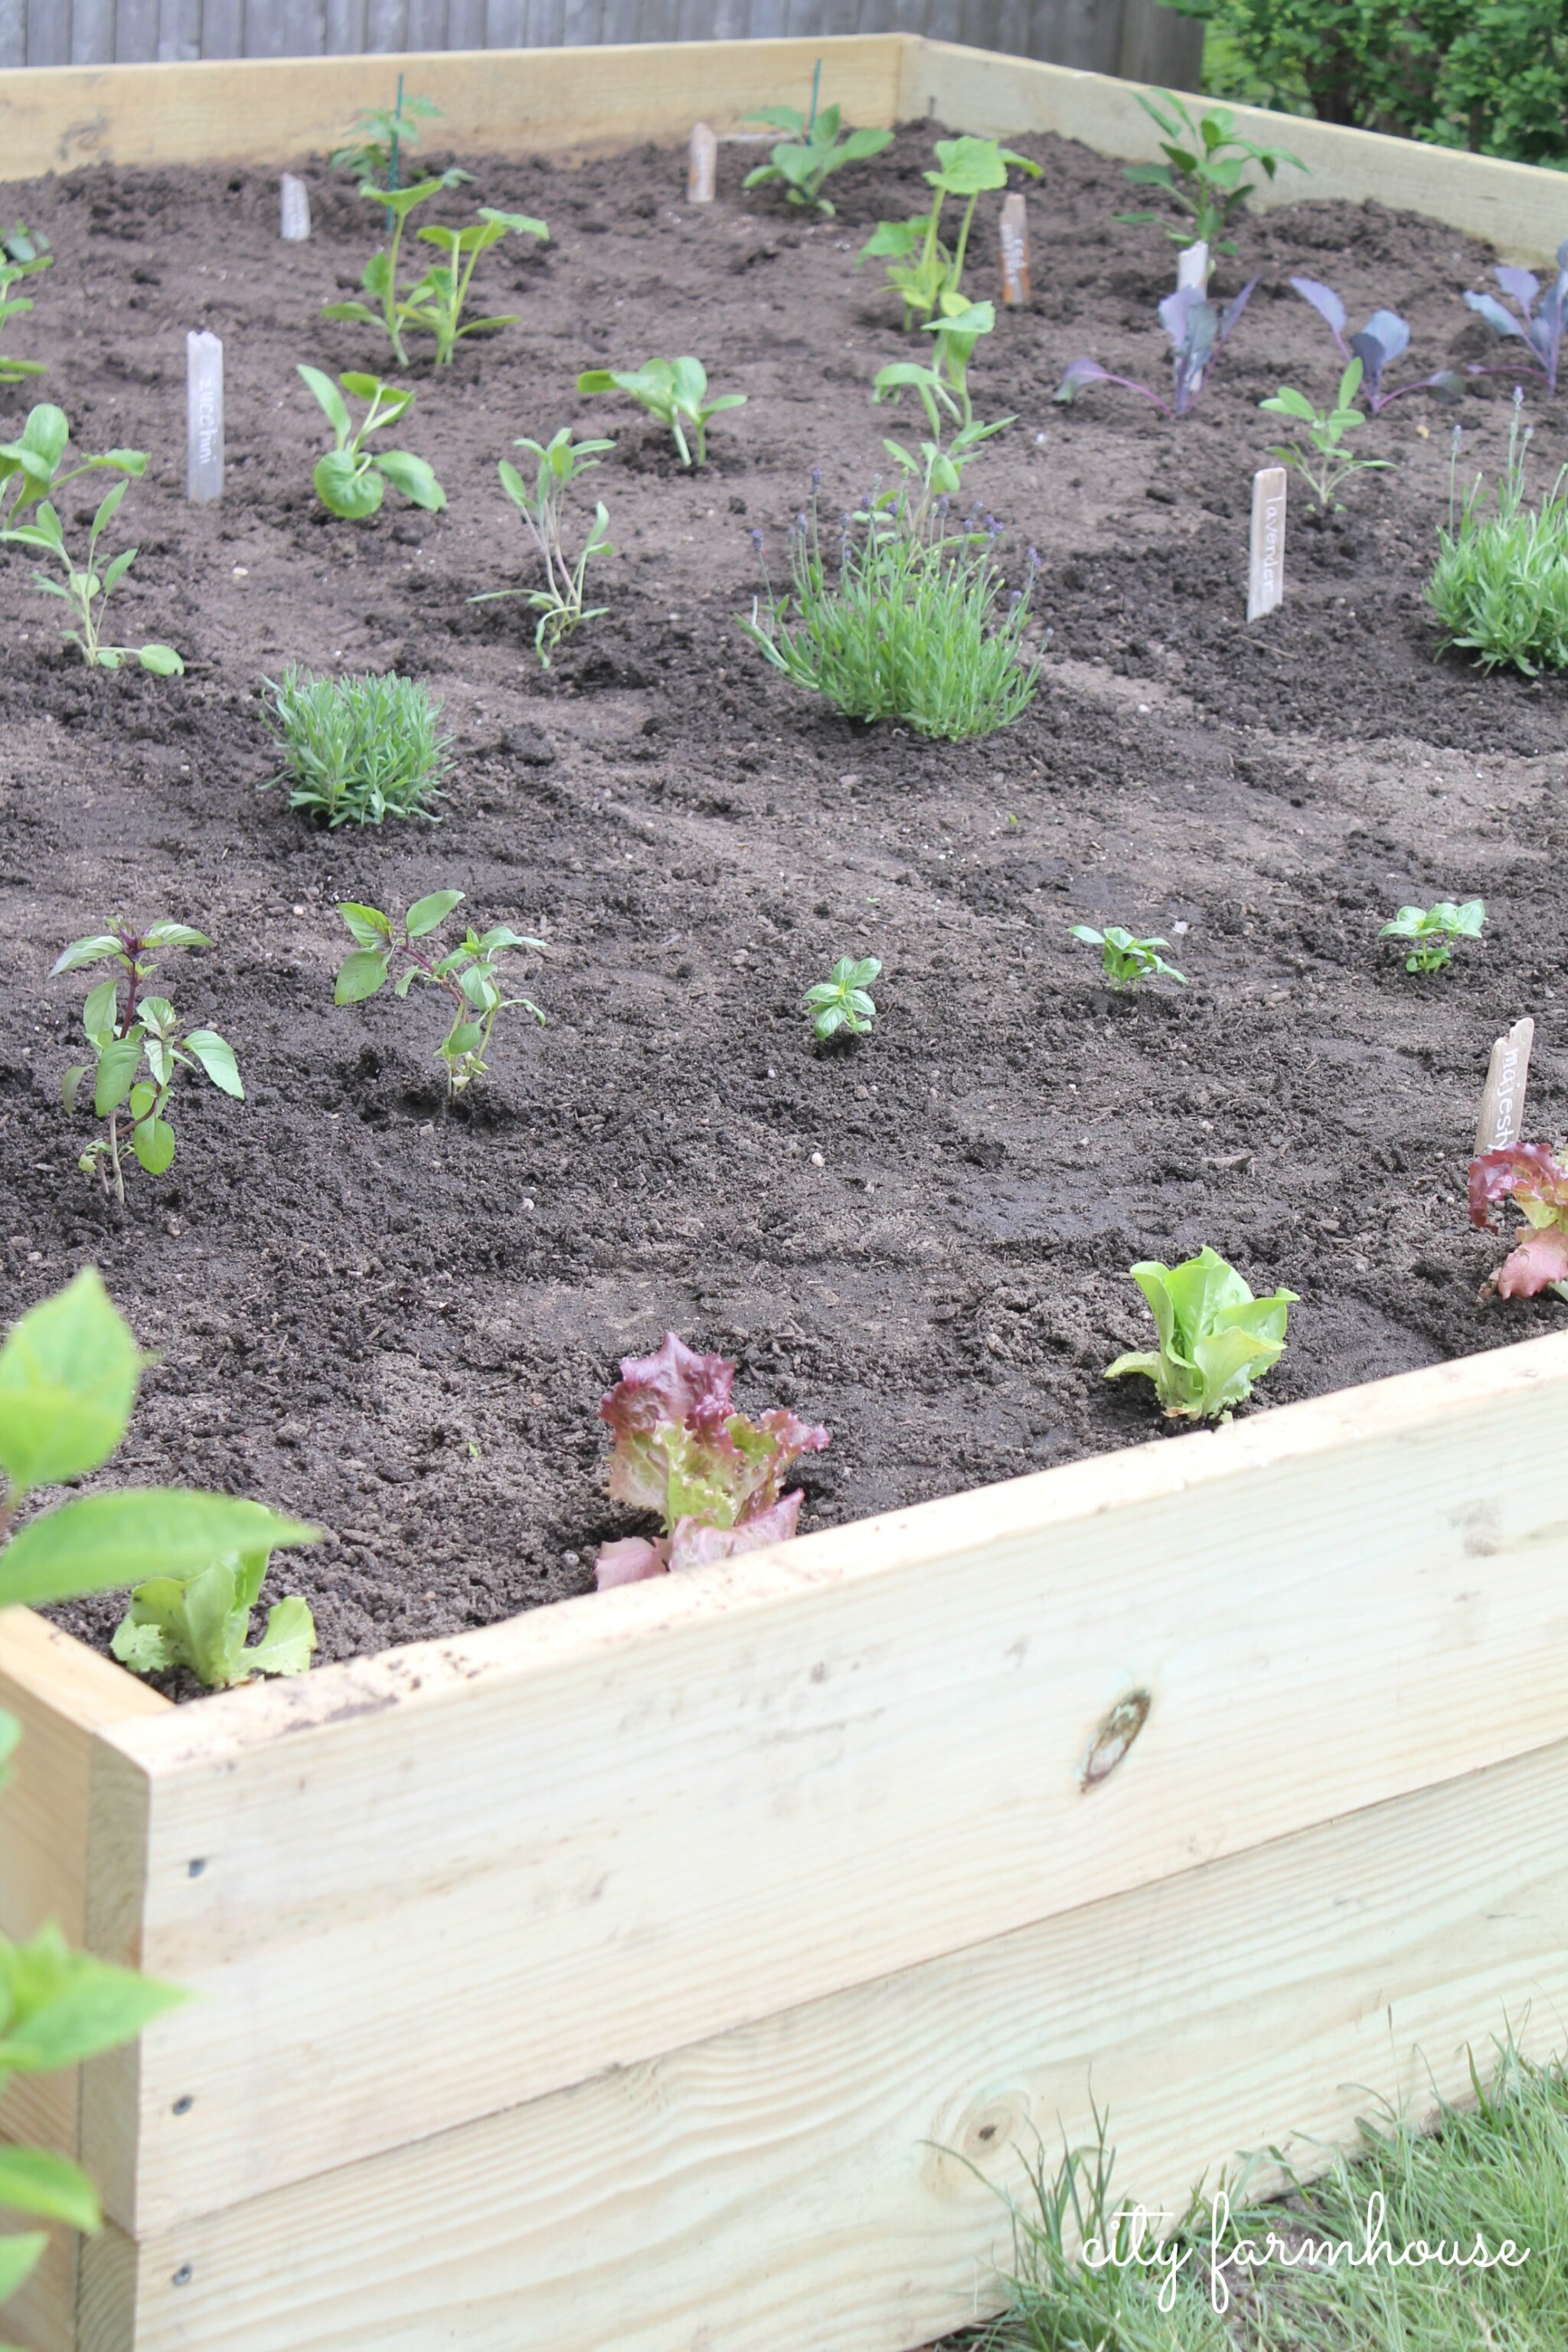
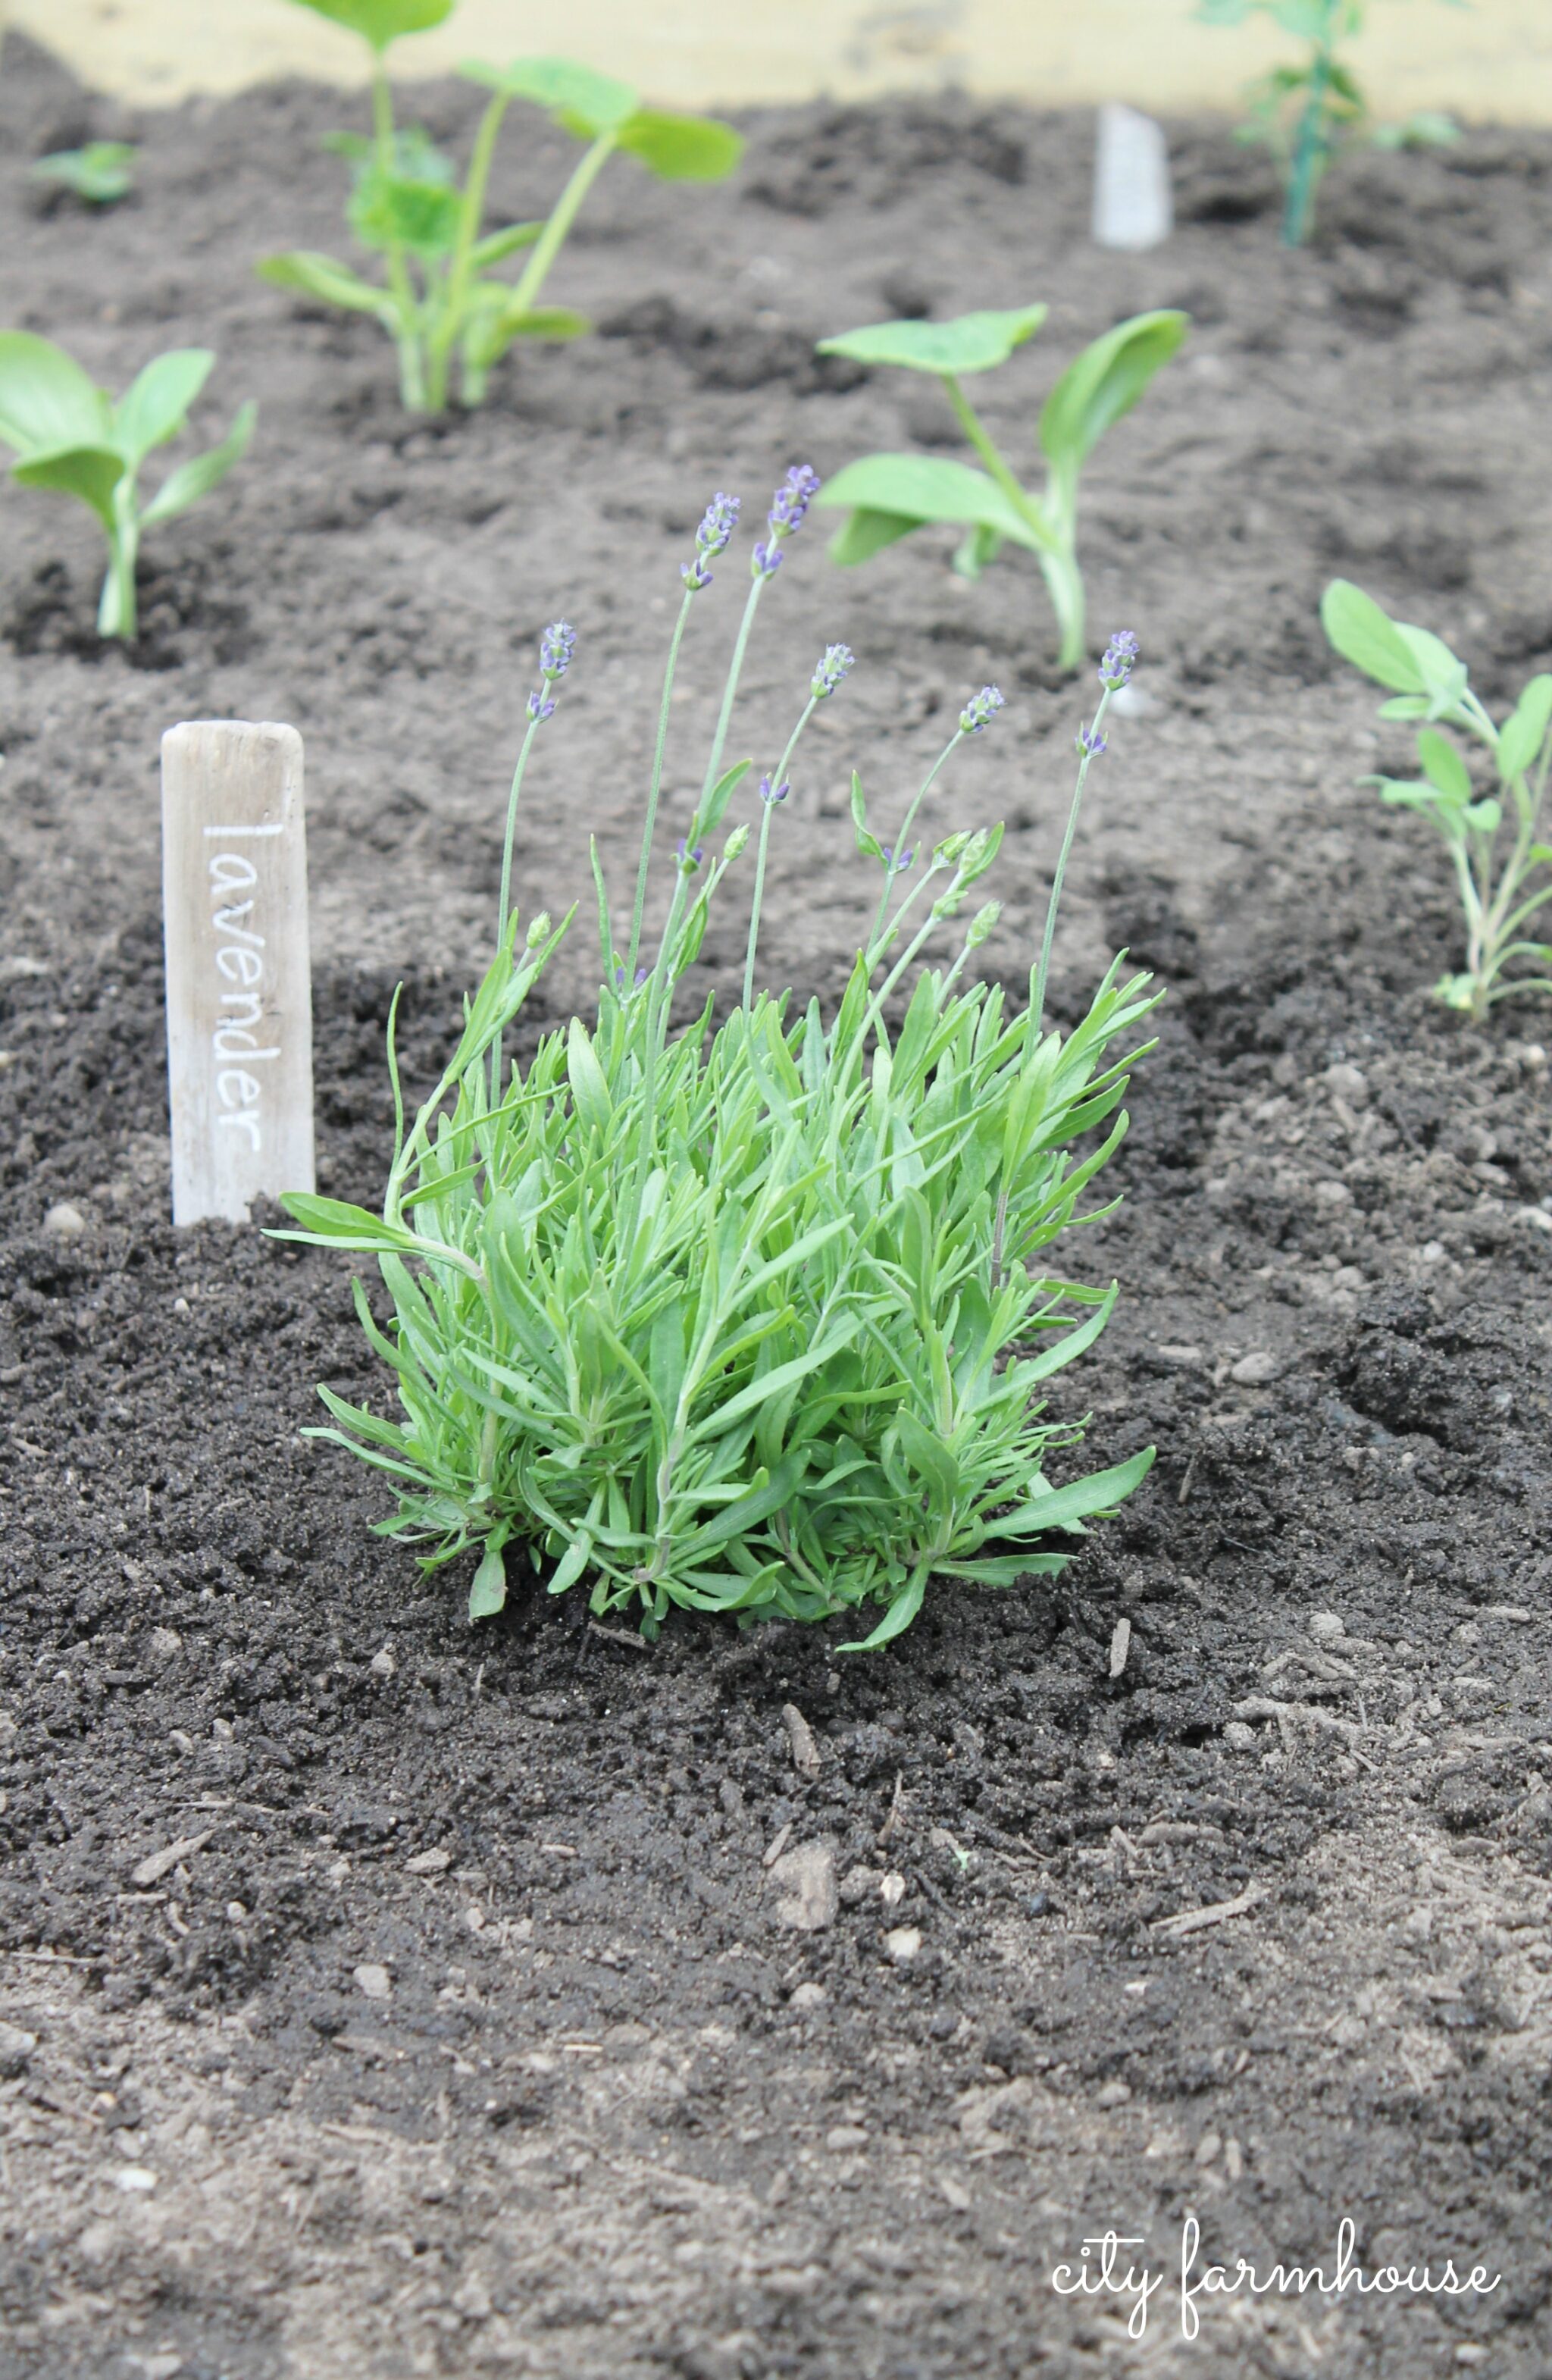
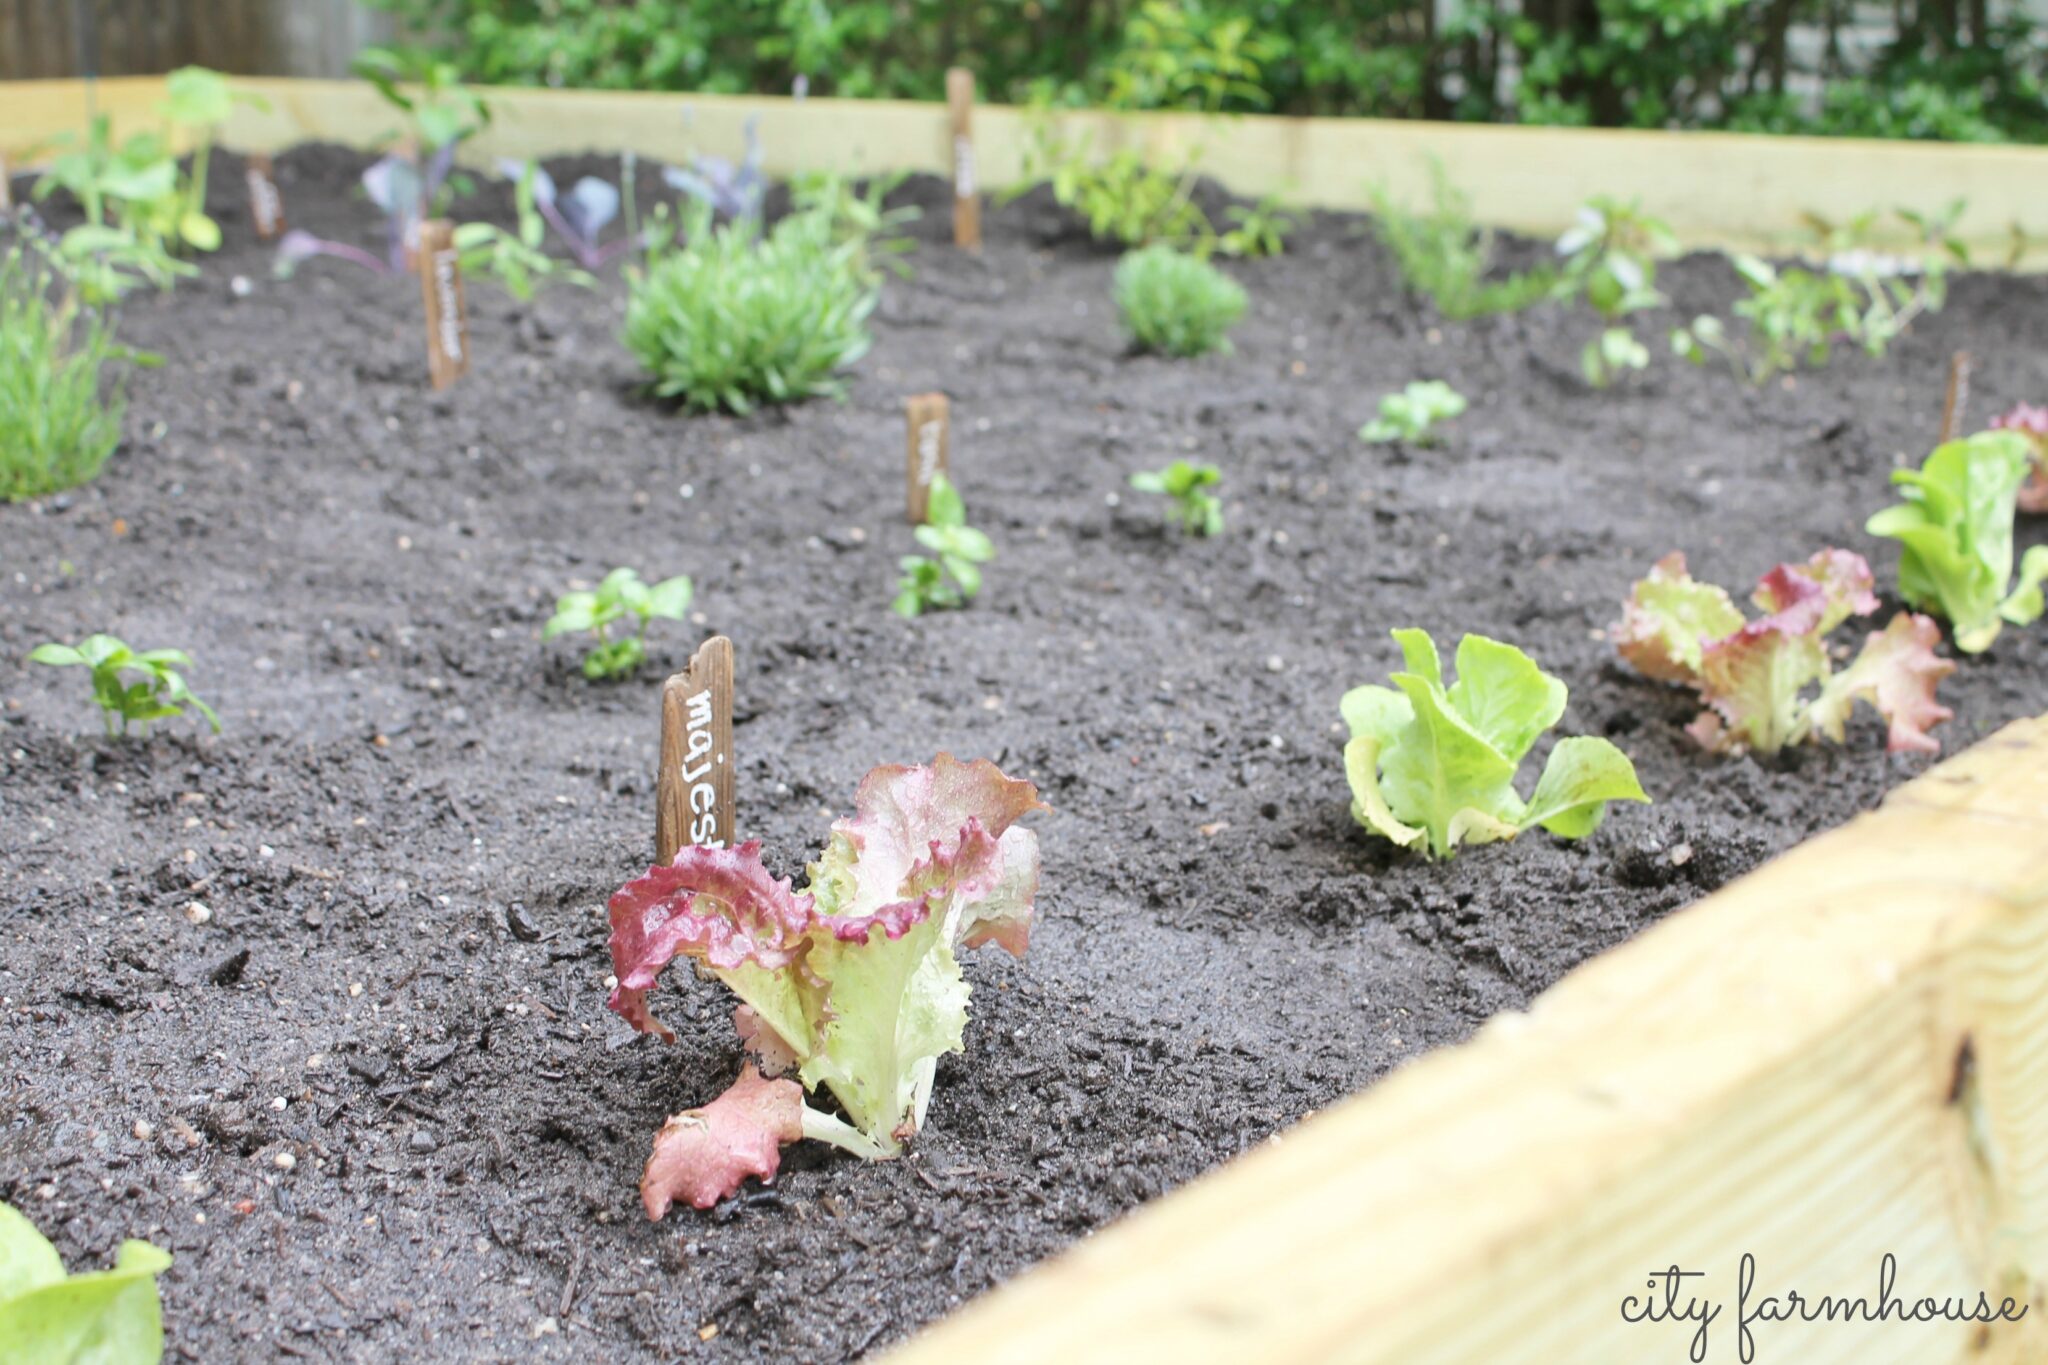
The fun part….
selecting the veggies & herbs.
I selected plants that we like to eat & use like rosemary, basil, lavender, heirloom tomatoes, eggplant,
squash, etc…

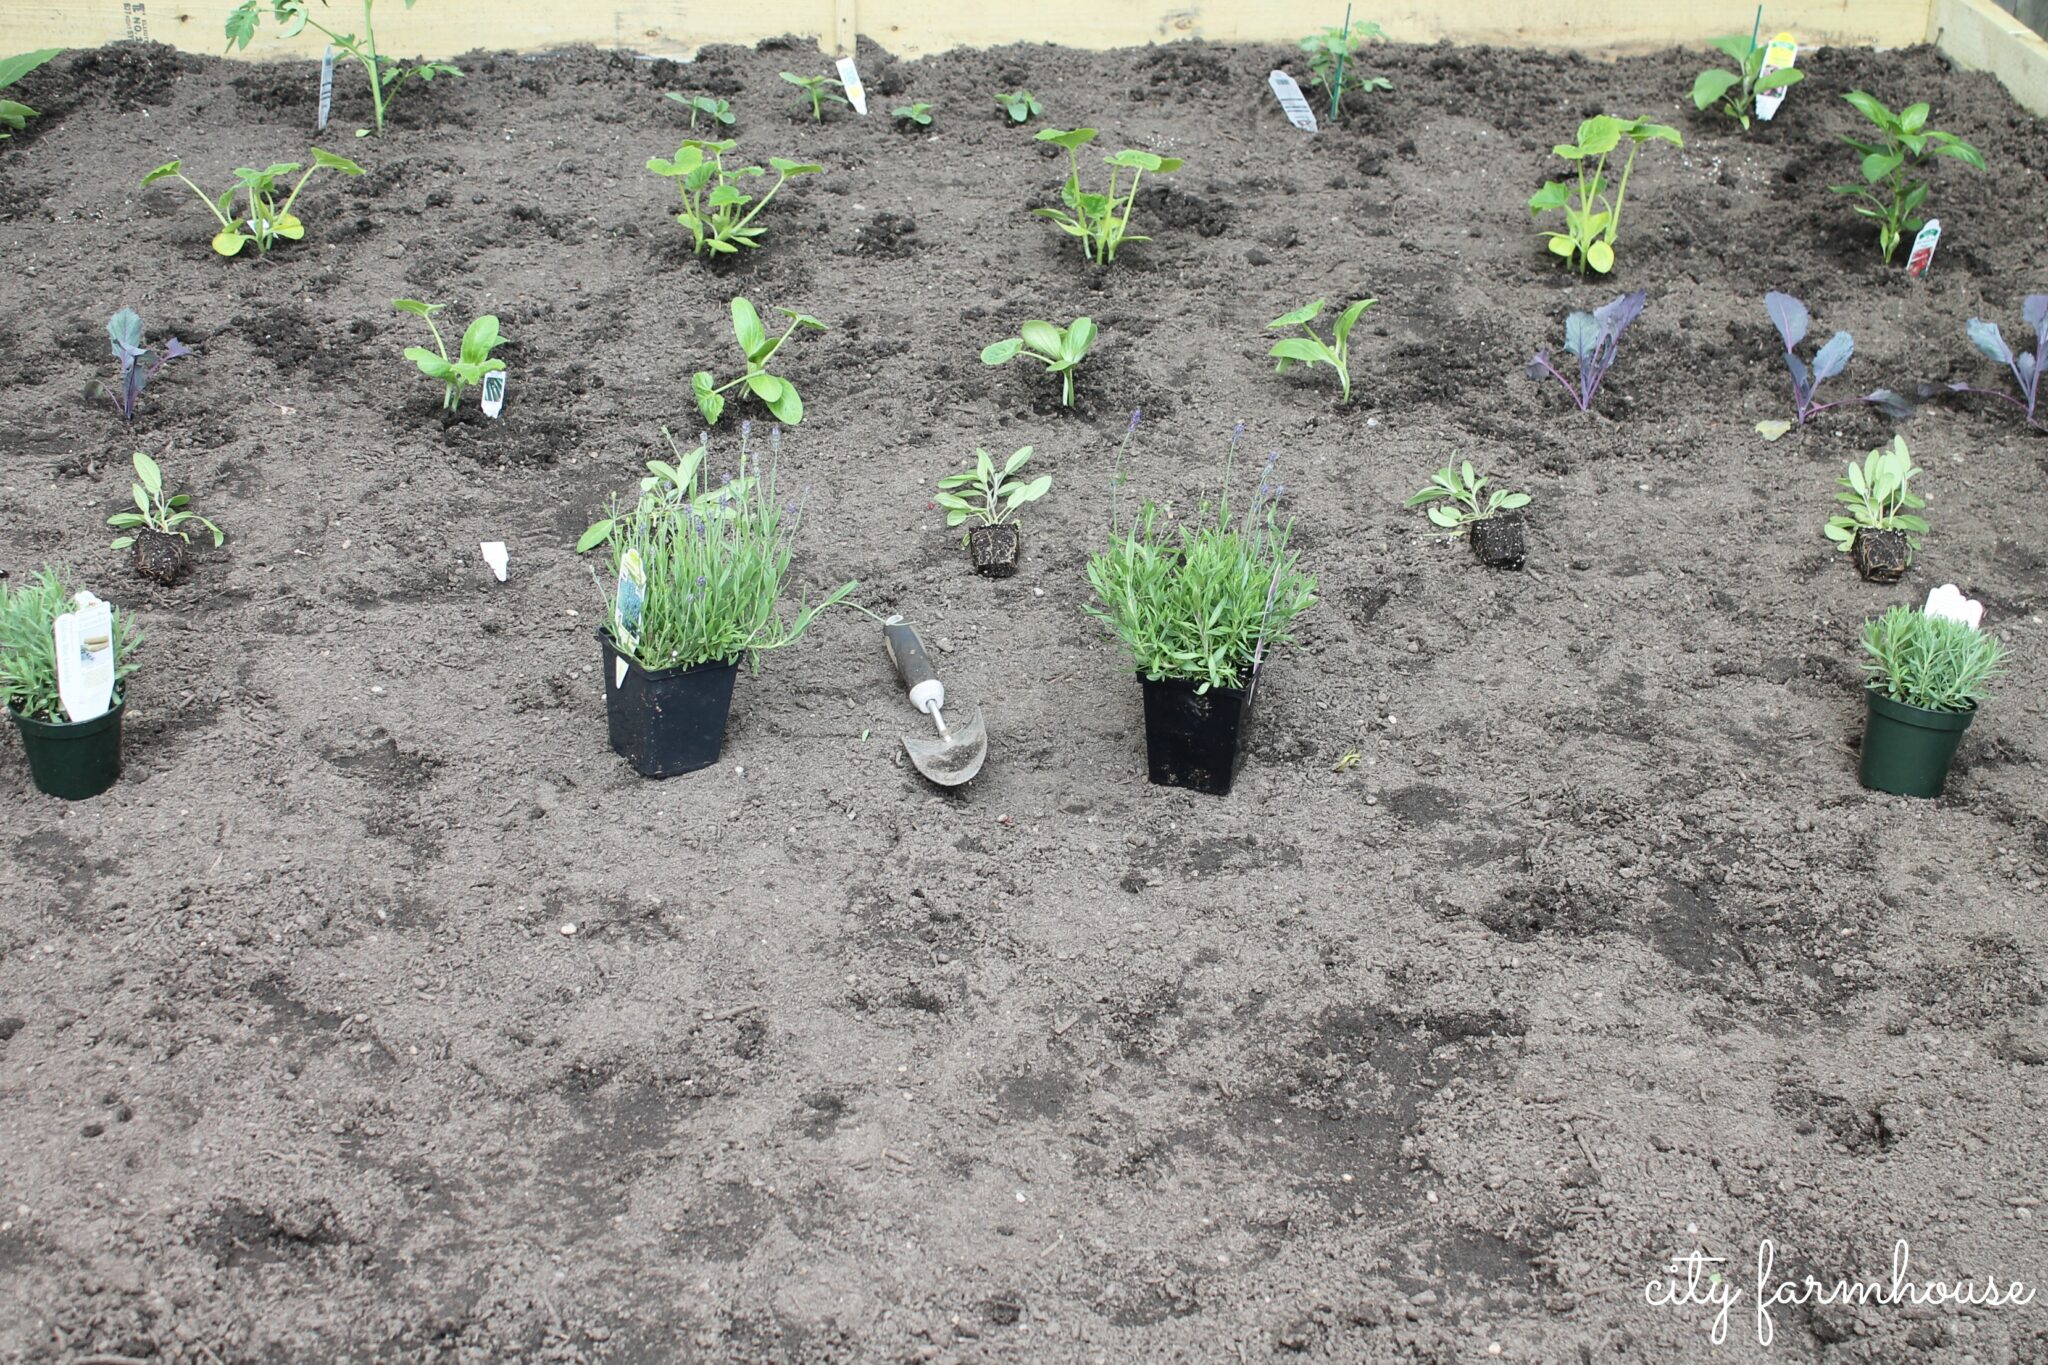
I kept them in vertical rows varying the spacing with each plant.
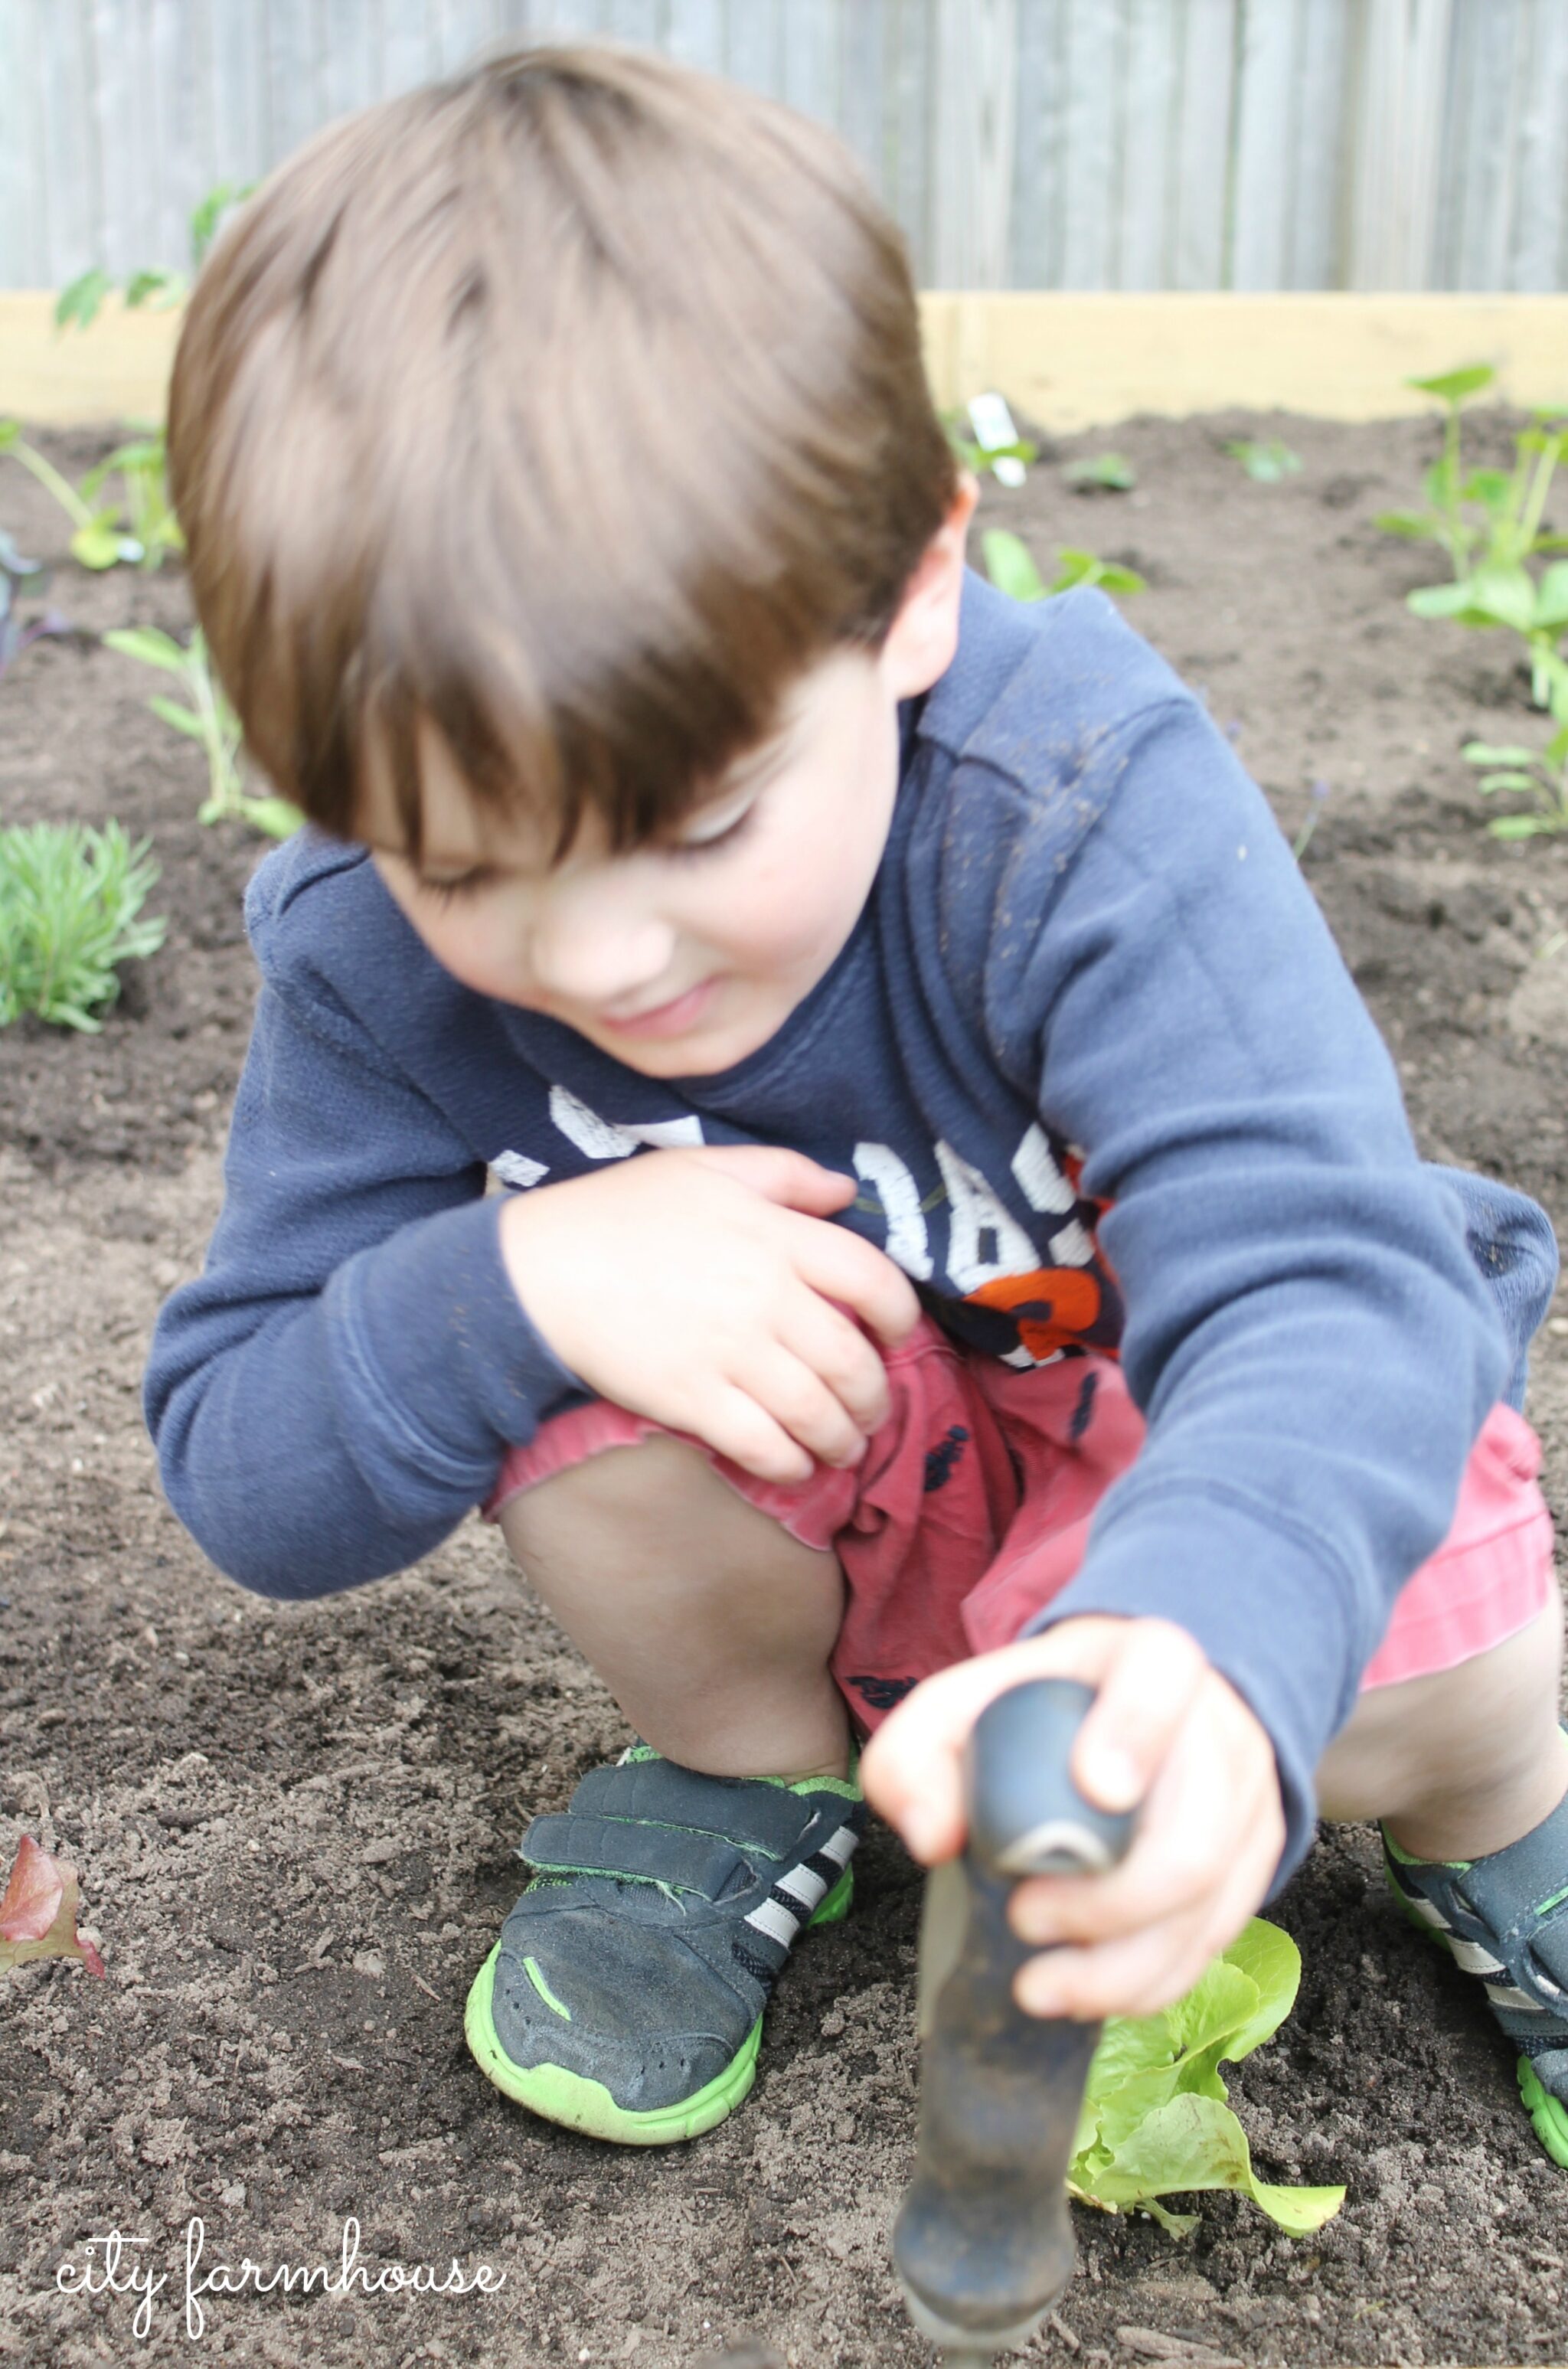
I had a little helper:).
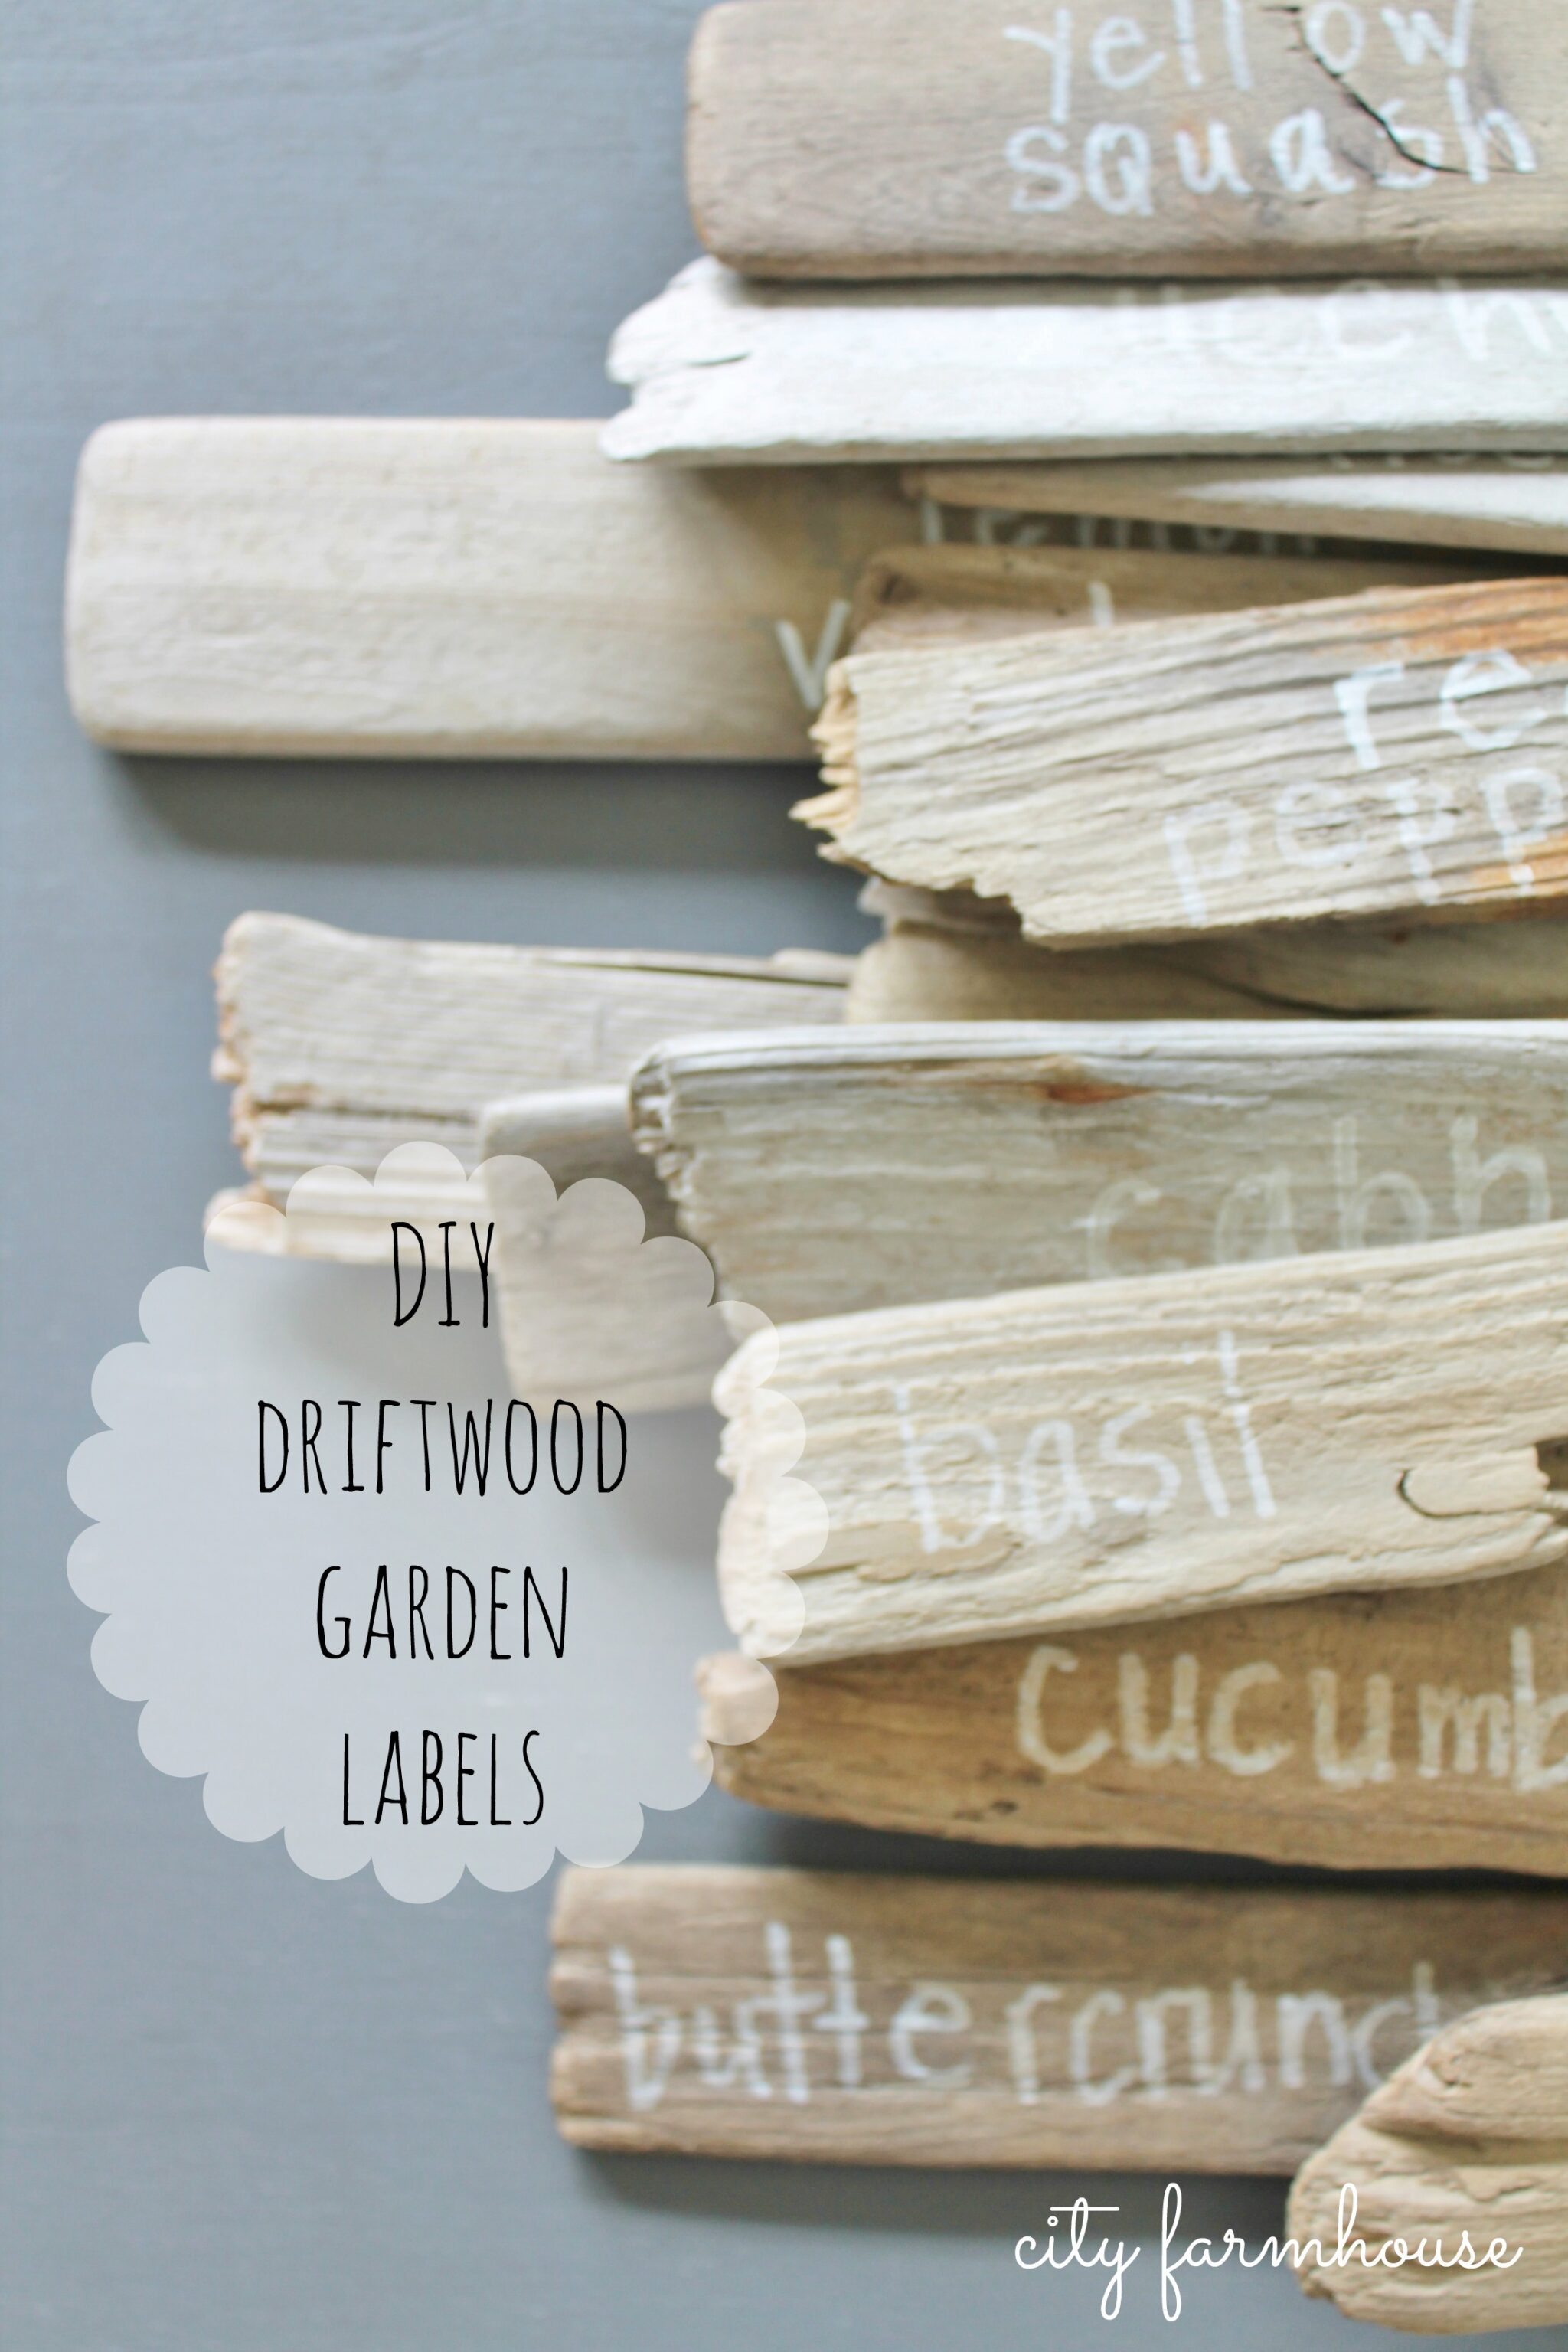
I wanted a clever way to tag my veggies & herbs.
I have piles of driftwood from our walks on the beach
so I thought they would be perfect.
I love how they turned out!!!
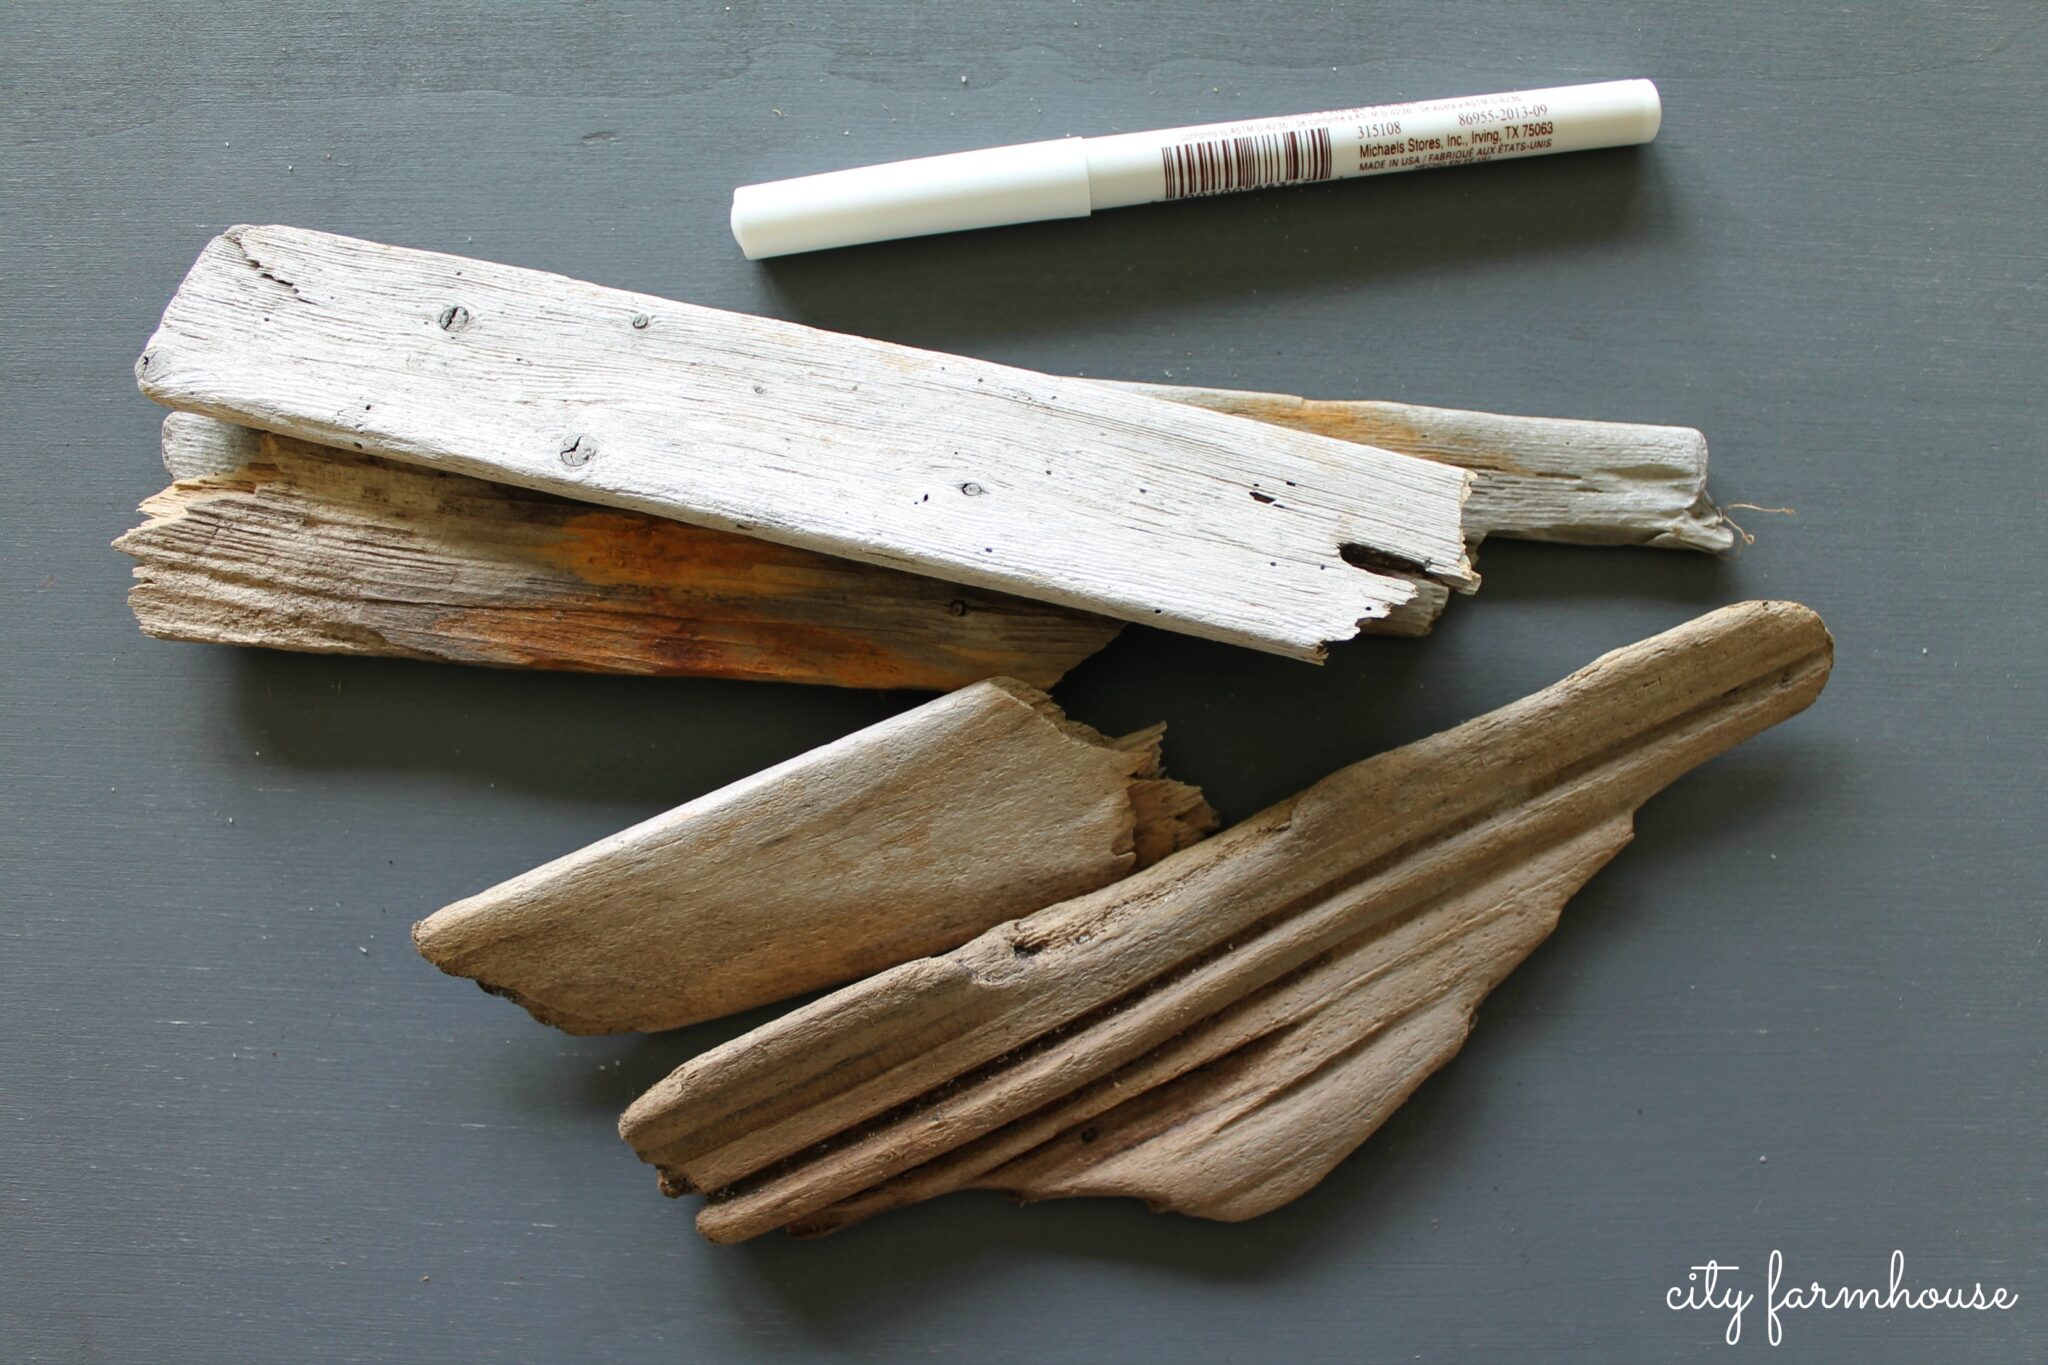
I just took a white craft pen & free handed the names.


Having a garden is something I have always enjoyed.
I can’t wait until the backyard is finished,
after 3 + years finally!!!
Stay tuned for more DIY backyard progress:).
Here is what my friends have been working on this past week….
Restoration House Interiors
Rooms for Rent
Space Number Sixteen
Ella Claire Inspired
This, That and Life
Migonis Home
Finding Silver Pennies
City Farmhouse
Just Destiny Mag
Craftberry Bush
The Chronicles of Home
AKA Design
Have a beautiful day!
I loved being challenged by you ladies last week… I accomplished quite a few procrastinated projects! Thanks!
I know it was good Sonya, to inspire each other:)! So glad you followed along!!!
Love this!!!! I just did a gravel patio too 🙂
Thank you Nikki, excited to get started:)!!!!
Wow! LOVE this. We made some raised beds at our last house but haven’t taking the plunge in this one yet. I’m going to pin this for next year. I also love the idea of driftwood markers. Your guys are so cute! x
Thank you Danielle:)!
That is one fabulous garden!!! My kids have been begging for a garden and we have yet to get to it. I’m hoping next year – we had to clean up our poor yard that had been neglected for years before we moved in!
Thanks Shannon! I know my yard is in need of a makeover, hopefully this is the year:)!
Jen! I love this!!! Totally pinning, this is exactly what I want for our yard too!!! Great DIY project 🙂 and if it didn’t love it already your driftwood markers!!! ACK! Swooning 🙂 XO Happy Memorial Day!
Thank you Bre!!!
Love your project and those driftwood markers are genius!
THank you Jen!
Great job to your whole family! 🙂 What a wonderful project for everyone to help with! Can’t wait to see your vegetables! xo
Thank you Kristy! Me too!!!
great job showing the build! great garden, too!
one issue i have here is the size you made it.
when you need some herbs from the middle of the planter, you have to climb into it to get it?
Thanks for the inspiration! You ladies did a great job of getting me inspired and what a fun time! LOVE your driftwood stakes! Thanks again! I accomplished SO MUCH! Look: http://www.pleasureinsimplethings.com/annie-sloan-virgin/
Love, Jackie
Great idea, Jen! We have some tomatoes to grow this year but want to relocate the existing garden. Something like might be the perfect interim solution 🙂
I pinned this and love it! I’m getting ready to attempt a smaller version this weekend hopefully! Have a great weekend!
Fabulous! We are wanting to do this too! Just the inspiration I needed. 🙂
Nancy
Love this! We did a garden box at our old house and I so miss it. I need to make one of these next spring… and those driftwood garden labels are so perfect!