
Hello City Farmhouse friends! It’s Bre over at Rooms FOR Rent Blog, and today I’m going to show you how I created the gallery wall behind our tv. I know creating gallery walls can be tricky to begin with, and there are a lot of formulas out there to create the perfect one. But sometimes those formulas or pre-made layouts just don’t work in your space. I always get questions on how I create my gallery walls, or if I use a template, and the answer is no – I don’t. I’m an eye-baller. 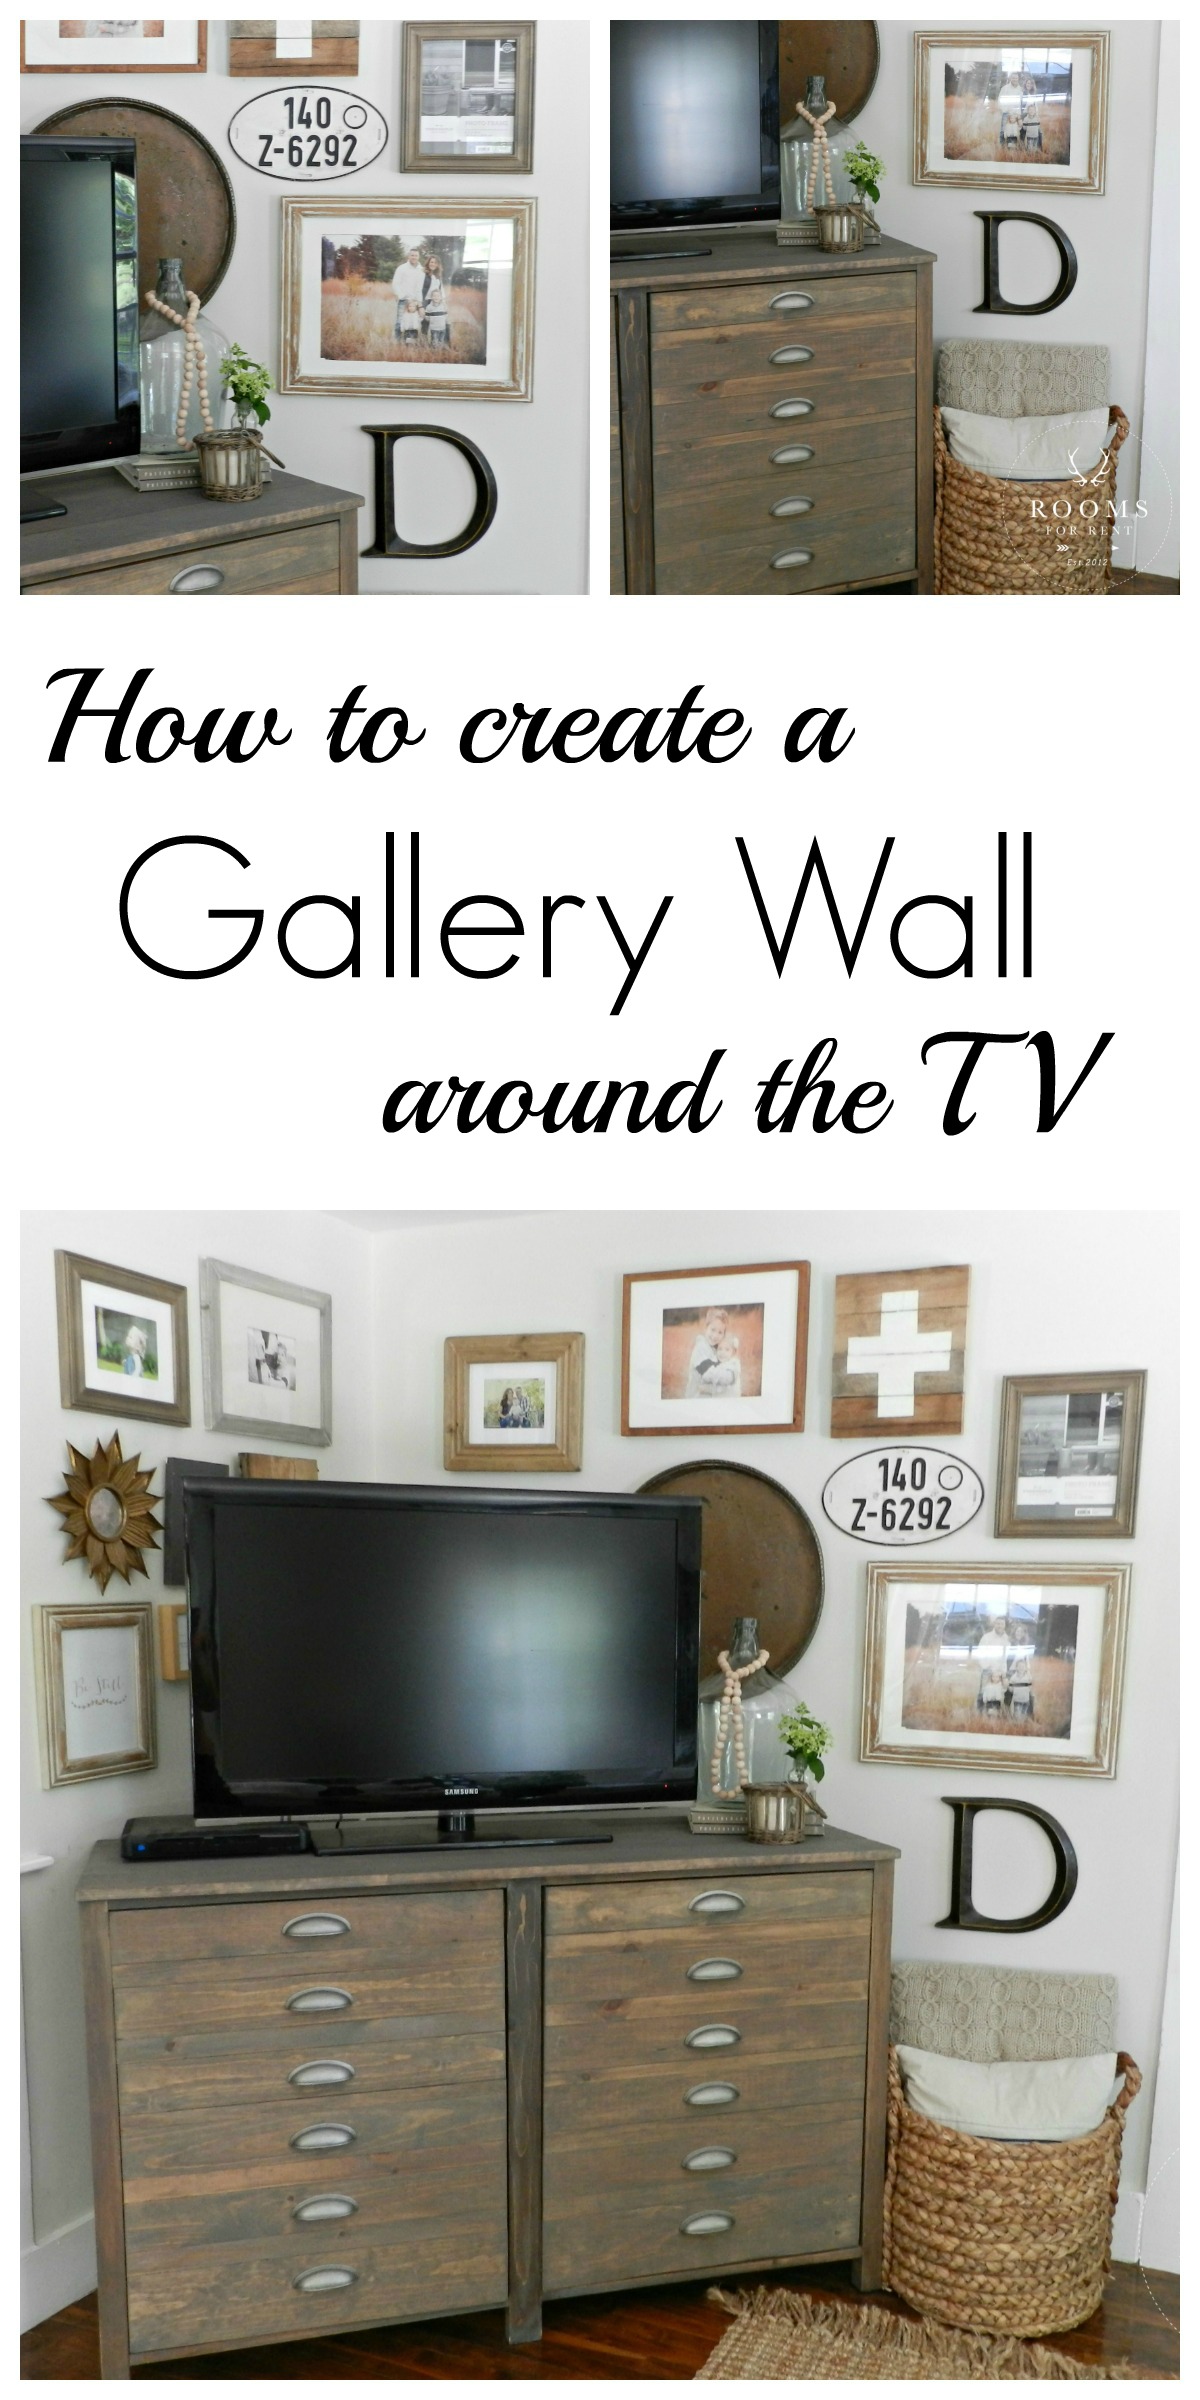 If I plan it out too much it just won’t ever happen, because sometimes you can stare at the wall all you want, and re-arrange your preselected frames on the floor and they just never make it to the wall. I will tell you this, starting is the hardest part, but once you start you have something to build off, and the rest just falls into place.
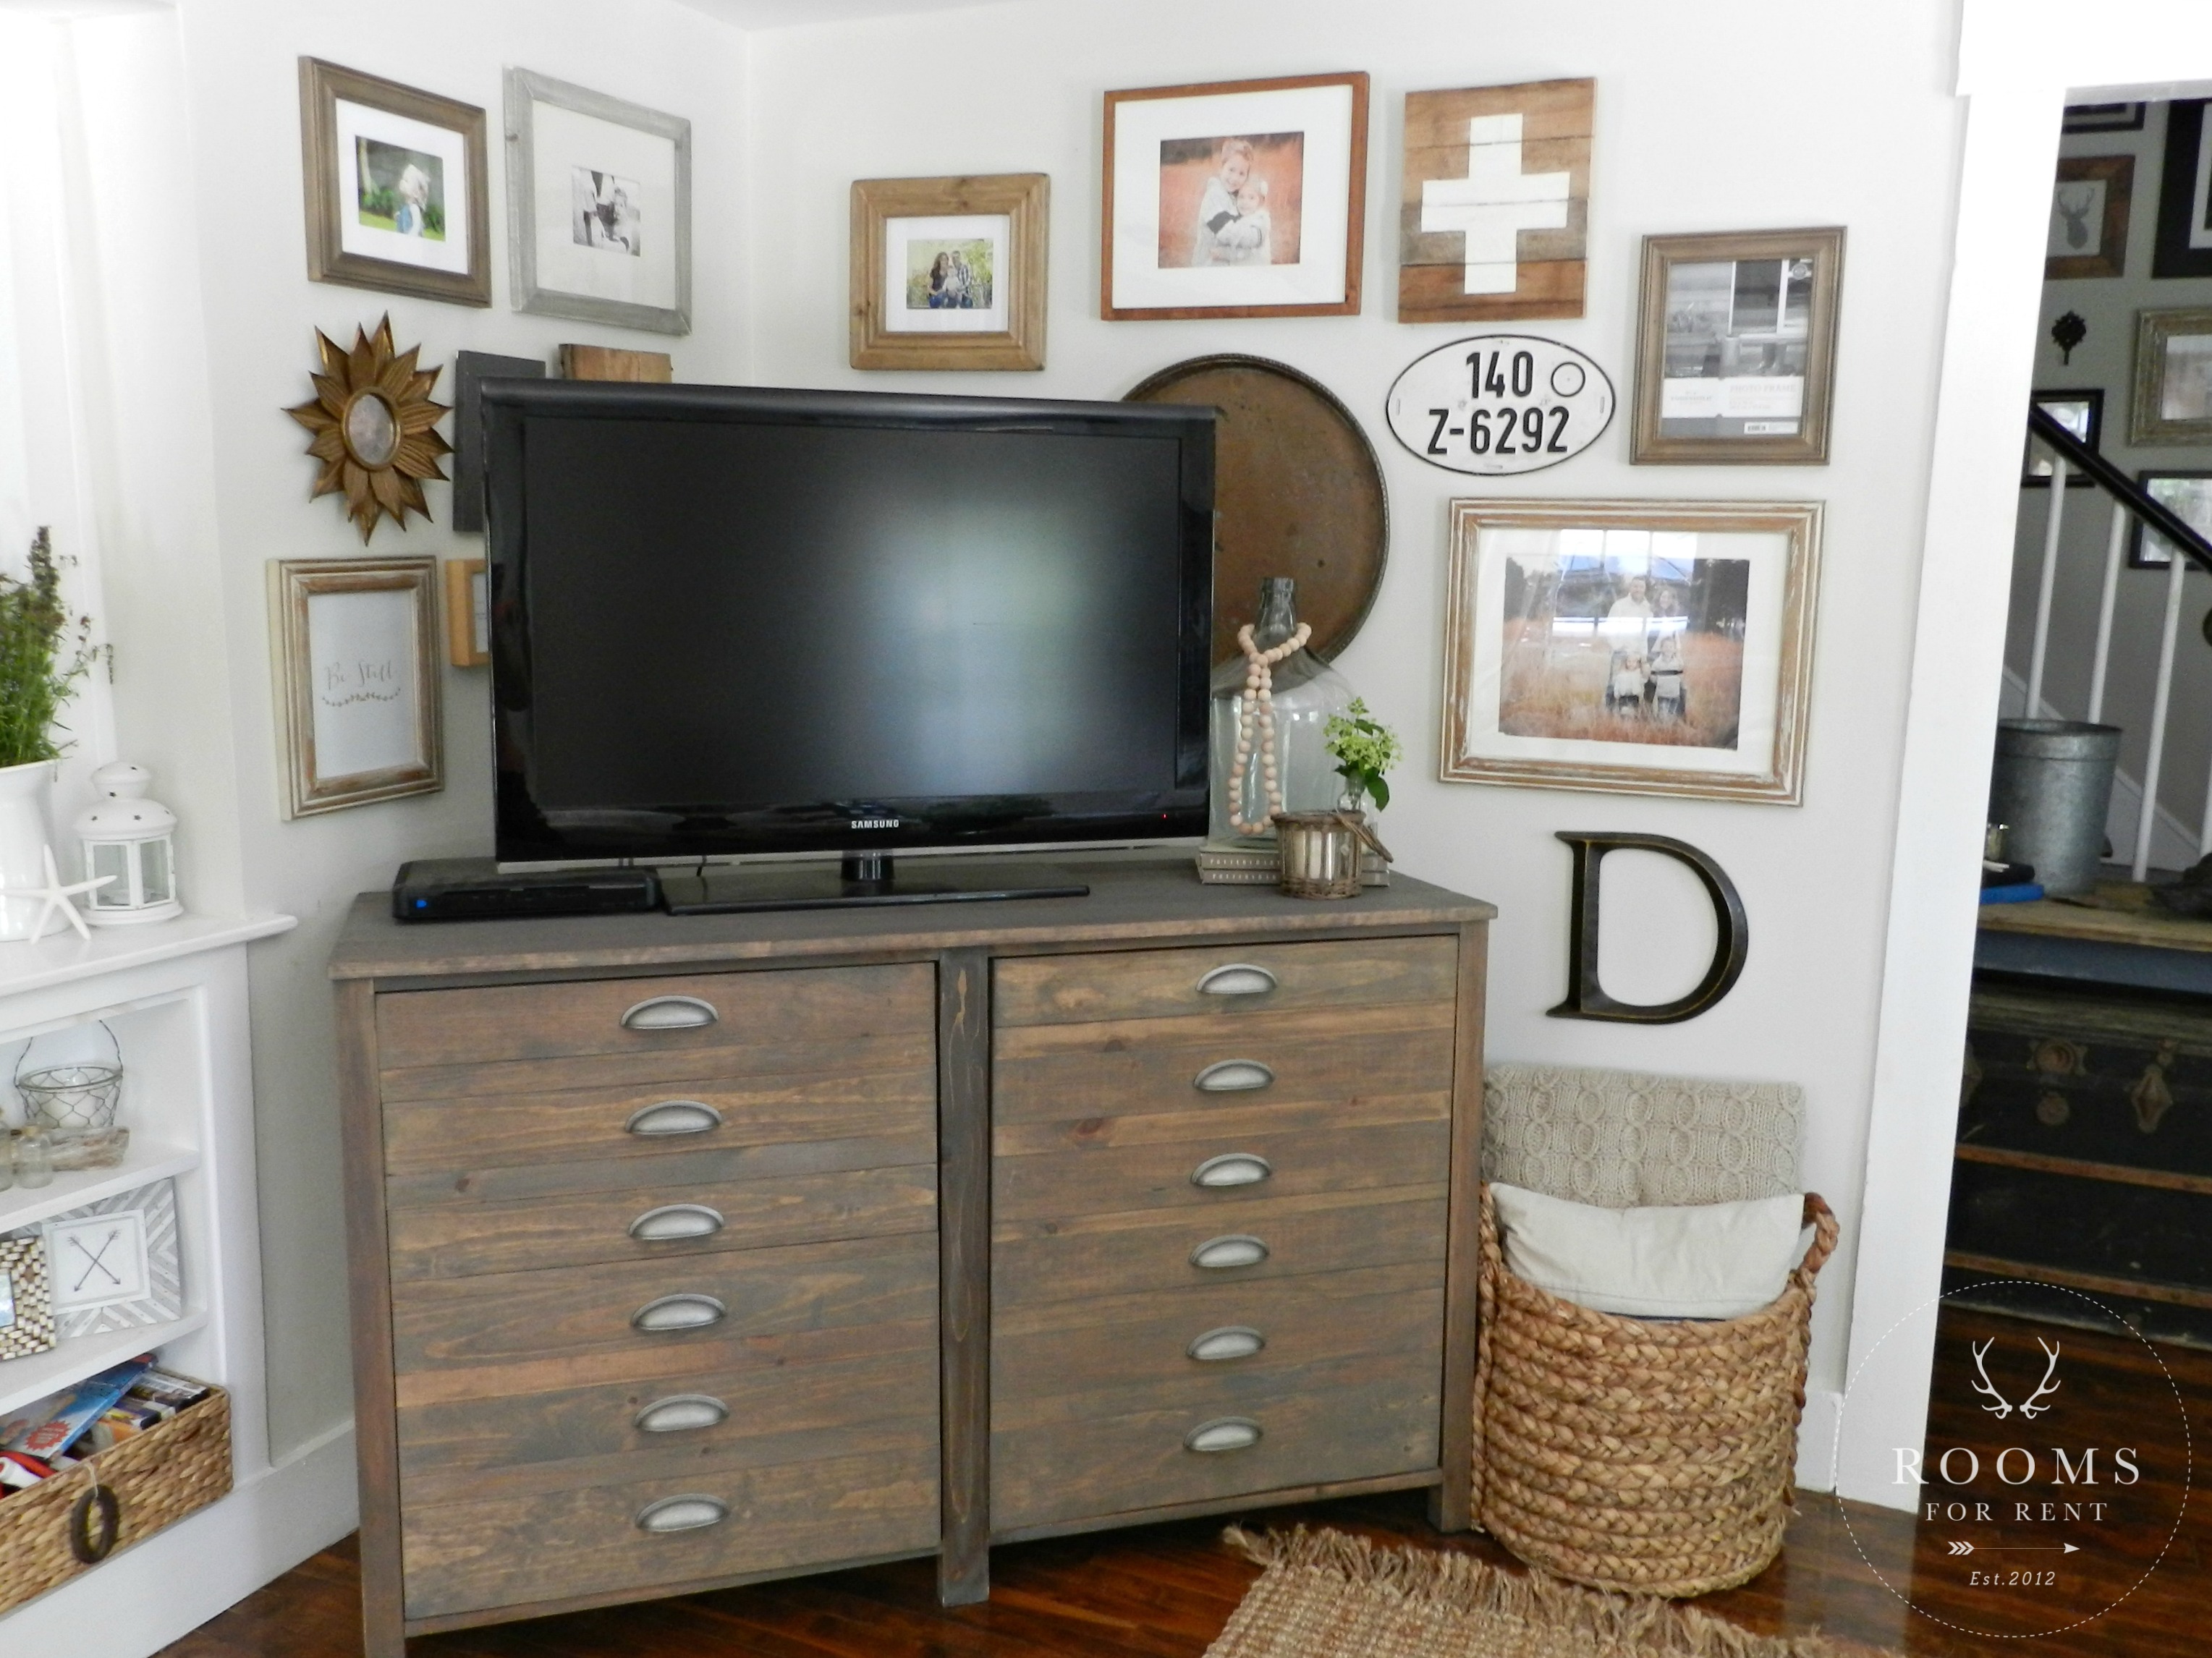 Starting is the hardest part. FOR REAL! Talk about struggling with a fear of commitment, the second you go to hang that first photo up you hesitate in fear that it may not be the right one, what if you get started and it doesn’t work because a different shaped photo would work better? Do I start in the middle and work my way out? Do I start left to right, right to left? Top to bottom? Are you starting to get the idea why sometimes starting can be the hardest part? Before I start I envision the wall I’m getting ready to create. What sort of theme do I want there to be? Are there any pieces I for sure want to incorporate? Chances are you have one key piece or pieces you want in there, and that’s what got you to start in the first place. When working around the tv typically speaking you want to start with your biggest frame or object first.
 One of the biggest reasons I was re-doing the gallery wall behind our tv was because my husband got me that large vintage-y copper tray for my birthday this year, and I knew I just had to incorporate it. So that was the first piece to go up! I made sure I had it layered behind the tv just right, so it was peaking out a bit, but not quite all the way, and then it’s up! Then I went for my next biggest pieces, or the pieces I knew exactly where I wanted them to be.
 Next to the copper tray, these two frames where the largest ones I had on hand. For me I find it a little easier to work with the larger pieces and then fill in the gaps with smaller pieces. *In all fairness, the larger distressed frame and letter “D” initial where from the first gallery wall there. I loved them so much in that spot I knew they were staying put!
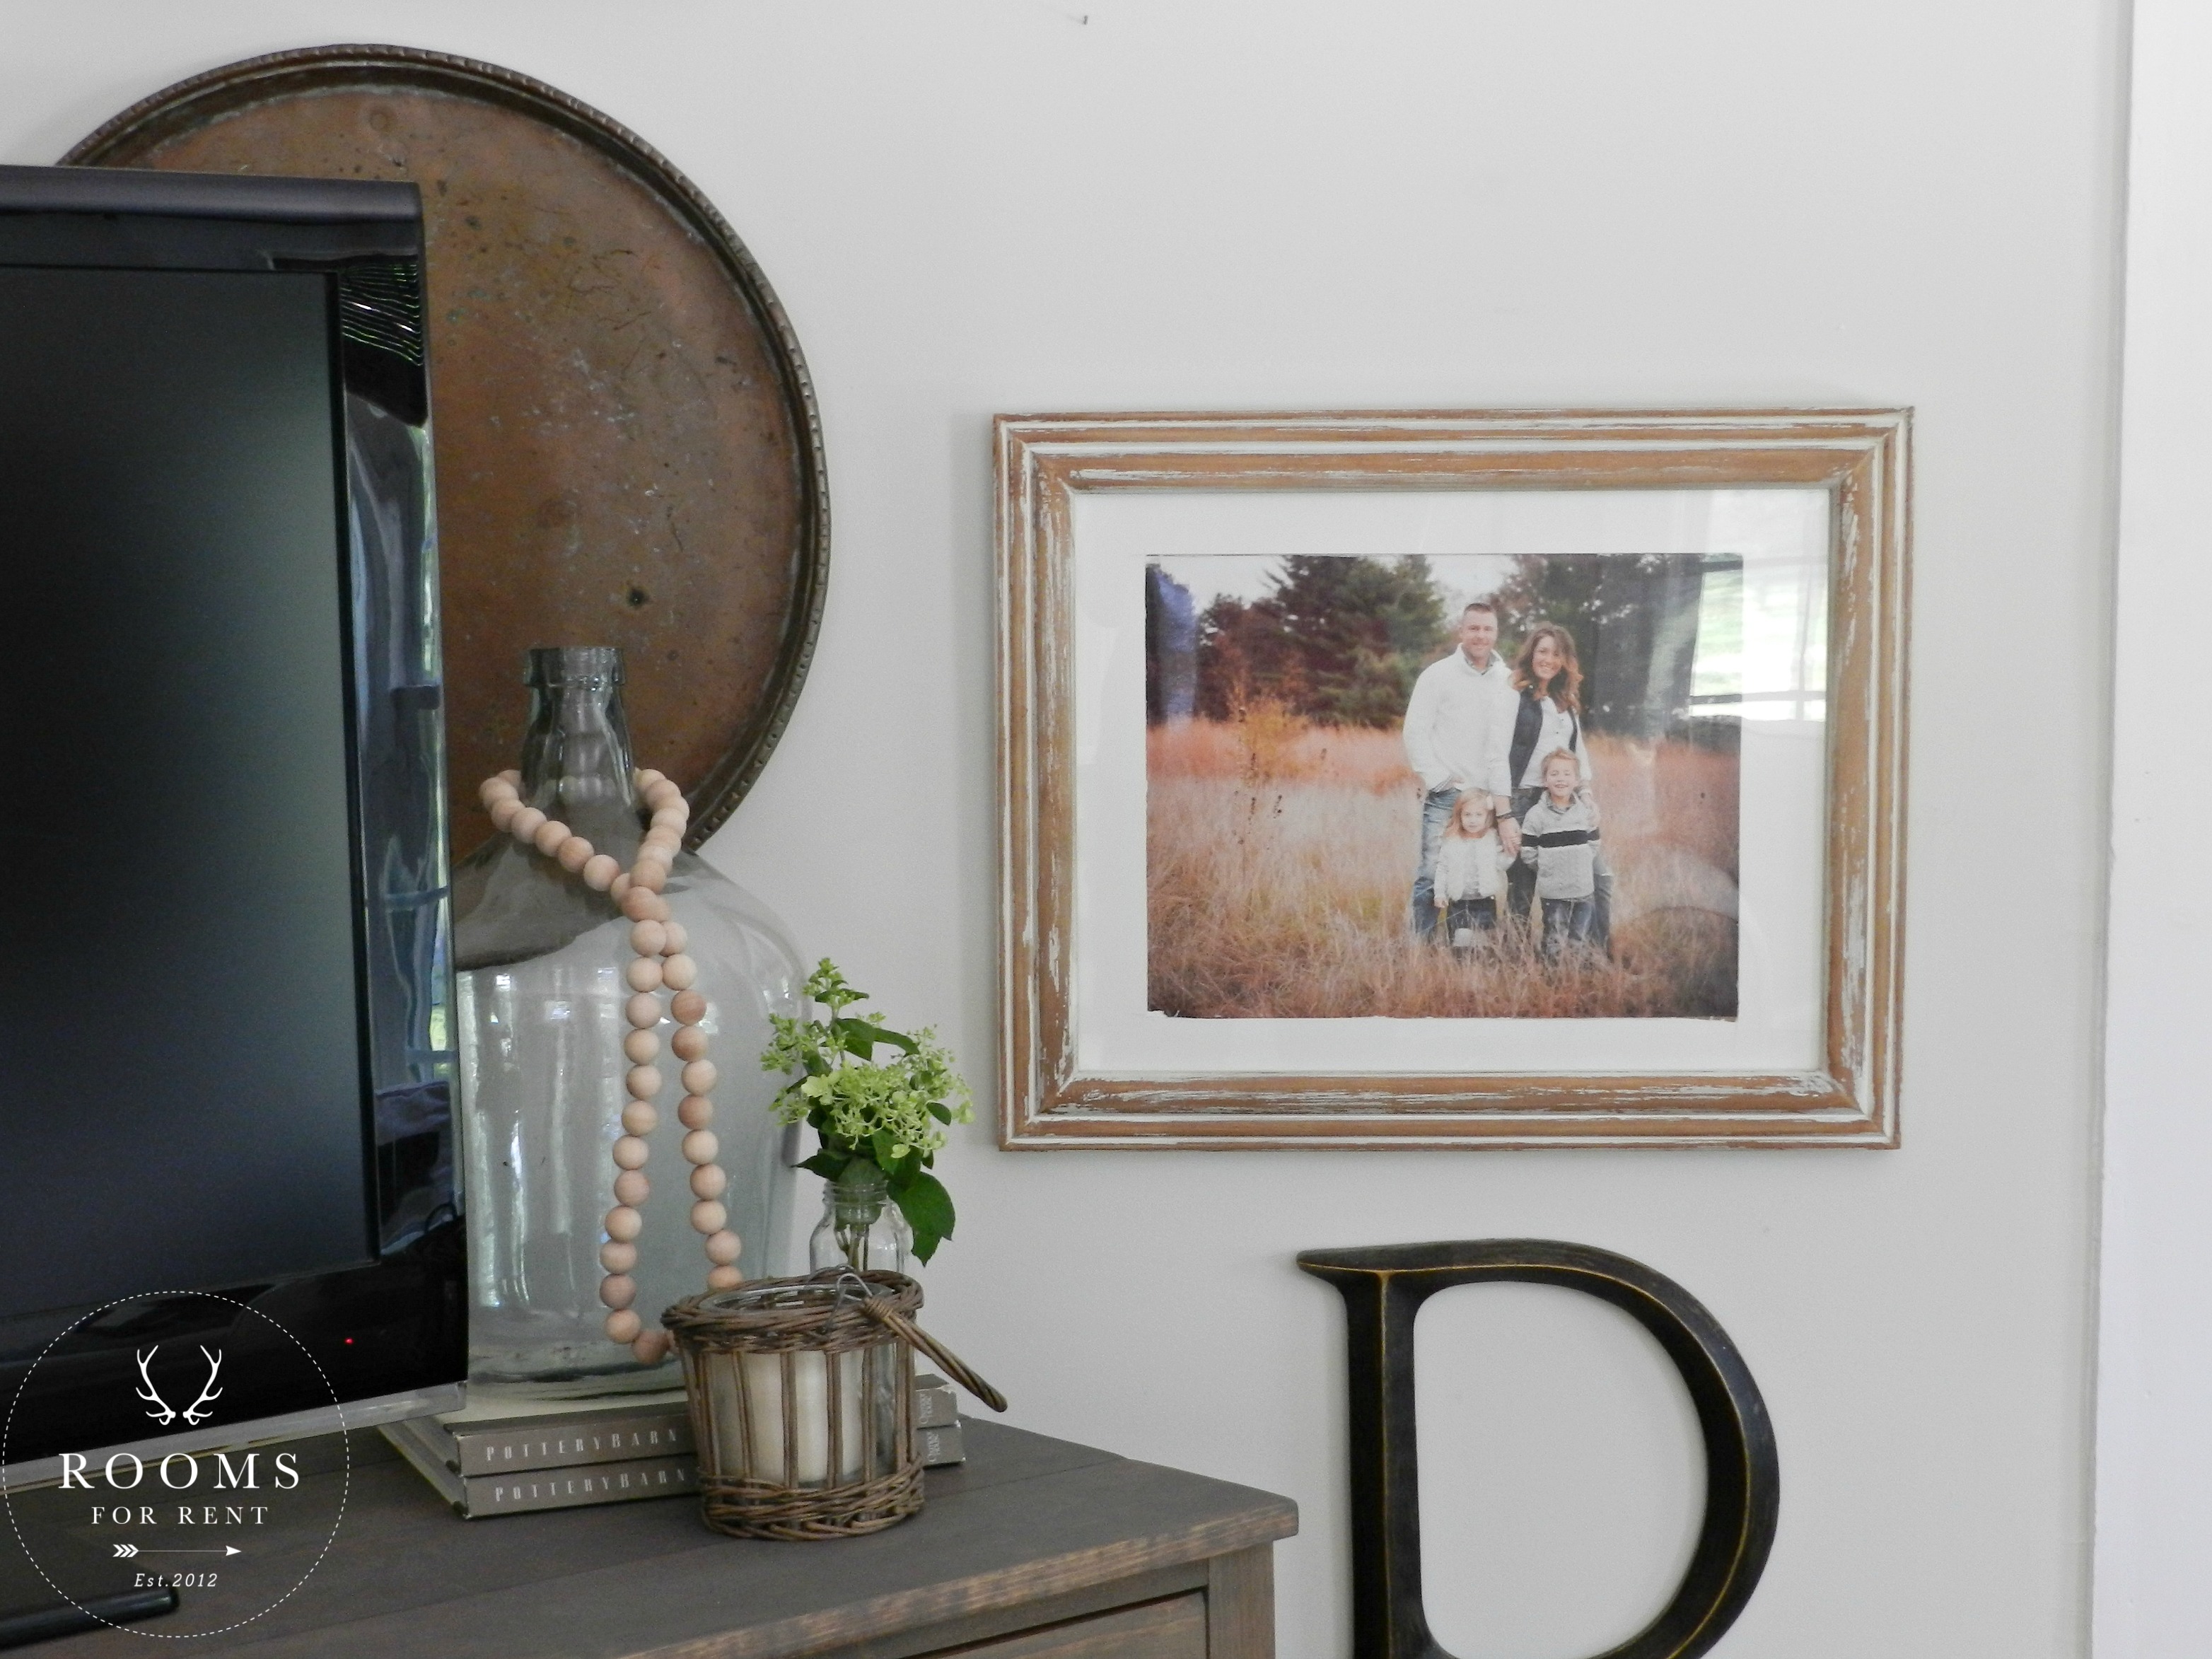 The key to not putting all the largest frames next to each other, it you want things to feel evenly spread out. In this unconventional gallery wall layout, if all your large pieces are side by side it feels a bit clustered and unbalanced.
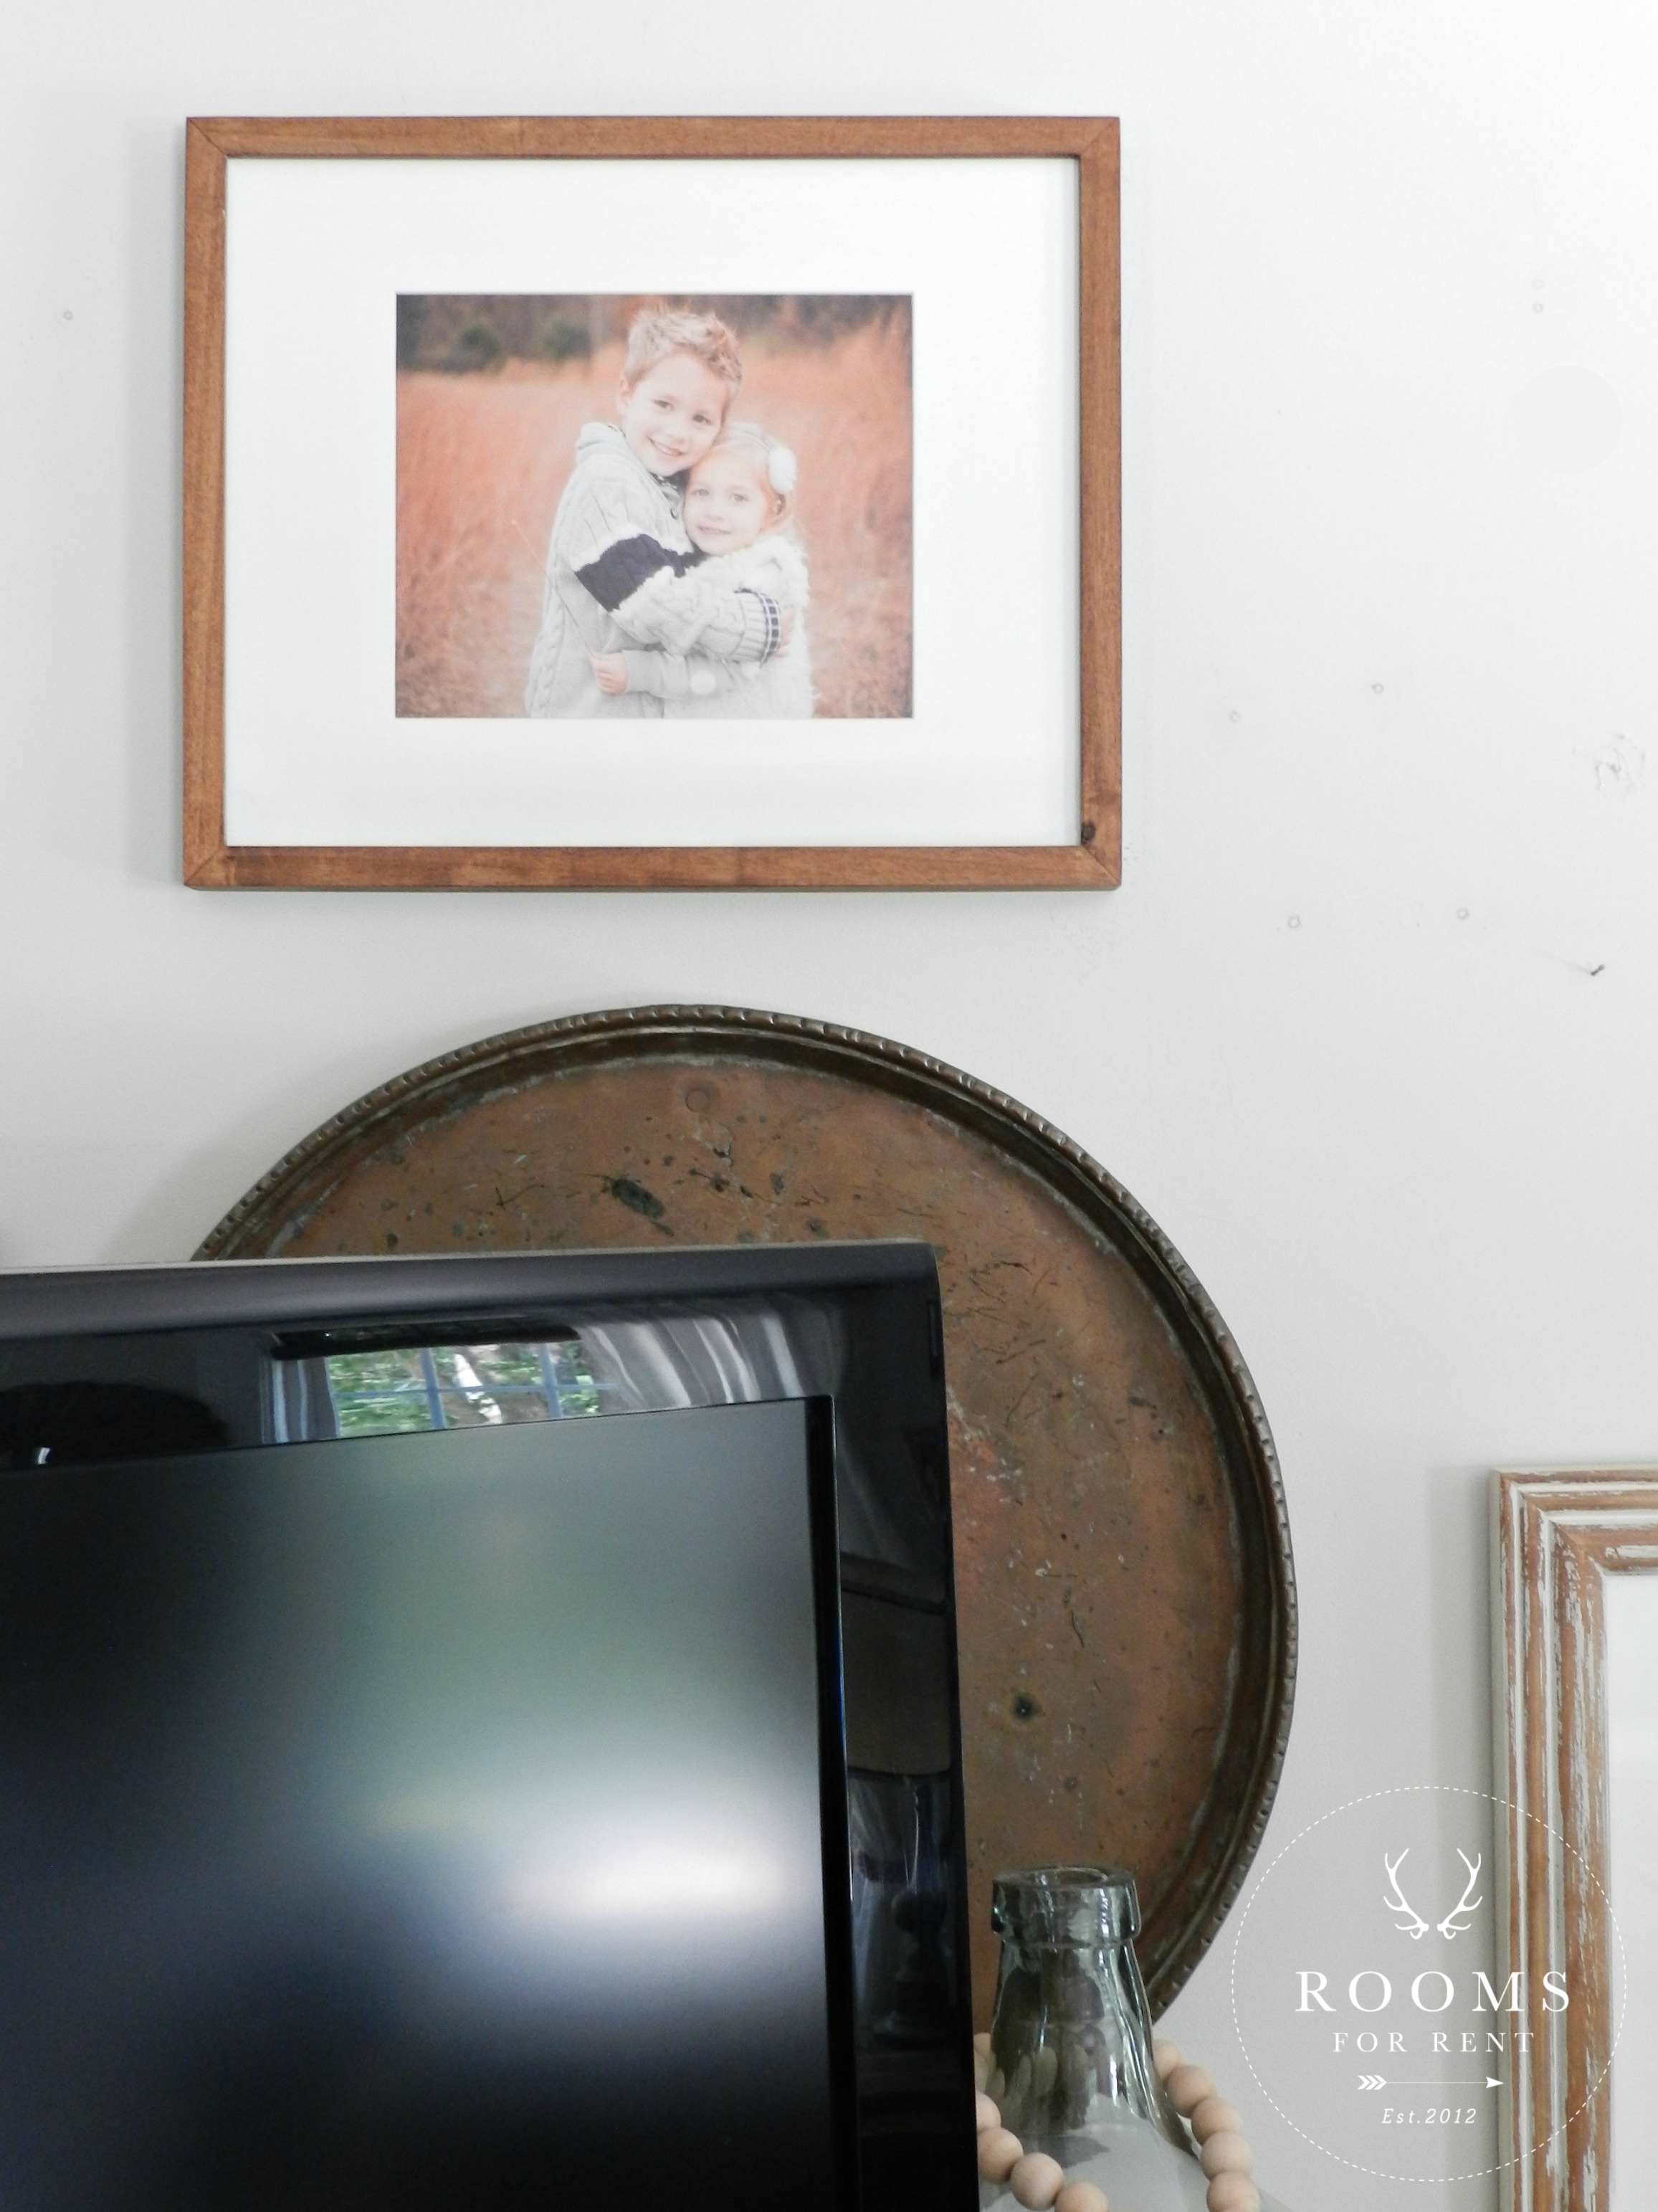 I used the next largest frame above the copper tray to ground the tray, and act as the highest point in my gallery wall. Additional frames hung will go slightly lower than the middle one to create an overall rounded feel that mimics the round tray in the middle. When you do this it helps keep consistency when you are hanging different shaped objects together. Now I need to bridge the gap between the frames, and fill in that empty space. I start holding up frames in place on the wall to see how they flow together. Before I nail I usually hold up a few different option to see which one feels the best.
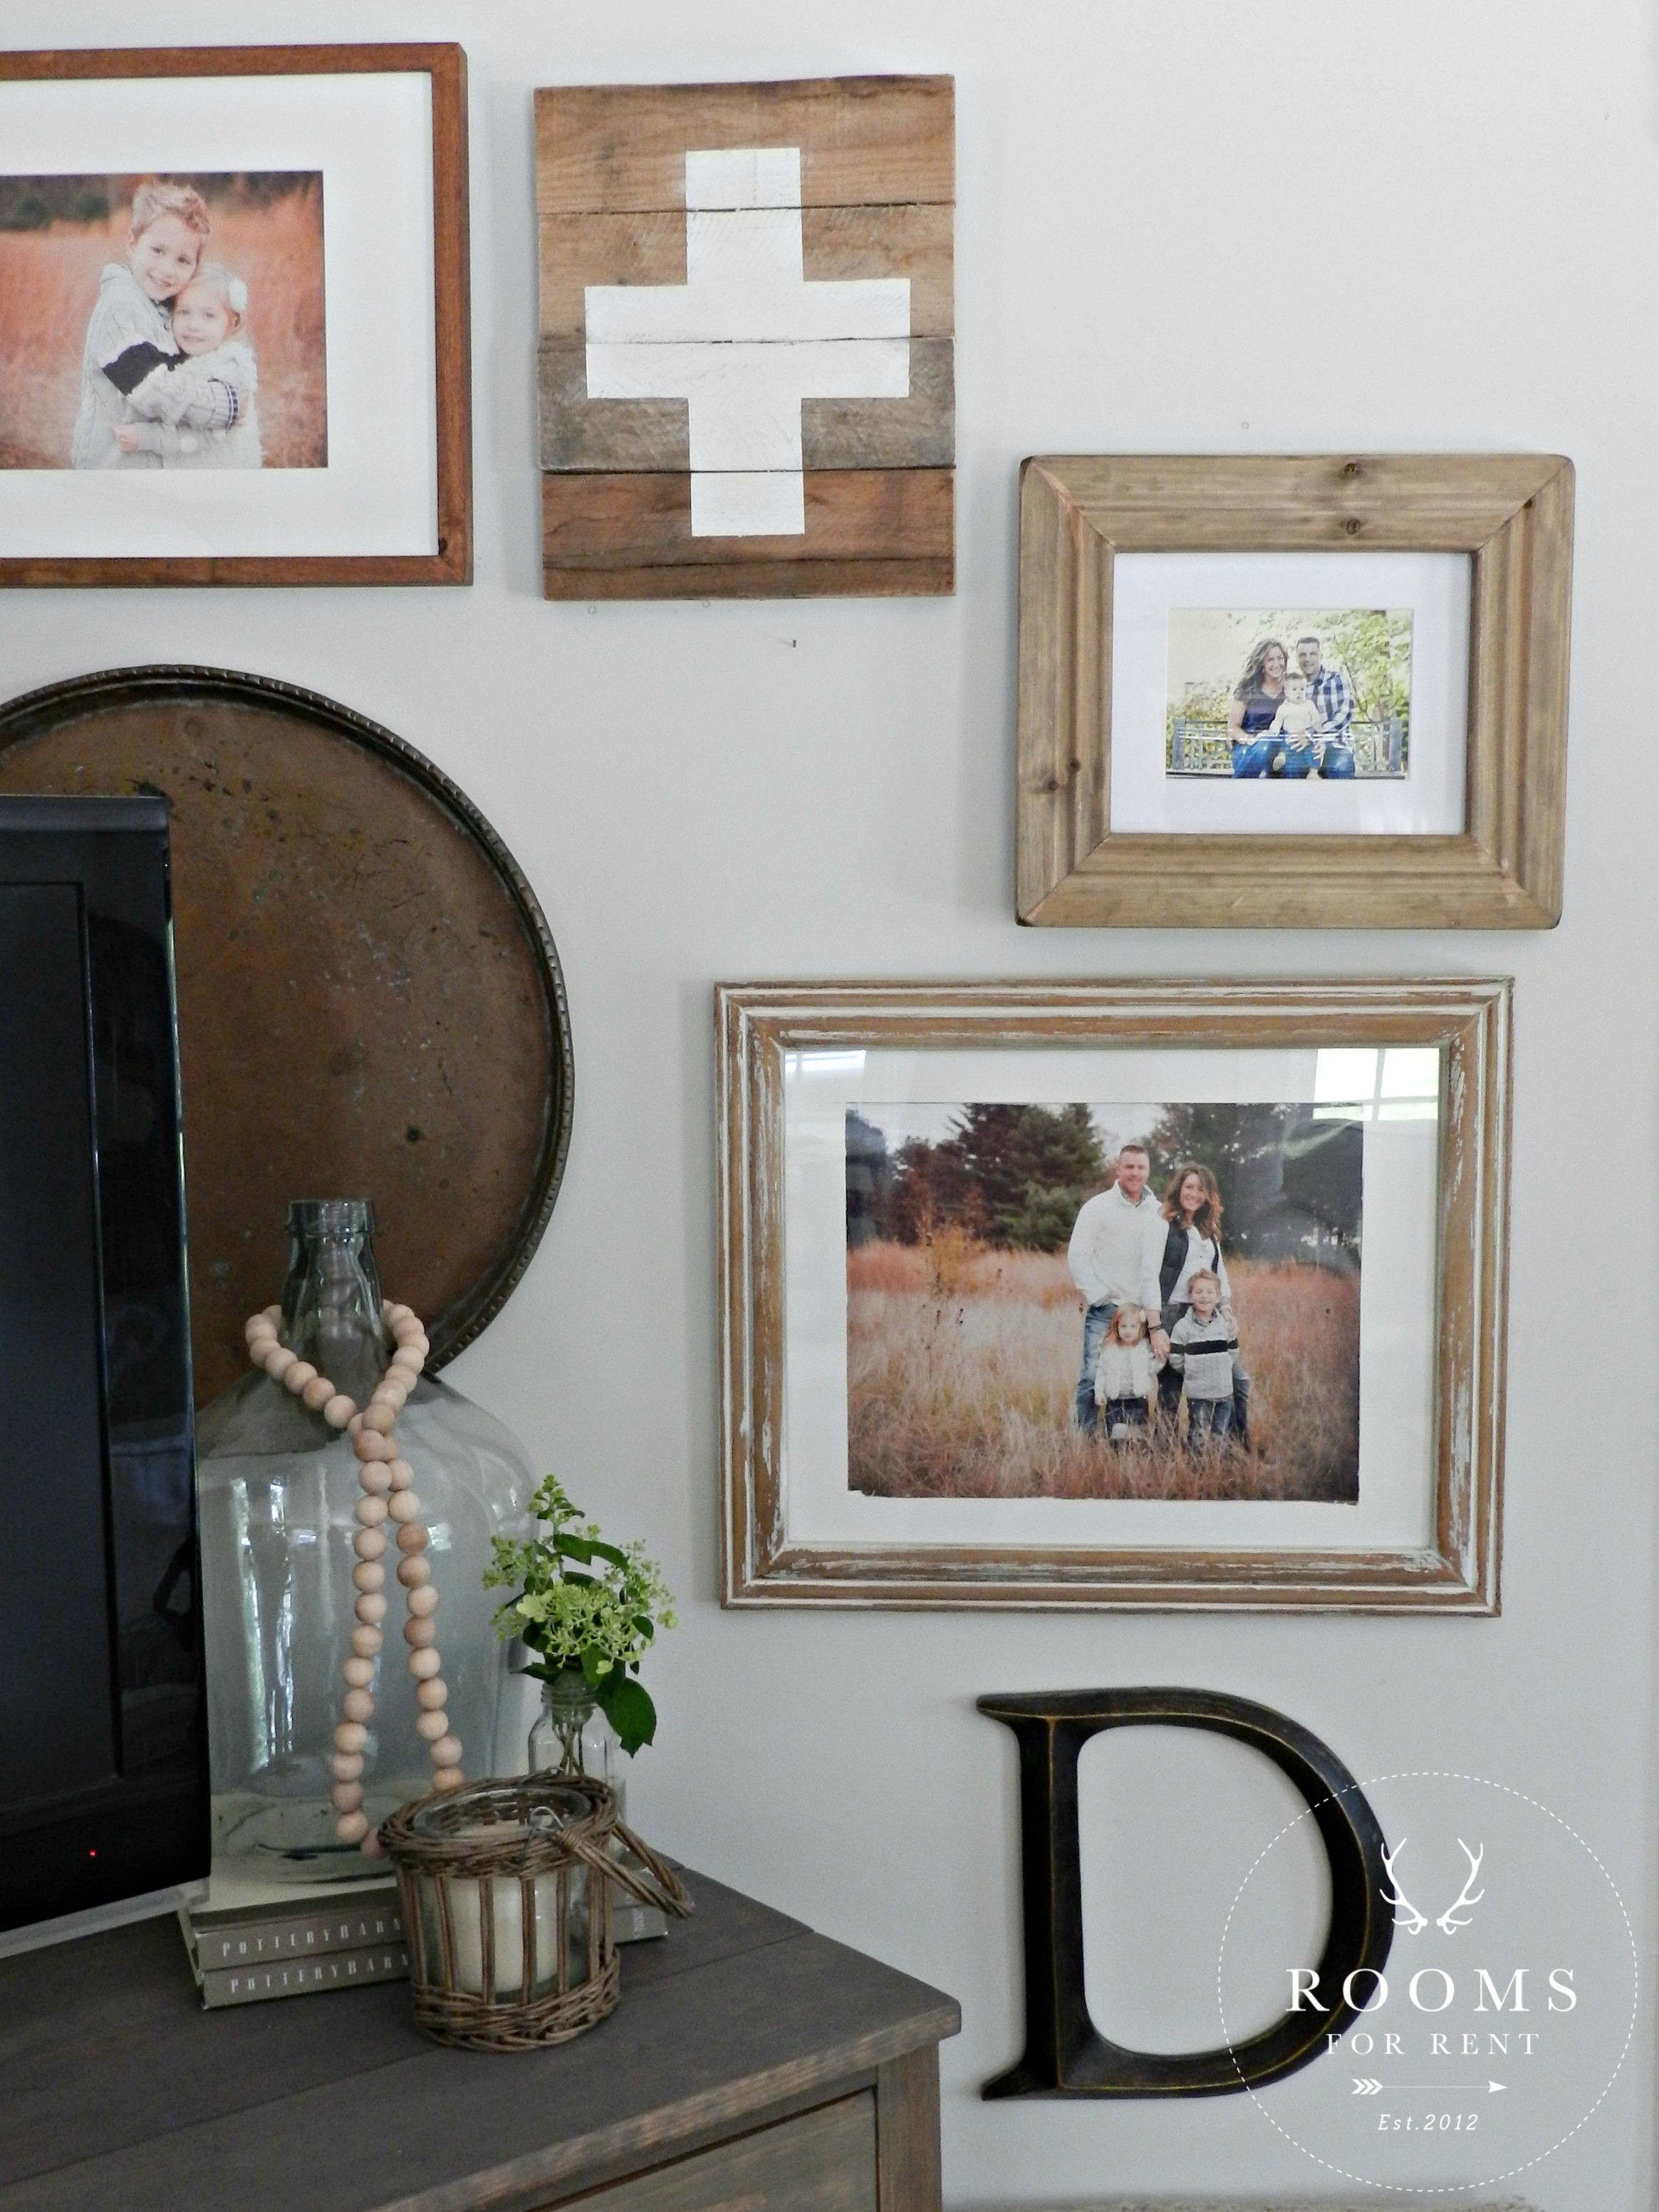 Sometimes though you may hang something up and take a step back and realize it just didn’t feel right. Like in the photo above, I added the swiss army cross art, and another frame, but taking a step back it just didn’t feel right. I left the cross art in place, and replaced the chunkier wood frame for a more slender frame. Like I said before balance is key, and you need to spread it out so it flows together nicely.
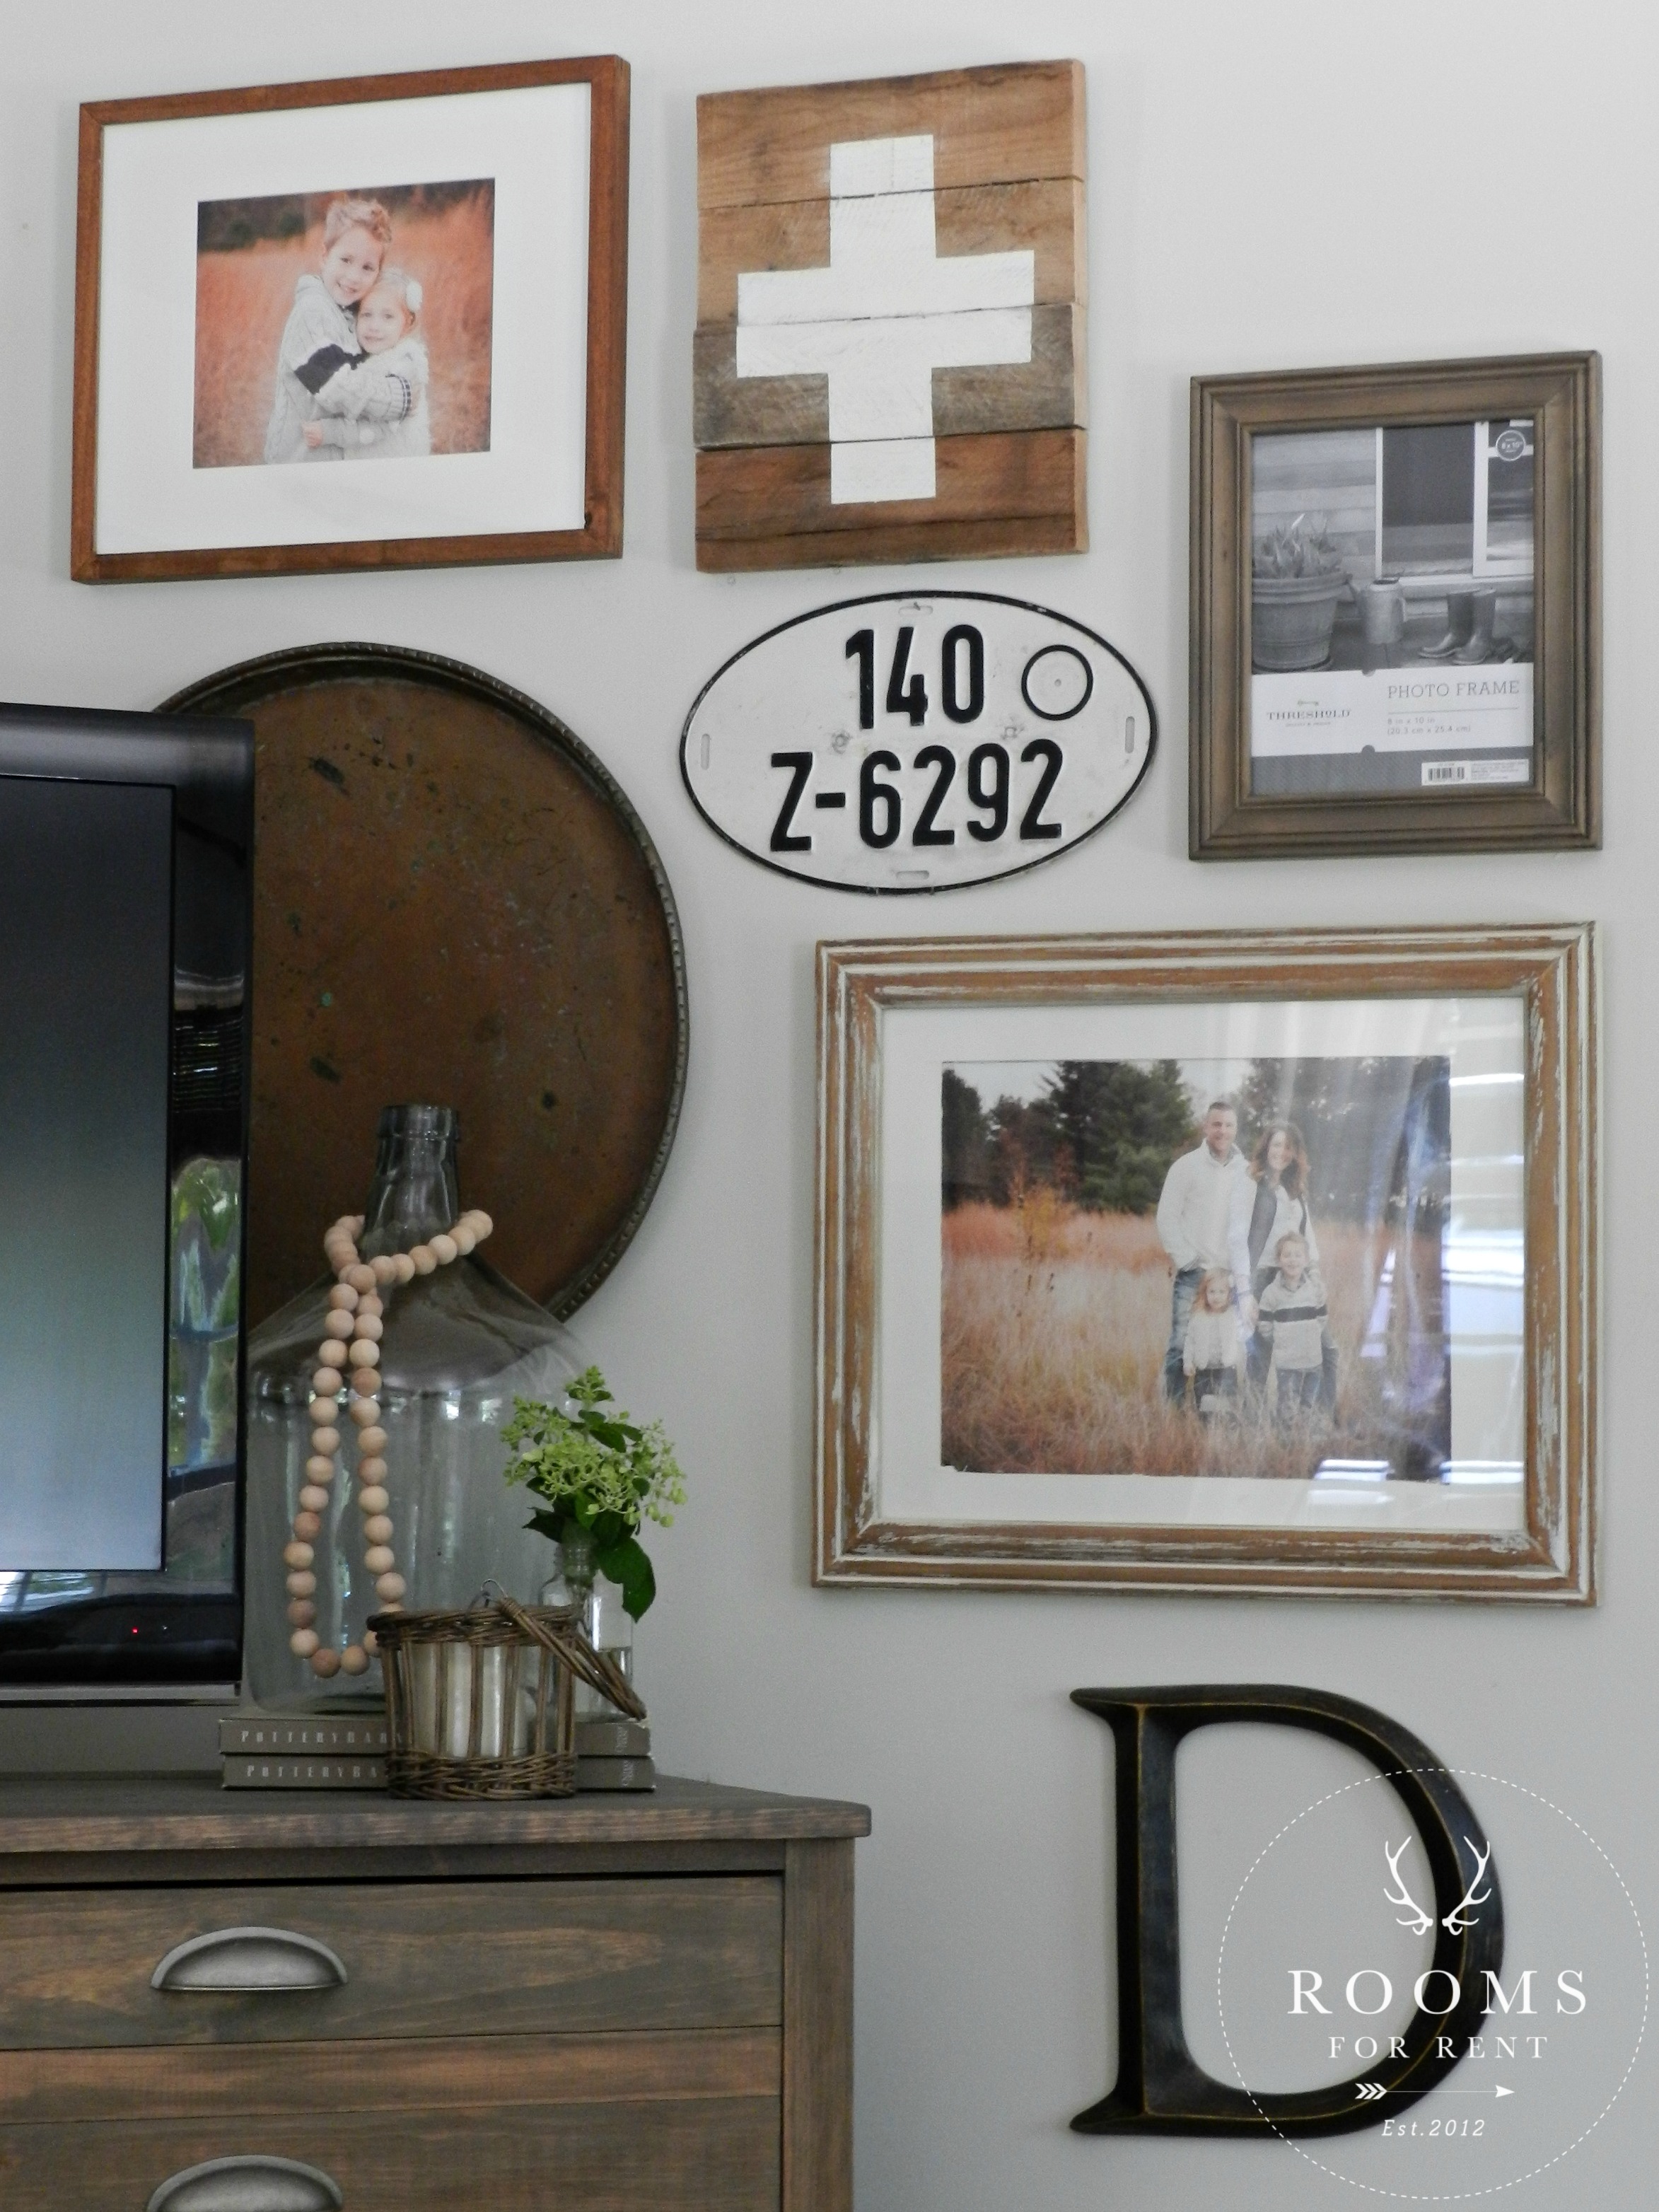 I took the thicker frame down, and placed a vintage license plate and slimmer frame from Target in it’s place. Now it feels complete, so I continue to work around the tv finishing up both sides. The thicker frame made it the left of the top frame and helps balance out the other side where the adjacent wall meets.
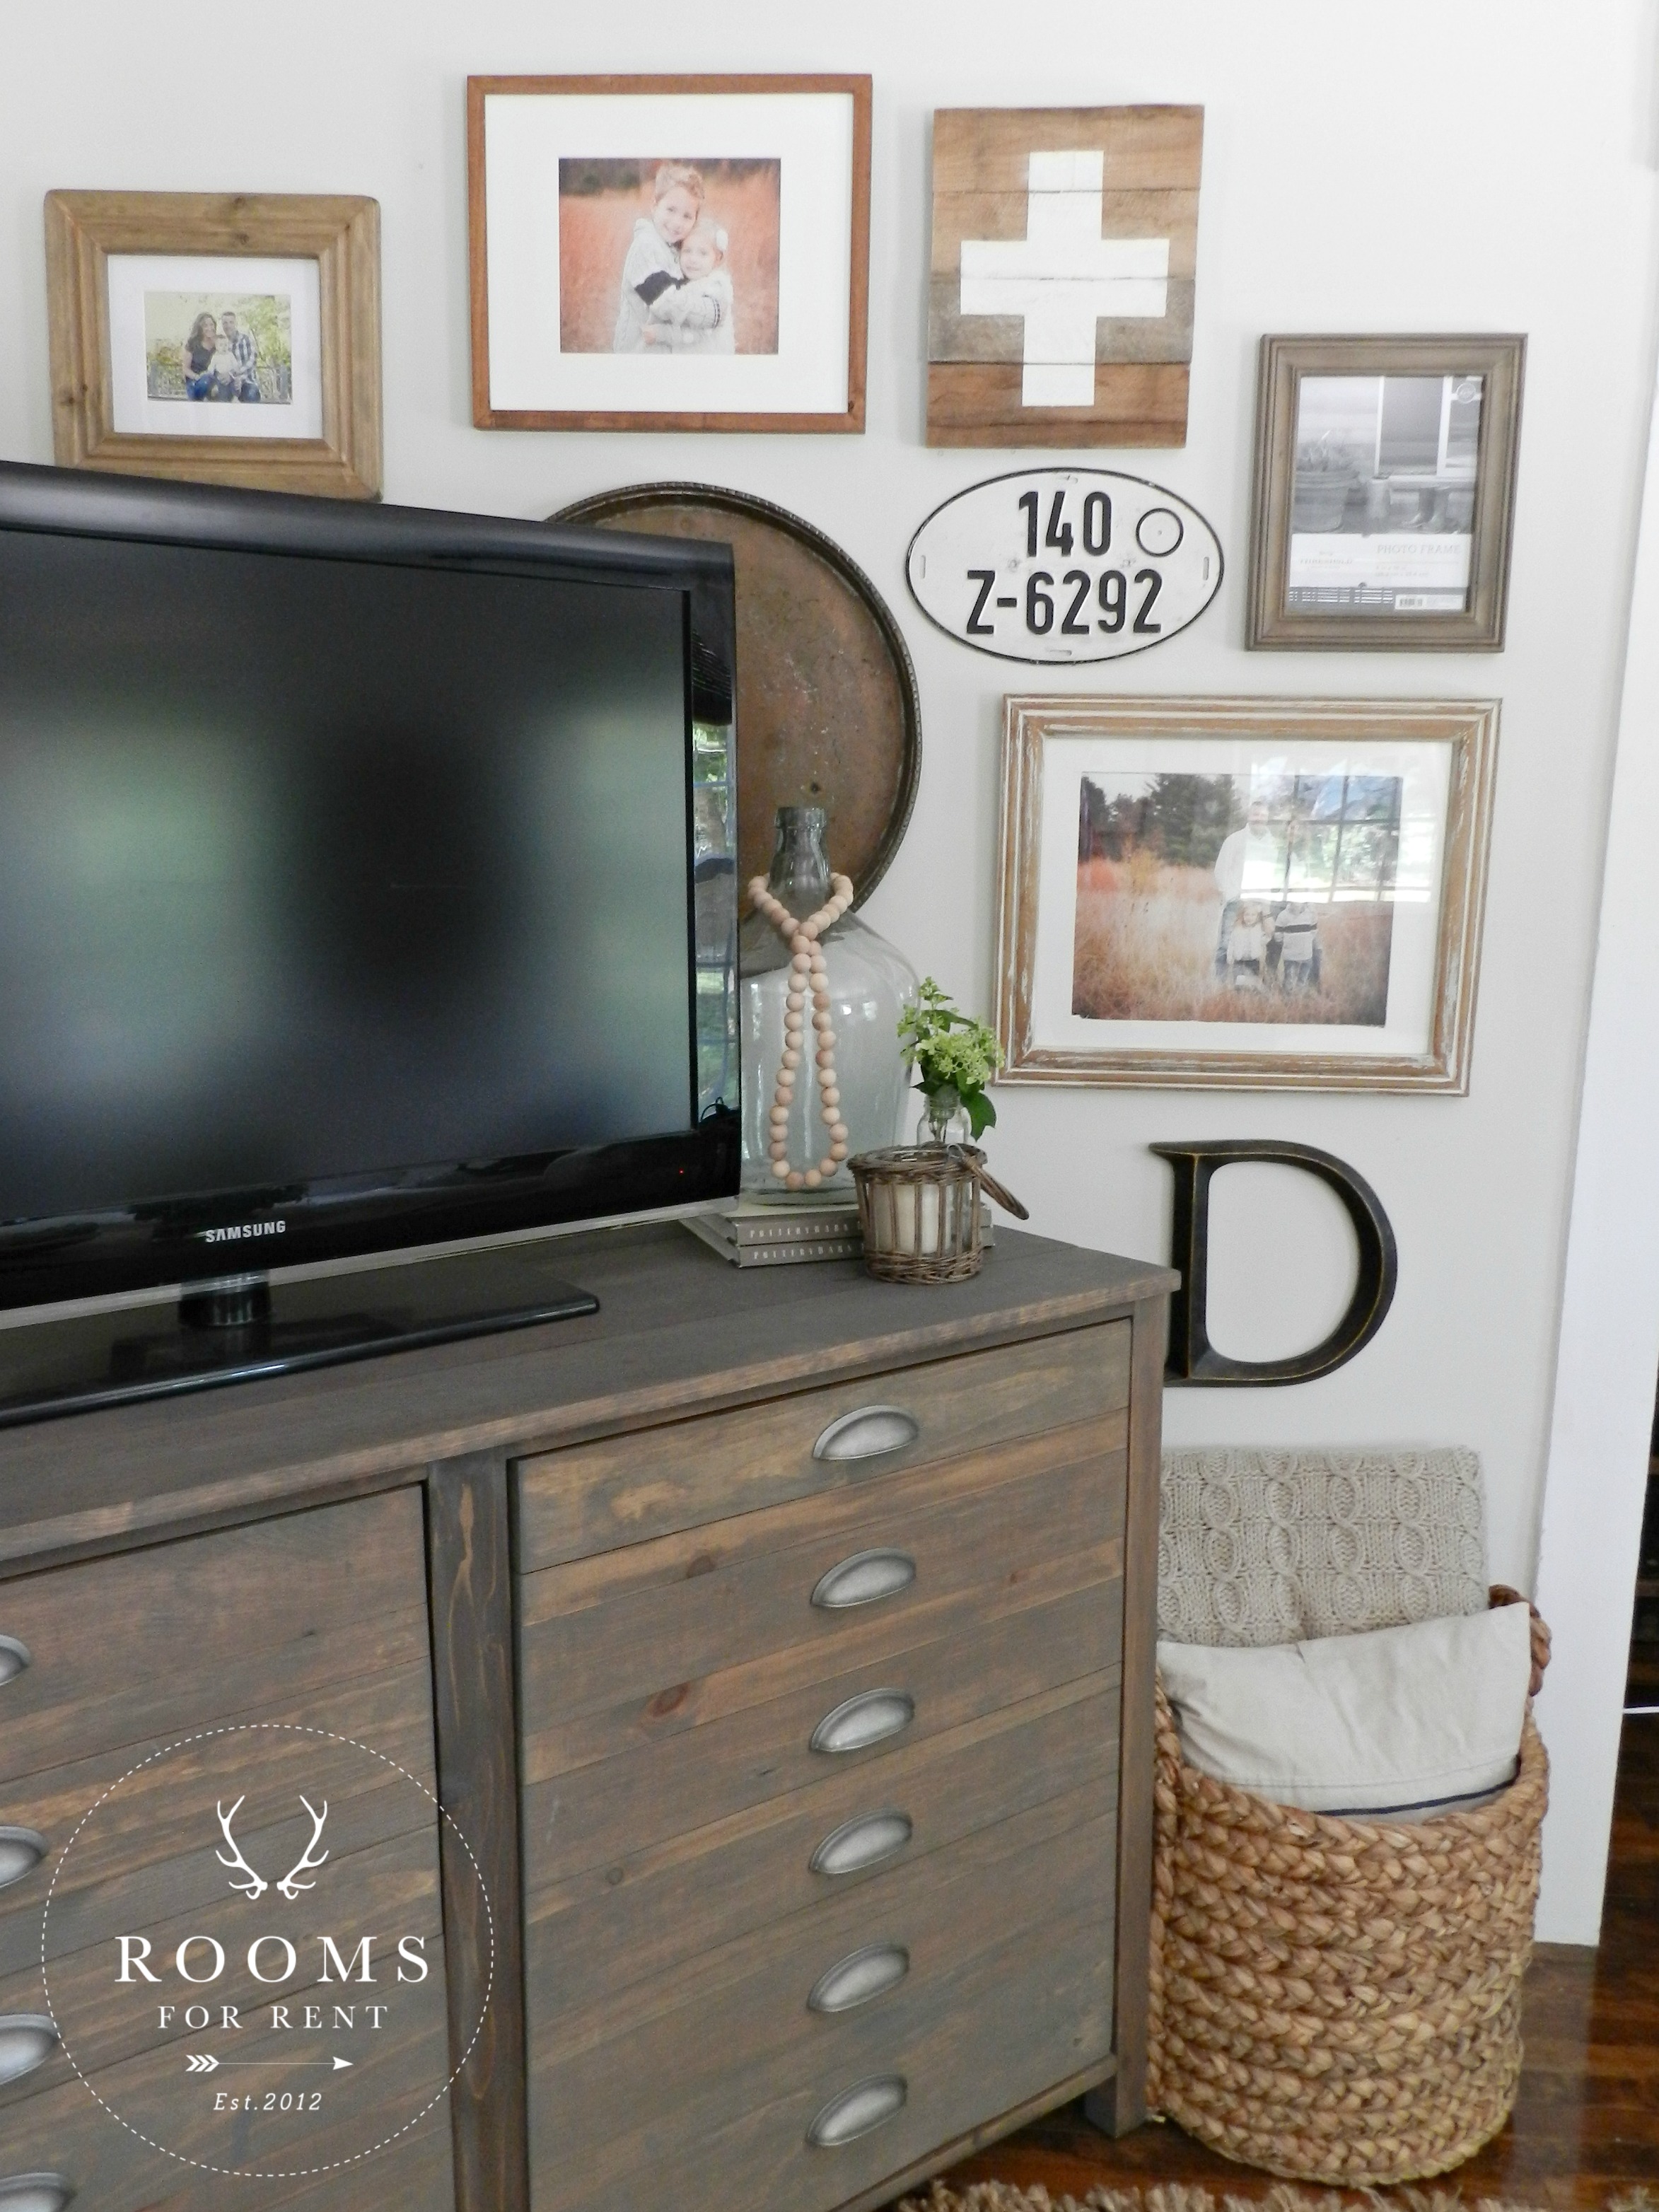
Disclosure: This post may contain affiliate links. As an Amazon Associate, I earn from qualifying purchases at no additional cost to you. See full Disclosure Statement HERE.
 I carry the same rule of thumb as I complete the other wall, and then take a step back to make sure both walls flow nicely together.
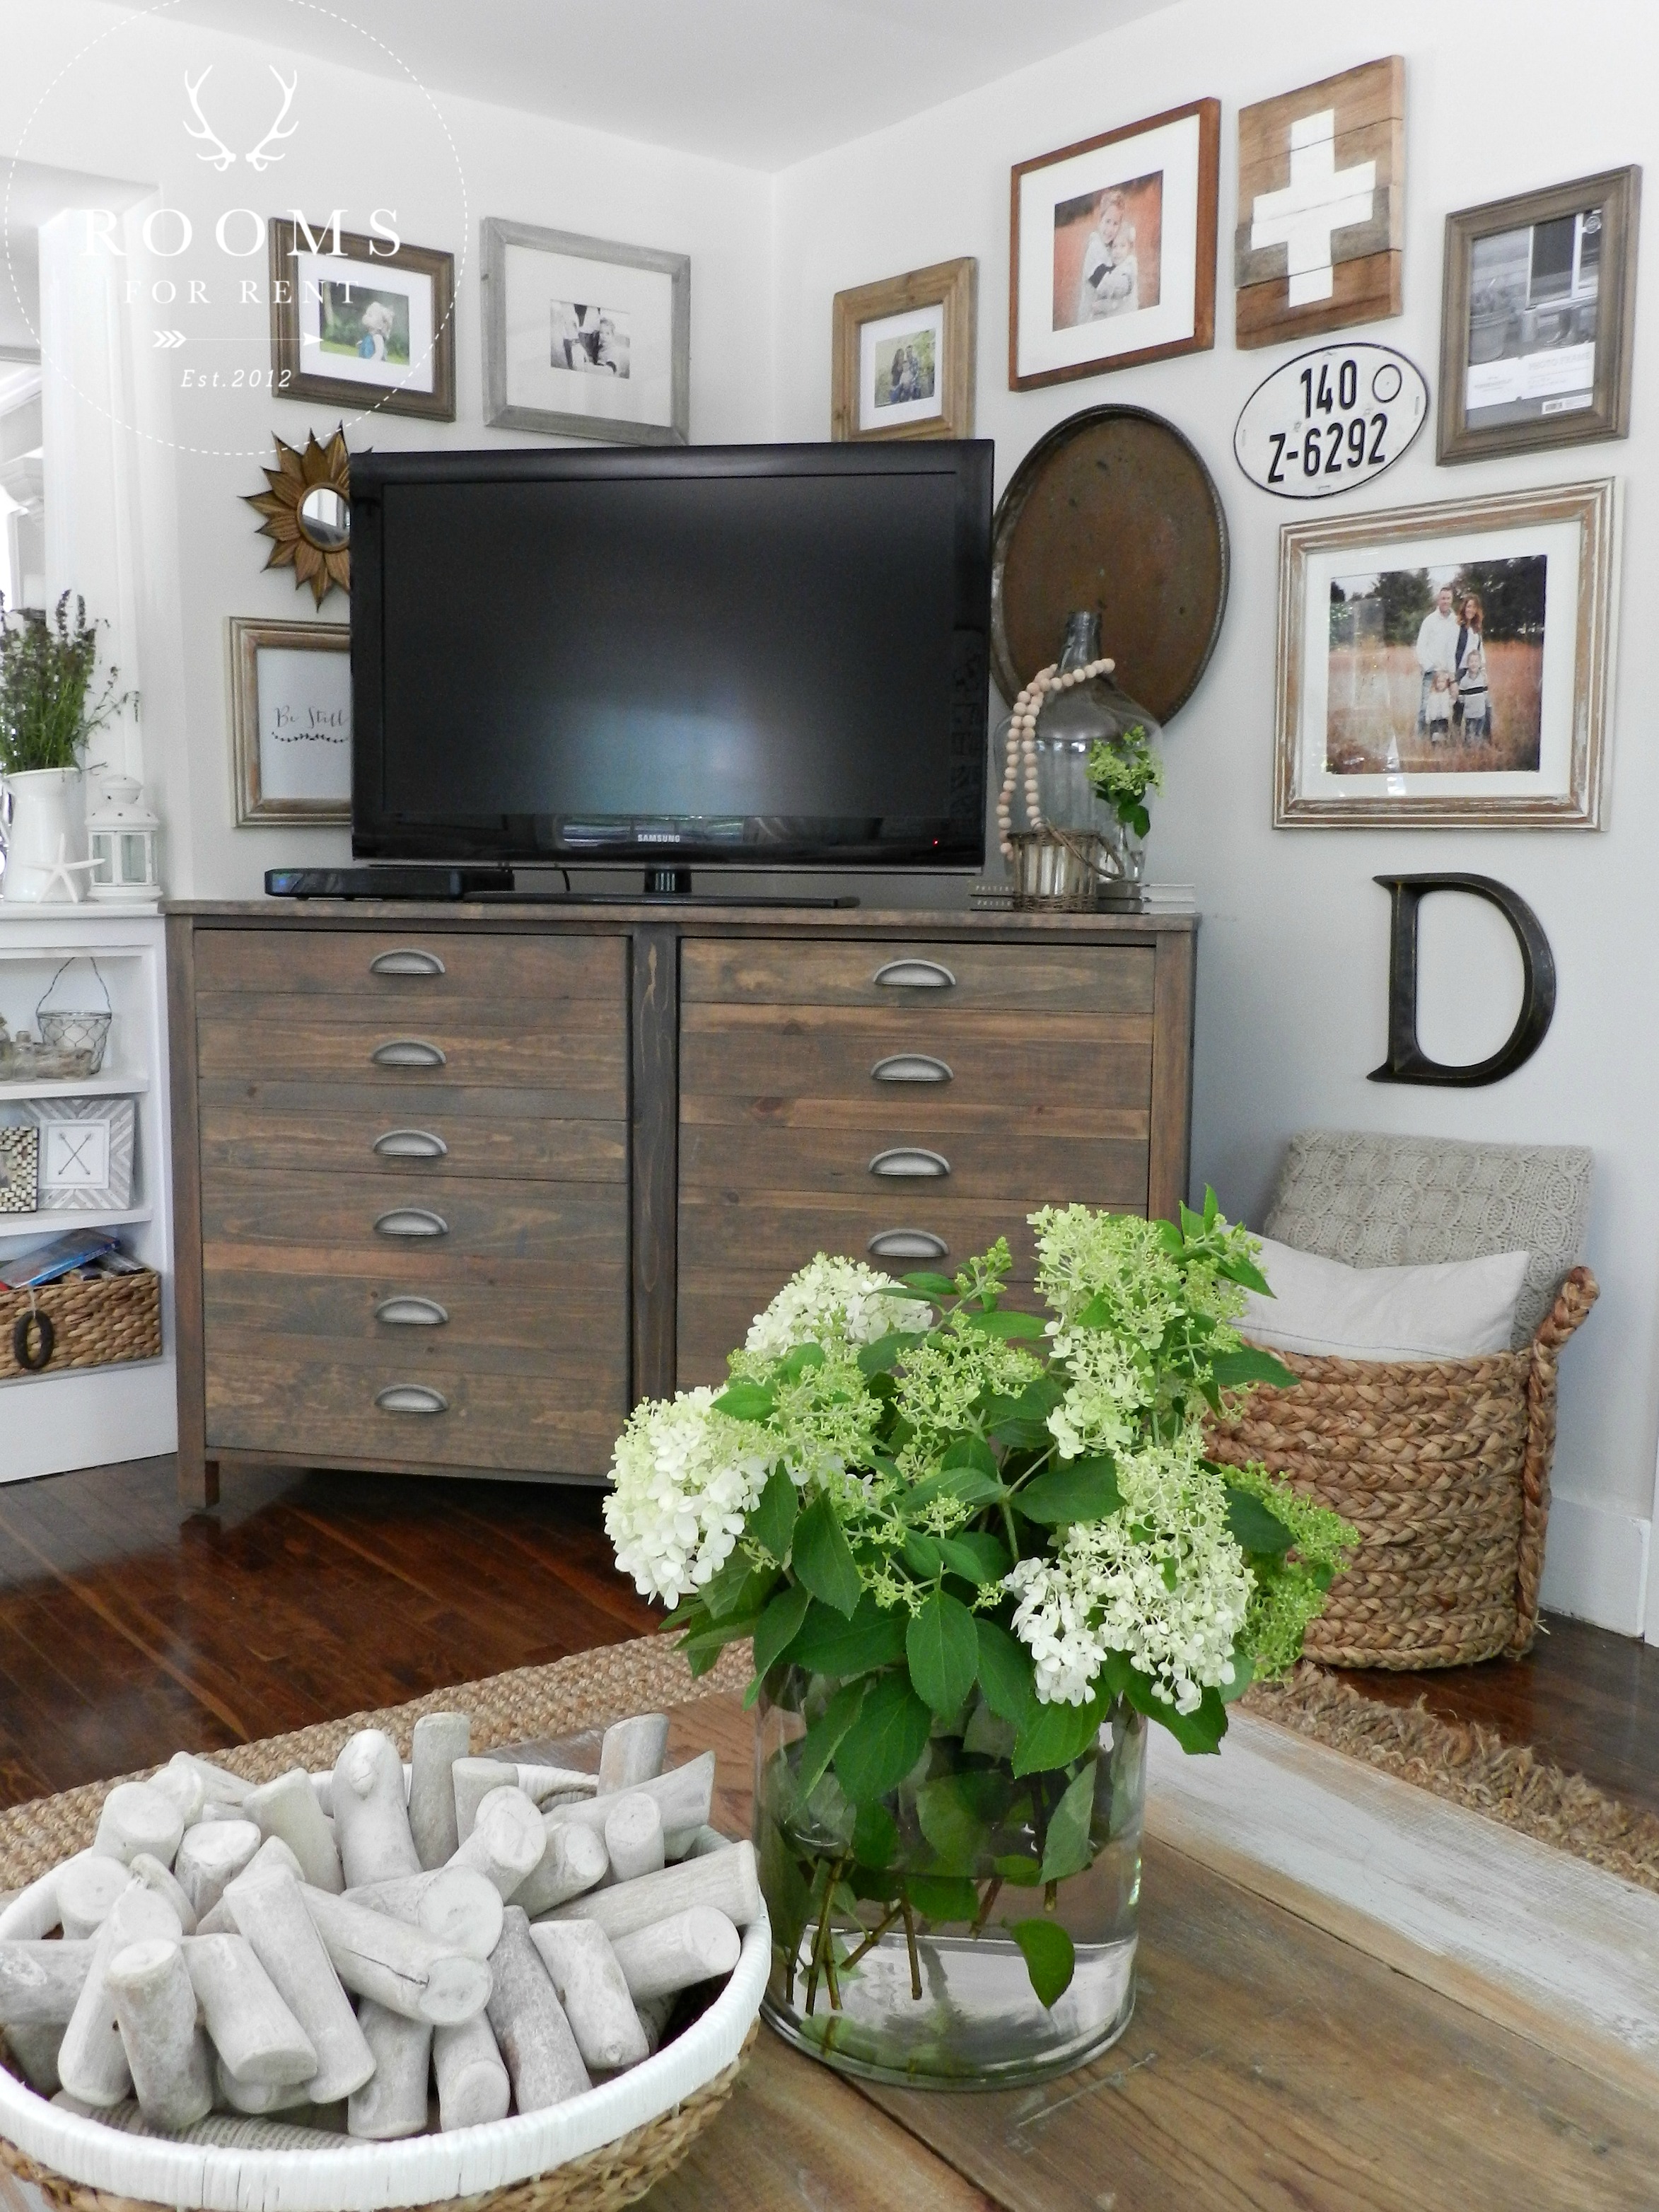 I don’t always have all my frames or pieces when I start my gallery walls. Sometimes it’s starting with a few key pieces and then seeing what I need next for the rest of the open spaces. As well as I don’t always have all the pictures in the frames. Sometimes I just buy the frame because I like it, and then worry about filling it in with a picture later. I know for some of you, guidelines and rules work better. But I think you’ll see once you start you won’t be able to stop!
Stay in touch!
Instagram / Pinterest / Facebook
Have a design question? Visit Doucette Design Co. for all your design needs!


Love it and I love how it wraps the corner. Gorgeous.
Thanks so much!!
Your gallery wall look great Bre! You’ve got some really interesting pieces, and everything works so well together in terms of colour and texture. Love how you’ve wrapped the artwork around the corner, and how some pieces are partially hidden by the TV.
I’ve hung a few gallery walls and measured out everything carefully for each one. I think next time I create a gallery wall, I’m just going to eyeball it like you did – so much easier than making sure every frame is exactly 1.5″ from the one beside it!
Thanks so much!! I know sometimes measuring can feel a bit exhausting, I get frustrated to quickly, so I run out of patience for it 🙂 I did it once without measuring, and never went back 🙂
where did you buy your tv stand? love it!
HI Meg! We made it, but we will actually be selling some similar ones soon. I will be announcing on the blog when they are available 🙂
Hi Bre I remember seeing your gallery wall from another post. Love how you arranged your gallery wall. I just have small area on one side of big window in our living room to arrange my gallery wall. Like to change it periodically, get tired of things being same for too long. Have grandkids photos up as the grow and I get newer photos of them. They’re in middle of wall and other art around them. Our grand kids are older, youngest is 15, oldest is 25. We have six. I like to make new art to include on wall from time to time. Whenever daughter and family come over they check out gallery wall.
Great post, very helpful. Last summer after we painted our l/r was 1st. time I’d done one.
Happy week
Hey girl Love the wall!! So cool!!
Looks great! I jane the same TV in the corner set-up so I will follow your lead!
Love your tips on creating a gallery wall Bre. Thanks so much
Your gallery wall looks awesome and I love how it goes around the corner!
So pretty!!! Where is the swiss cross art from? It’s so simple and pretty
This is just amazing!!!!!!!!! I will try it!