
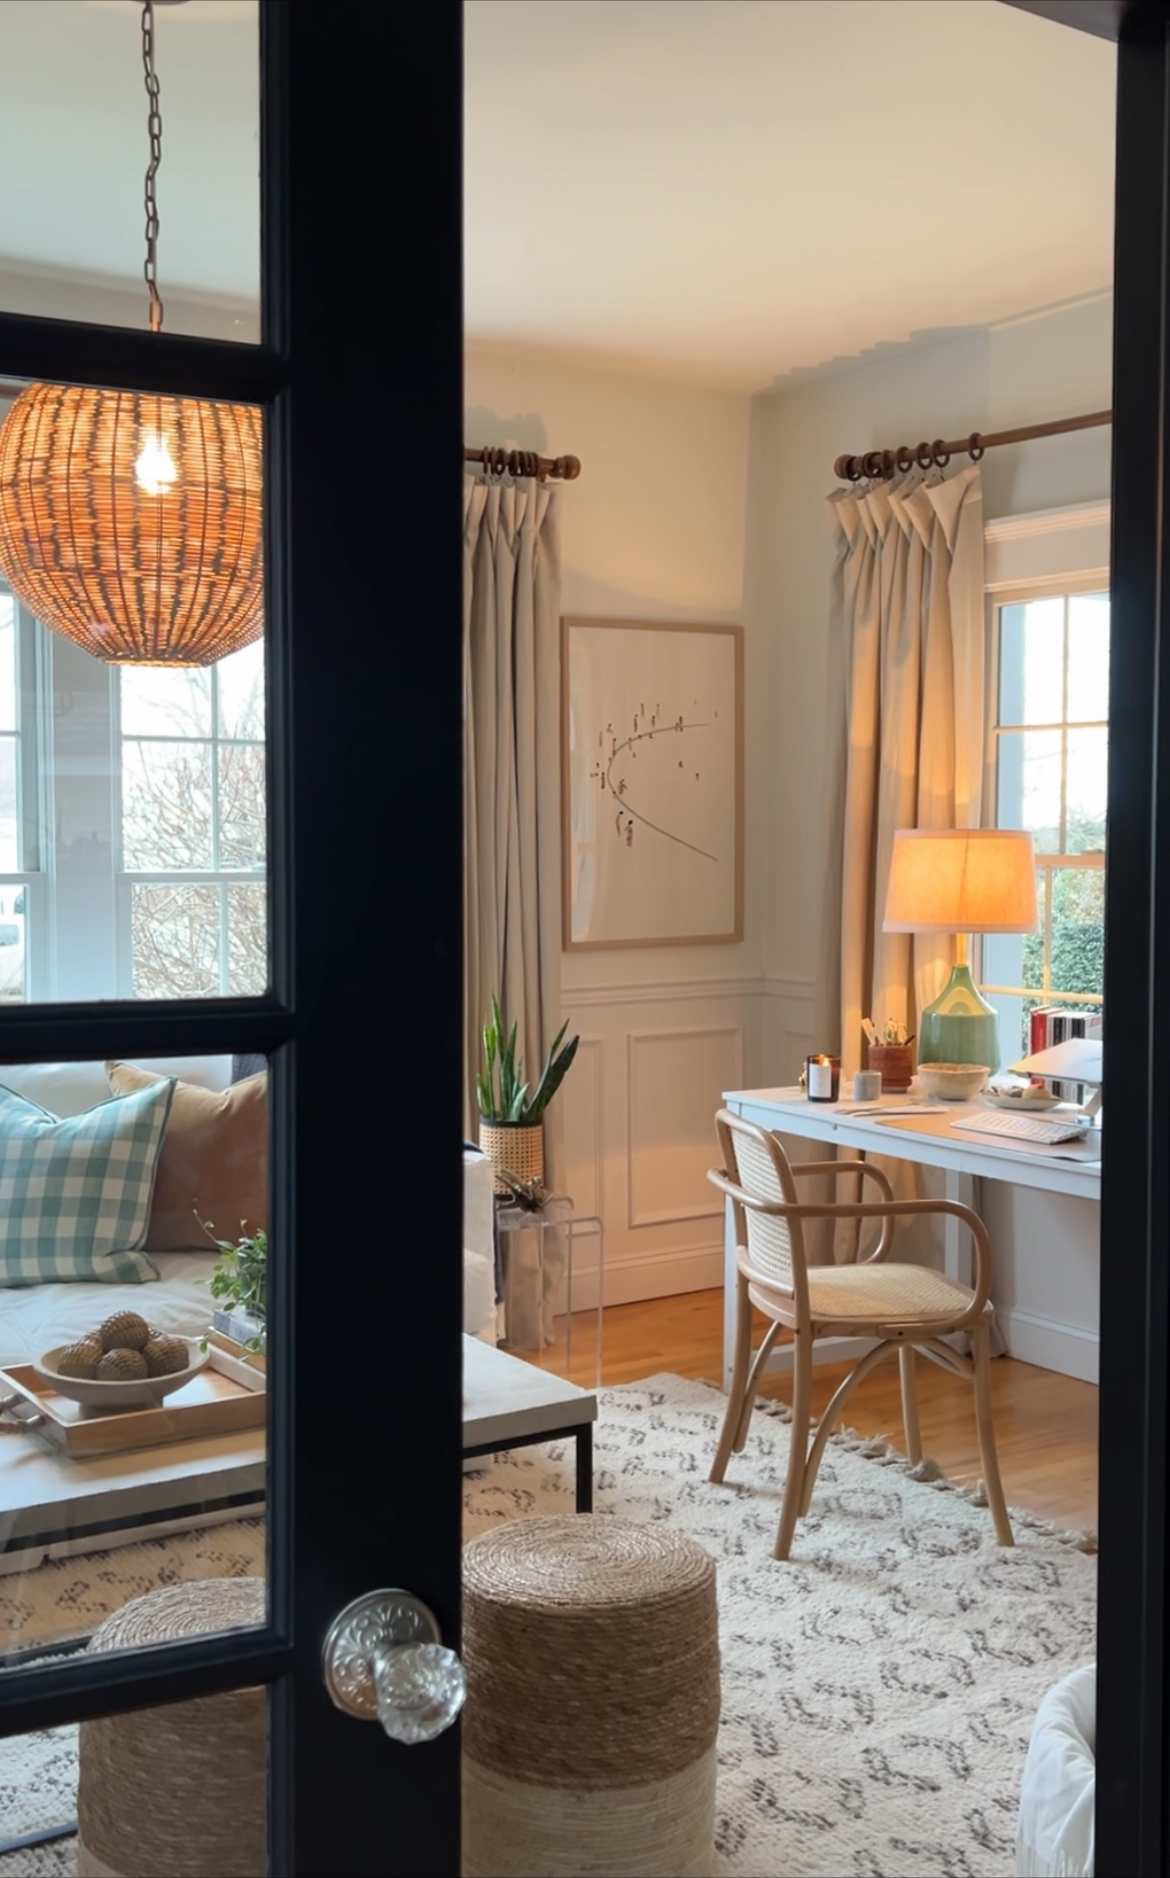
Hi friends!
Disclosure: This post may contain affiliate links. As an Amazon Associate, I earn from qualifying purchases at no additional cost to you. See full Disclosure Statement HERE.
Are you ready for some exciting news?!!!
I am teaming up with Better Homes & Gardens
and my 3 creative friends who were the final contestants in
to bring you our FULL tutorials
&
a Makeover Linky Party hosted by BHG!!!
How it works….
Today at the end of each of our tutorial posts will be the linky party.
It will go live today over at BHG Style Spotters at 3pm.
The linky party will close April 20th.
After which myself, Diane, Jenn, Karrianne & BHG will each pick our favorite project(s)
to be announced & featured on our blogs, BHG Style Spotters & on a BHG Pintrest Board
on April 23rd.
Isn’t this so exciting!!!!
Did you get a chance to see the 4 projects & videos last week?
Click HERE in cased you missed it.
Amazing right?!
I have to tell you,
I sketched & planned this project many times
but from the beginning knew it would make a perfect
Beverage Bar /Dessert Bar/ Coffee Bar.
I was SO happy with the way it turned out!
Not only was it classy & functional but also easy!
I have so many favorite elements in this project to share!
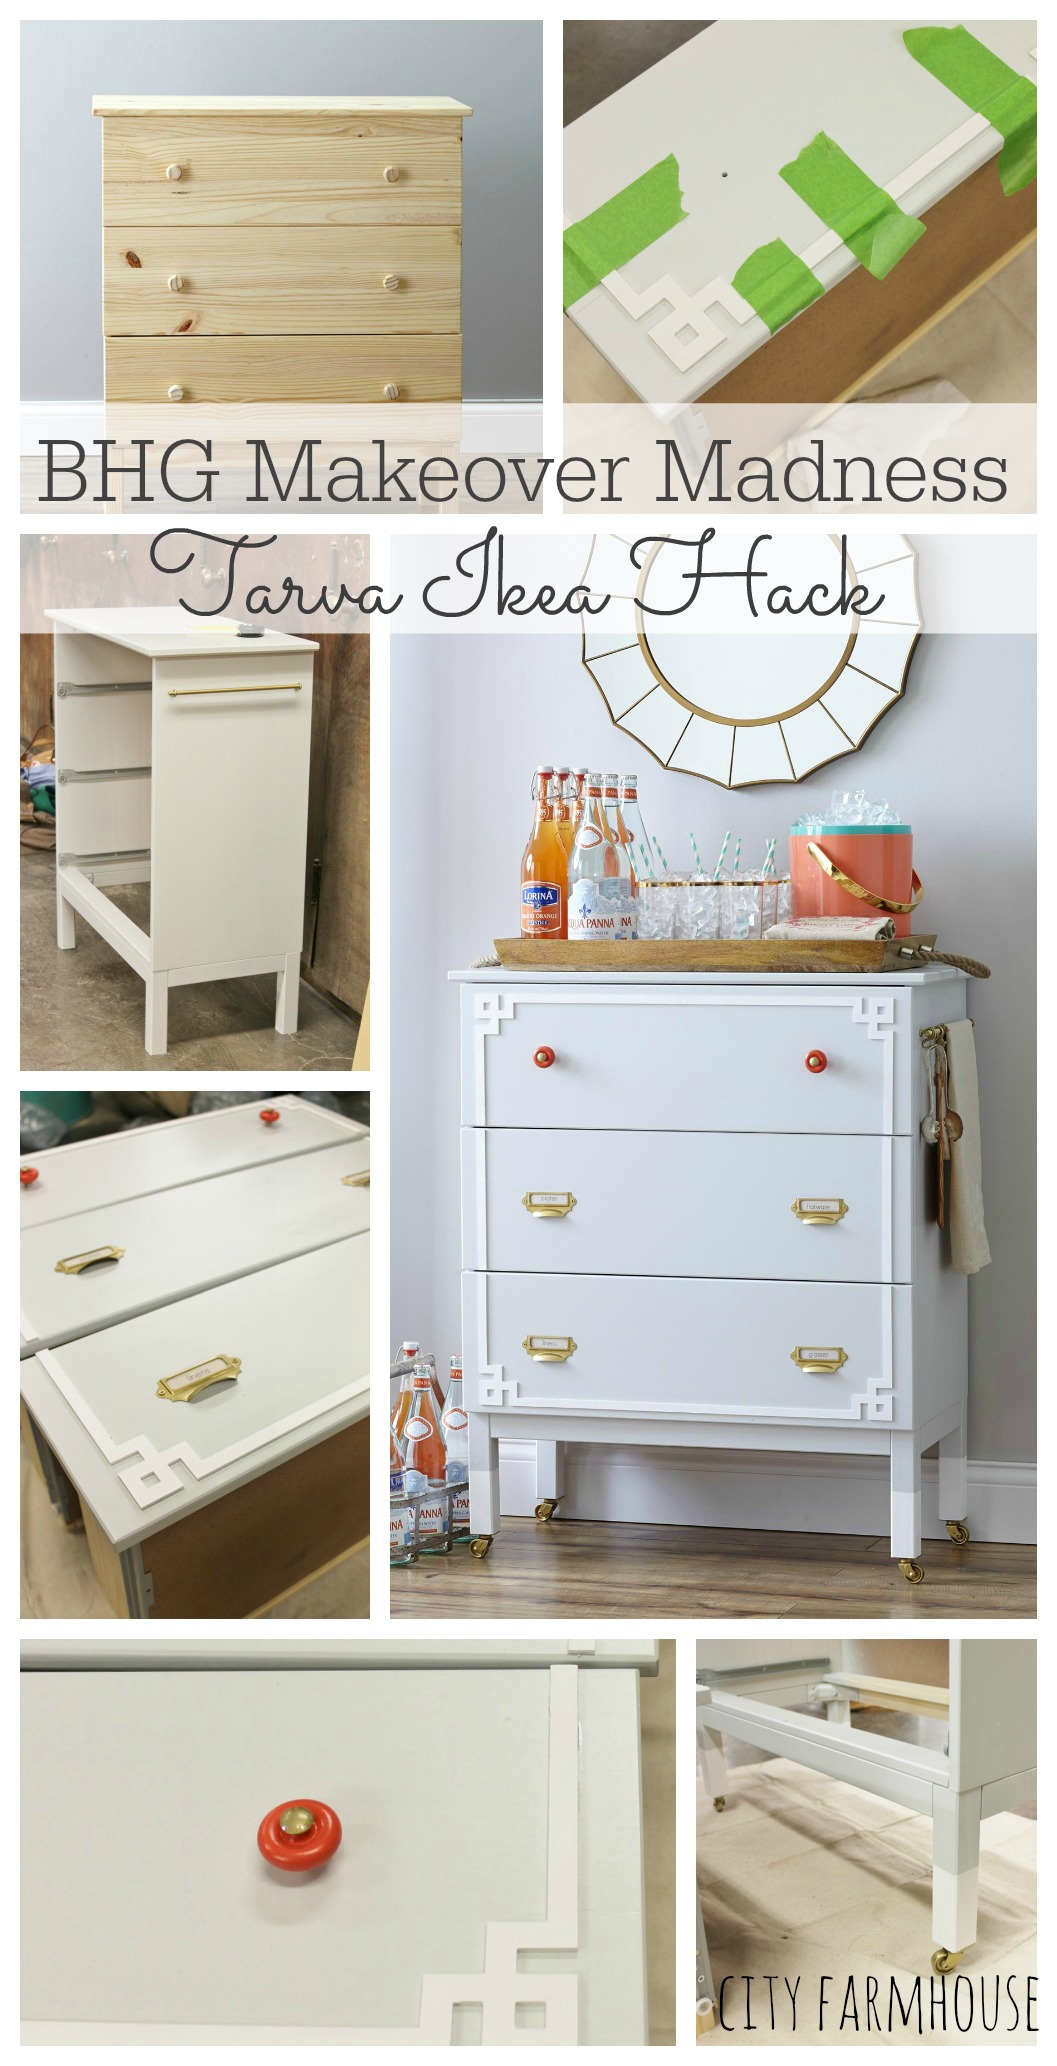
Remember the before….
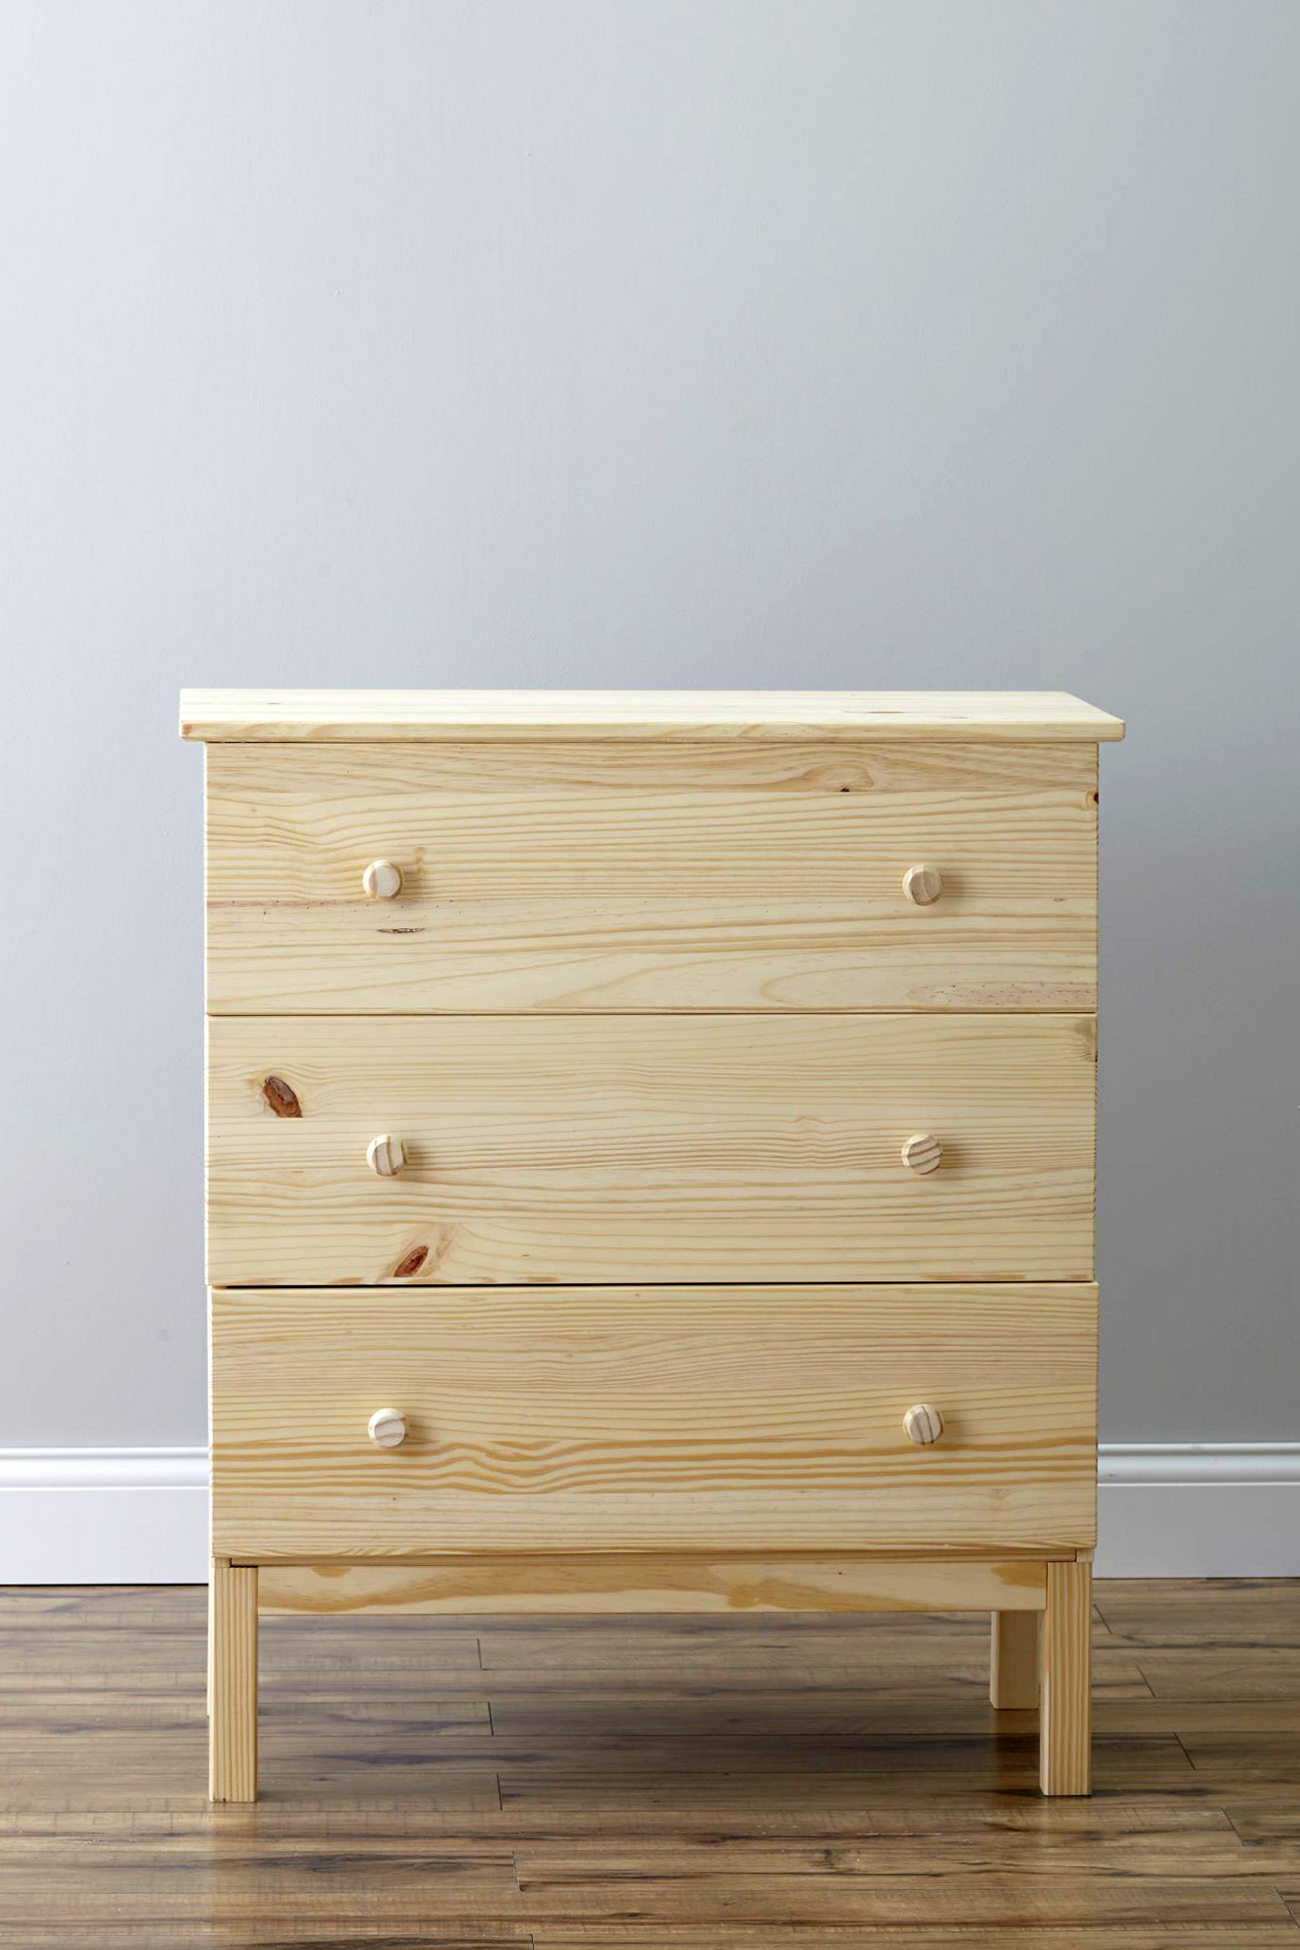
And here is the after!
{photo credit to Karla Conrad from Better Homes & Gardens} 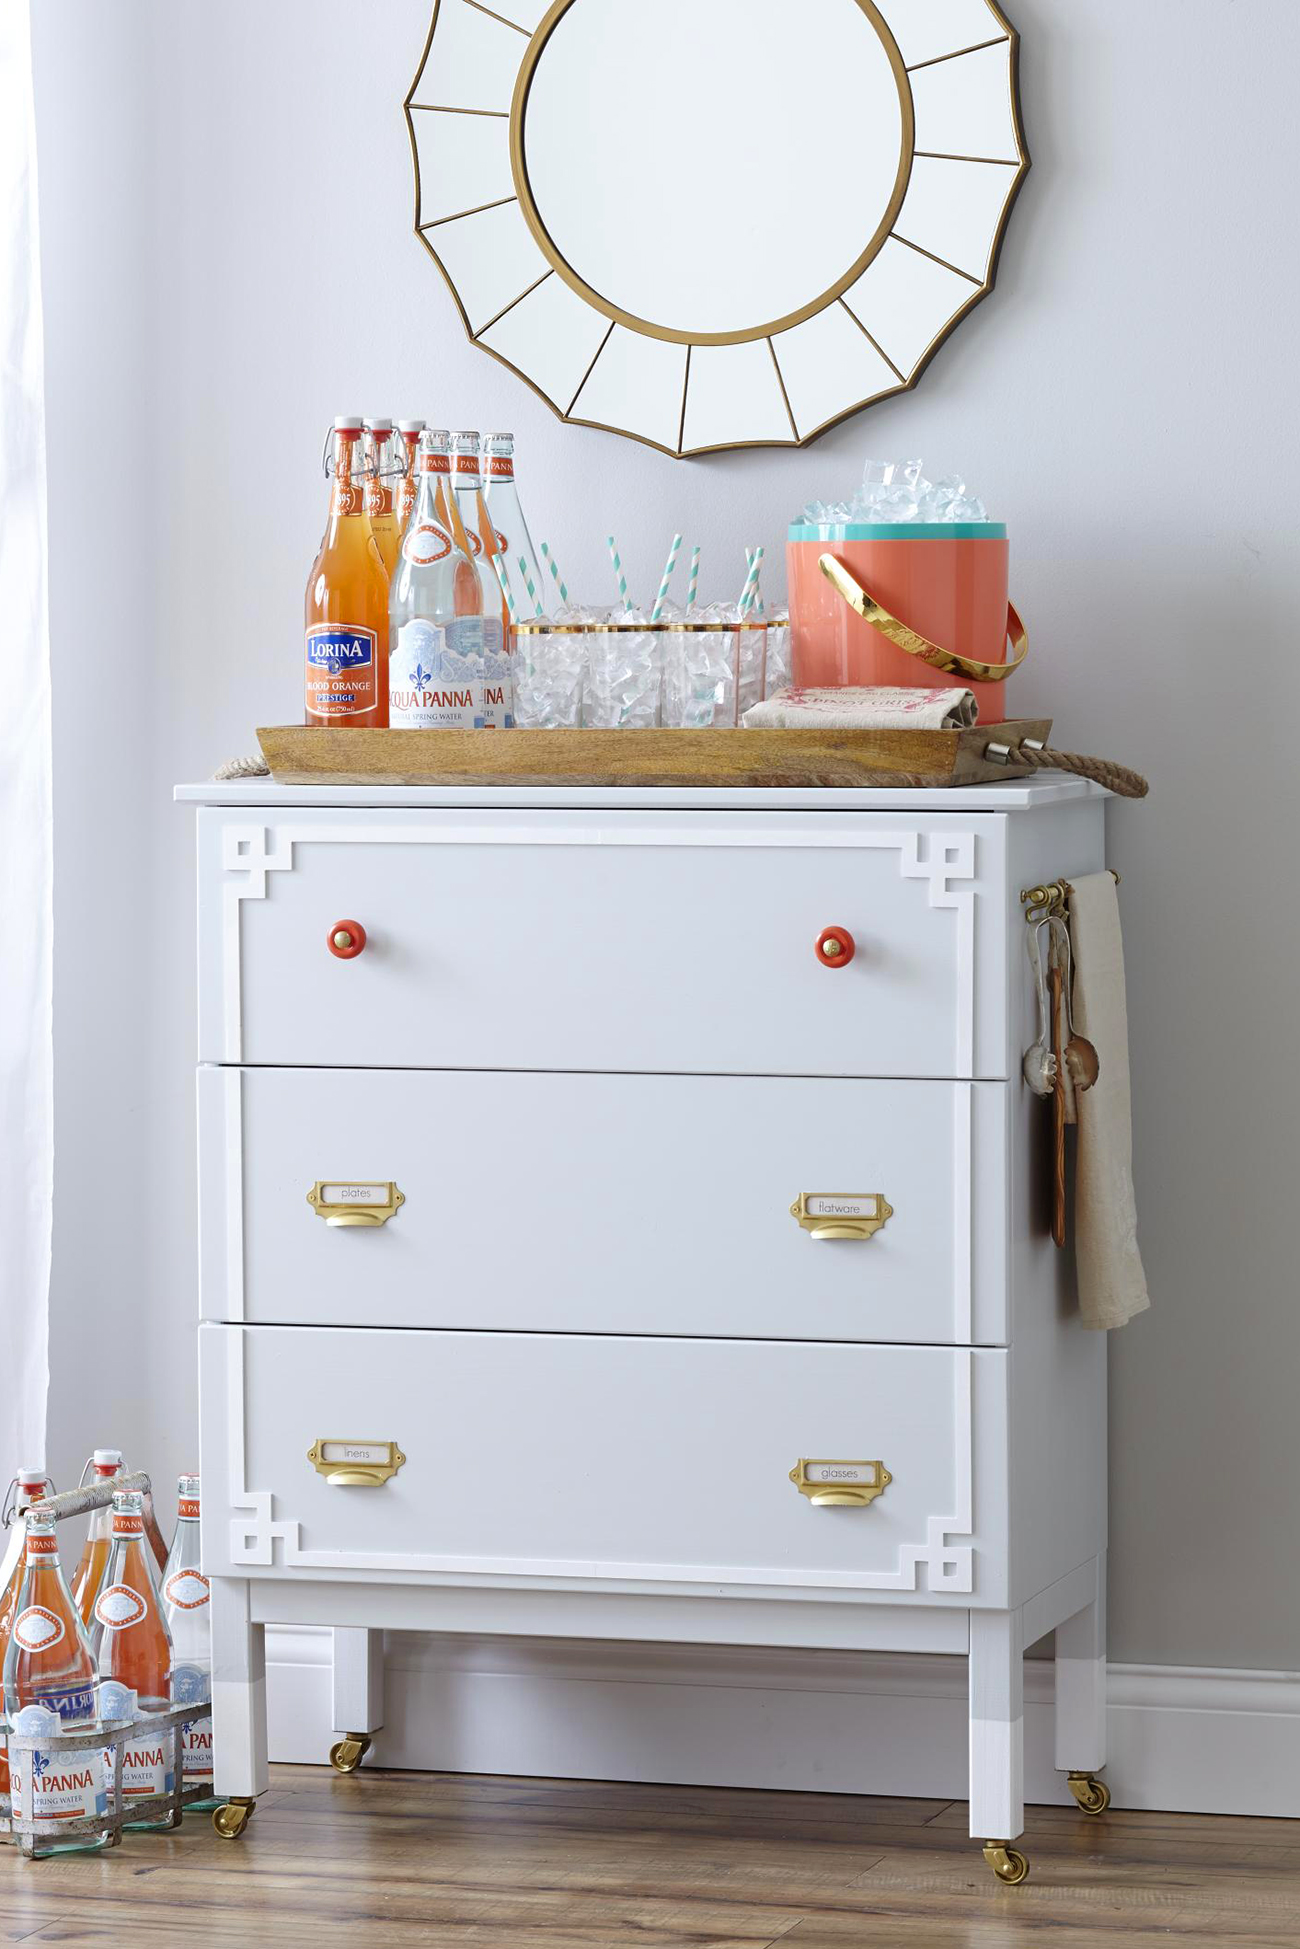
Here is the step by step to transform a plain Ikea Tarva dresser into a
functional moveable entertaining station/bar.
Here is what you will need….
Ikea 3 draw Tarva Dresser
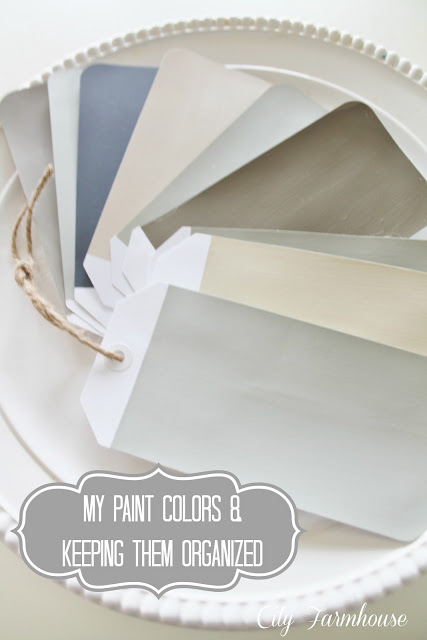
BM Wickham Gray paint
small roller
an overlay
Liquid Nails
small brush
painters tape
primer
white spray paint
gold spray paint
vintage library labels
linen paper
2-craft wheels
2-carriage bolts
6-bolt to fit^^^
MS Geranium craft paint
Clear Gloss Spray
drill & drill bits
crisp white paint
4-small casters
riveted rod
2-large eye hooks
2-washers to fit^^^
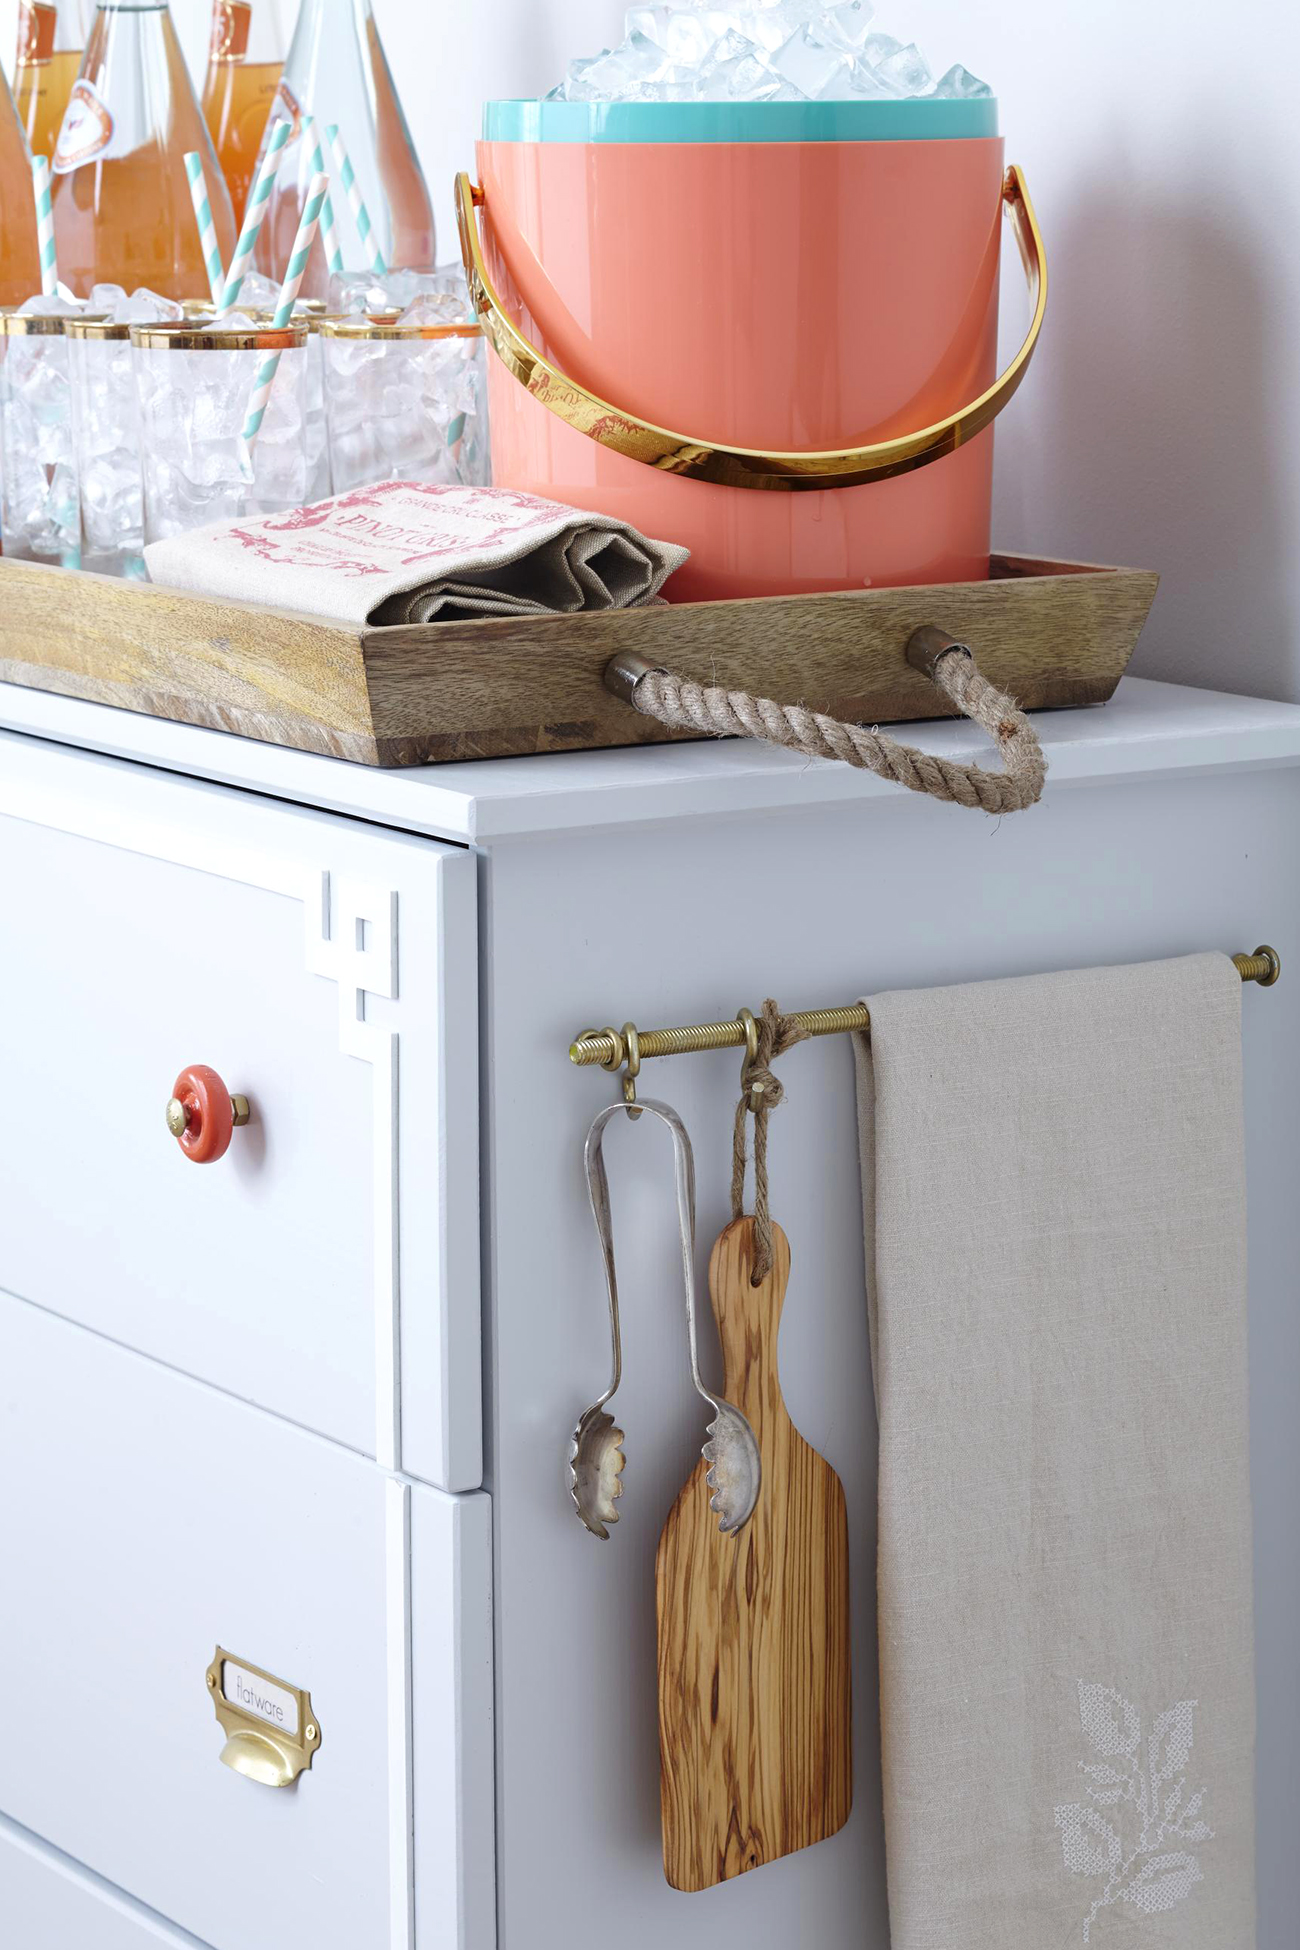
The color is swoon worthy, it is called Wickham Gray by Benjamin Moore.
I used the Aura, it is more durable. 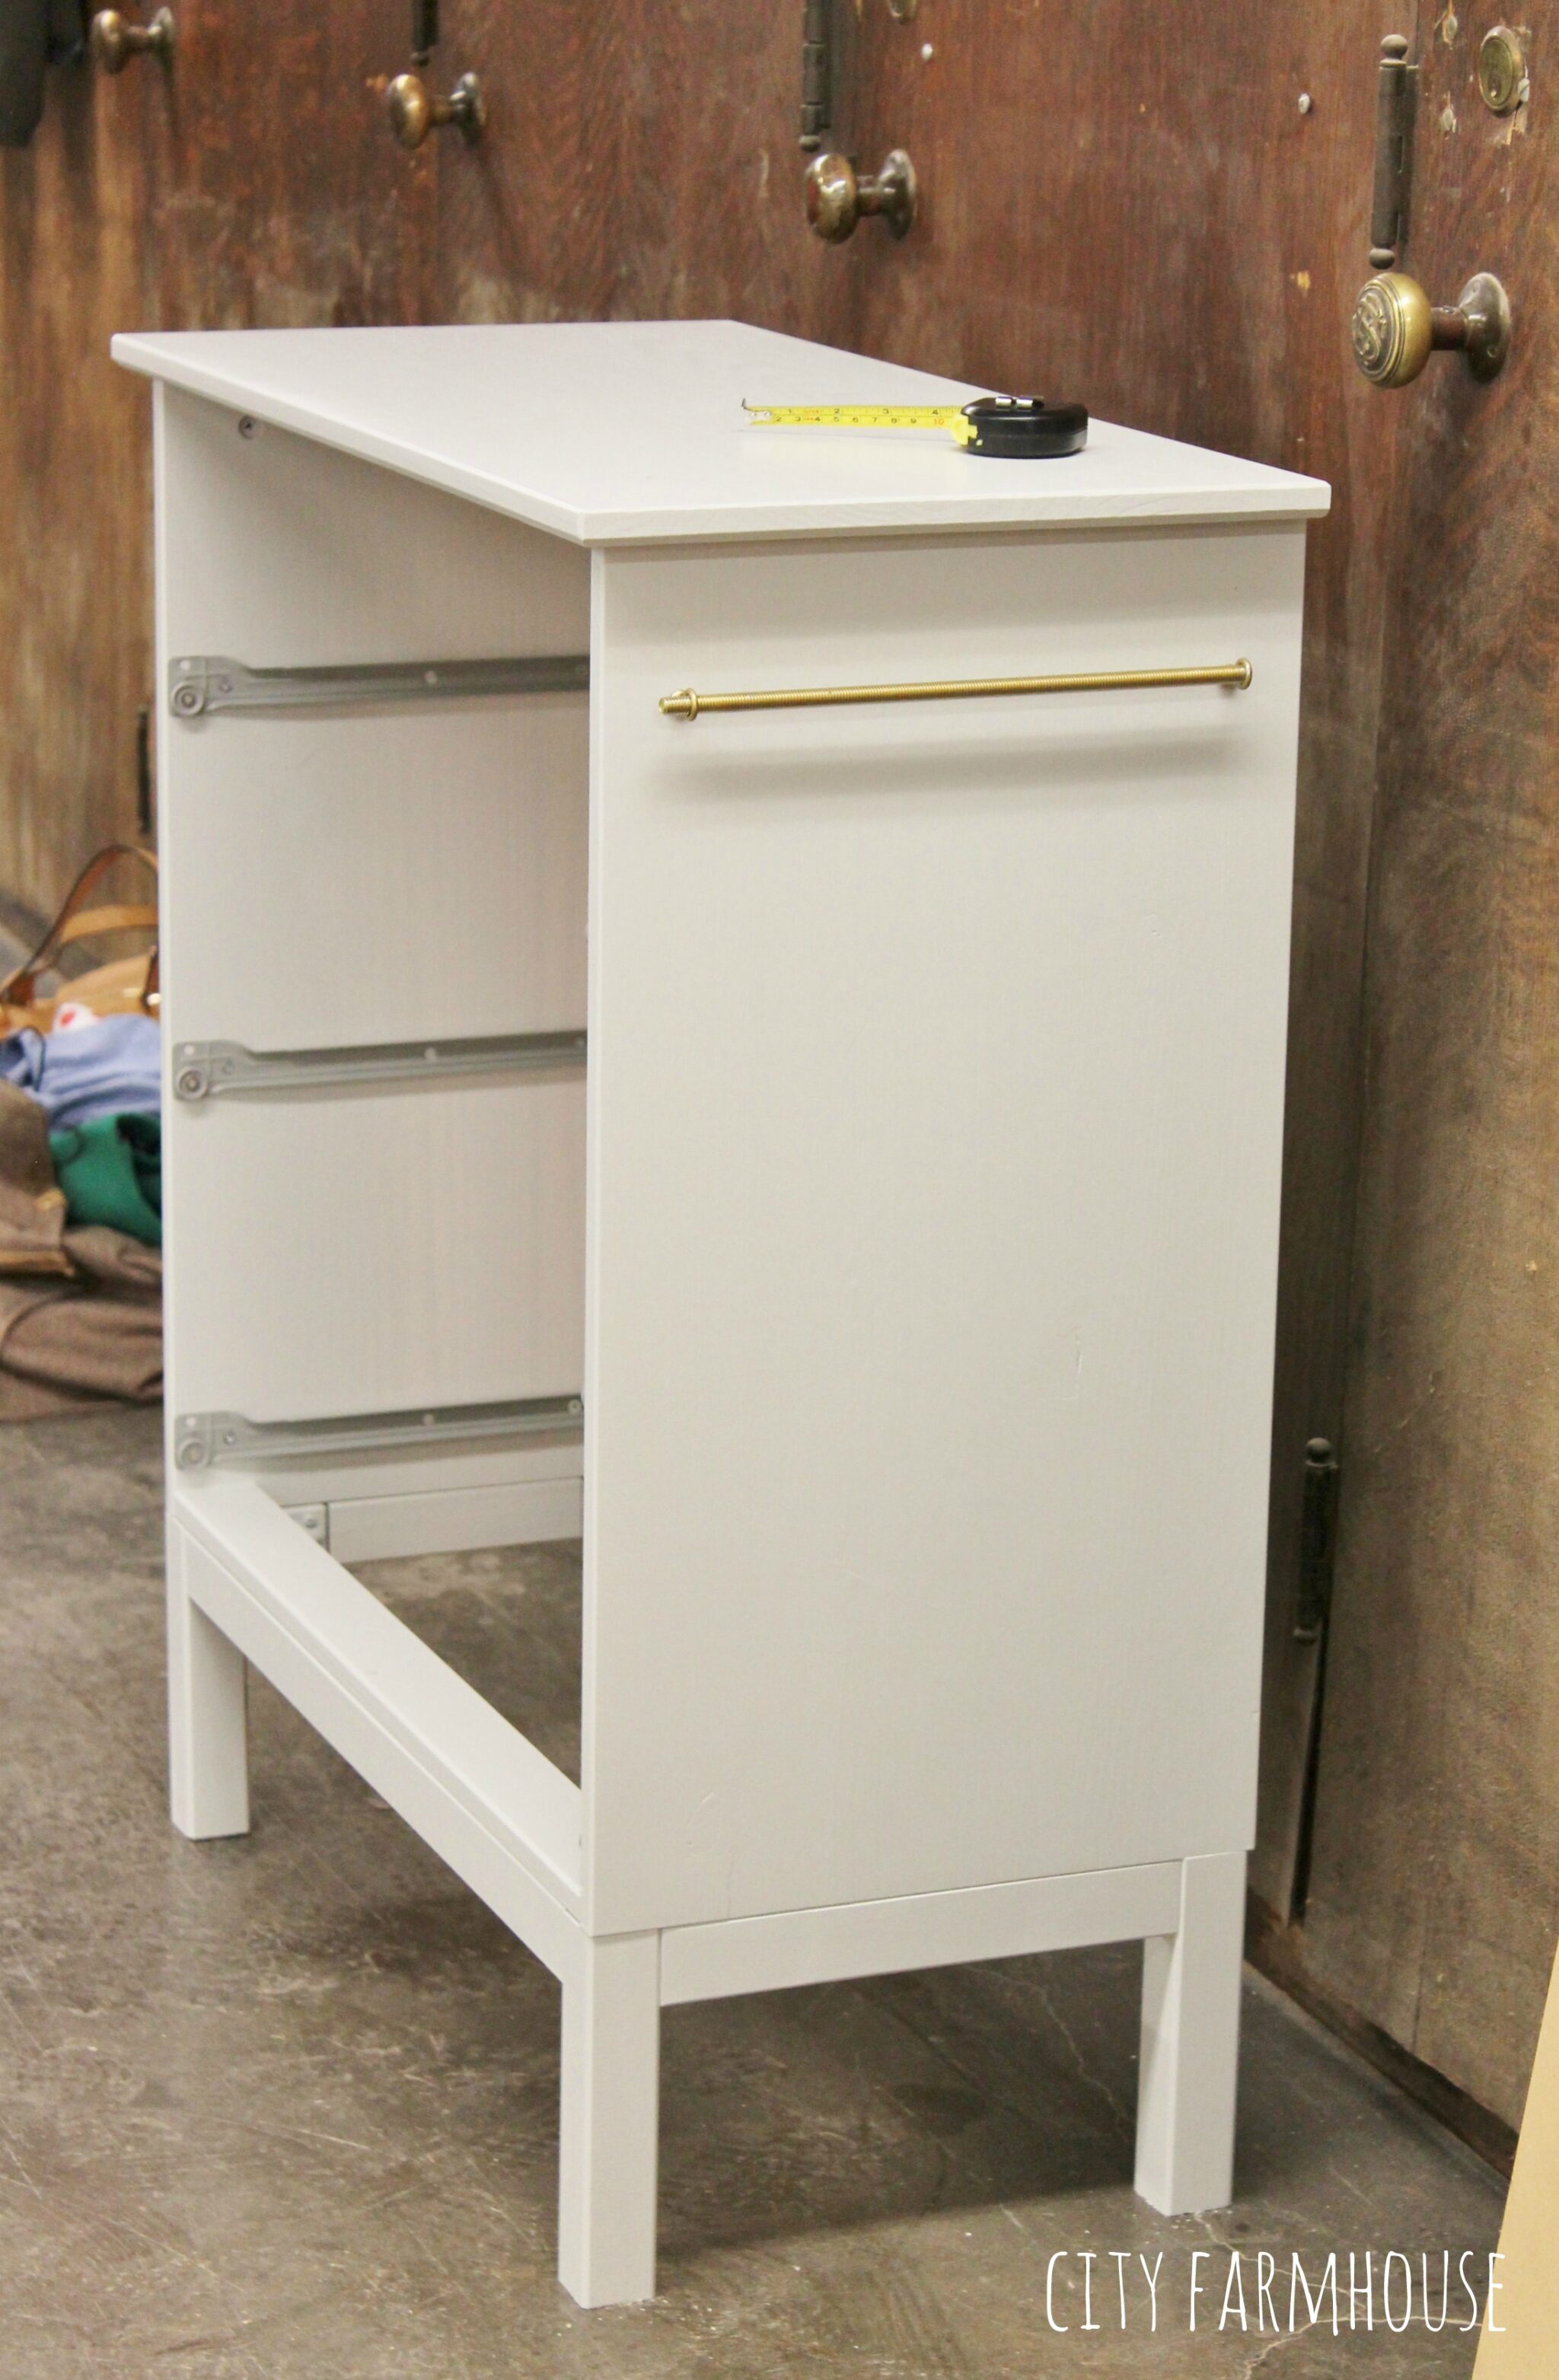 This towel rack cost me less than $1.50.
It is riveted rod, 2 large eye hooks and washers {all bought at Lowes}
that have been sprayed gold.
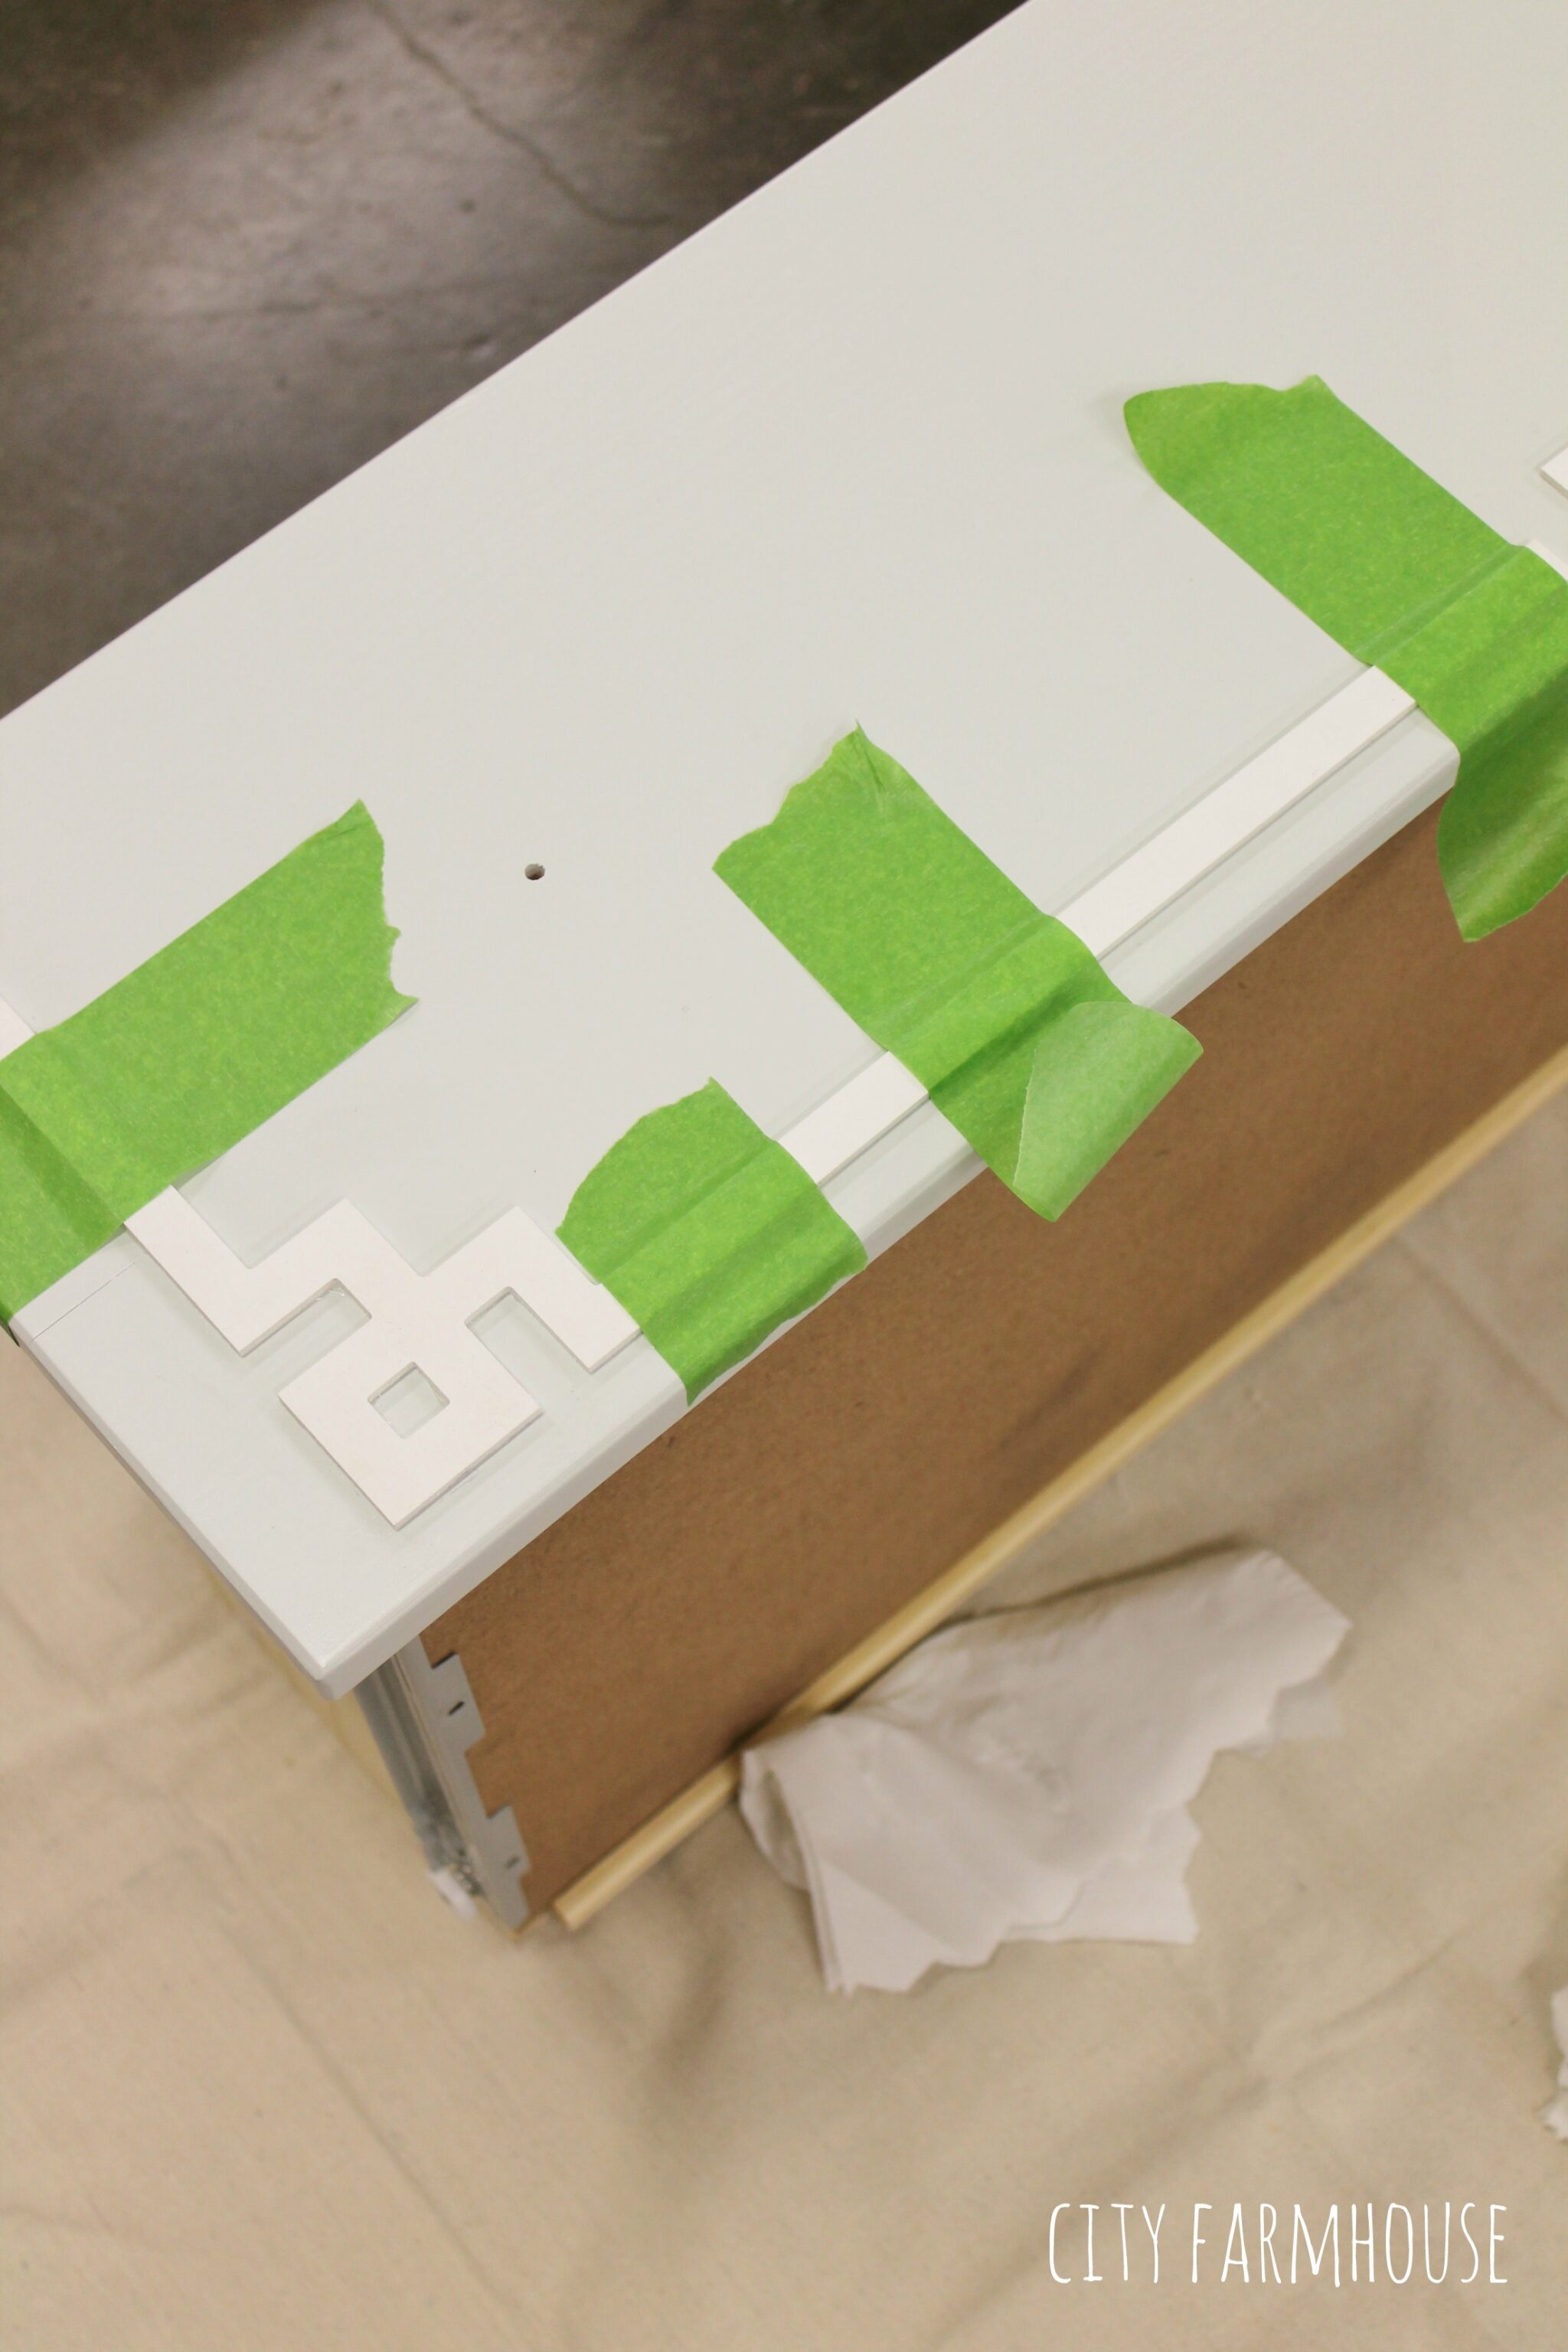
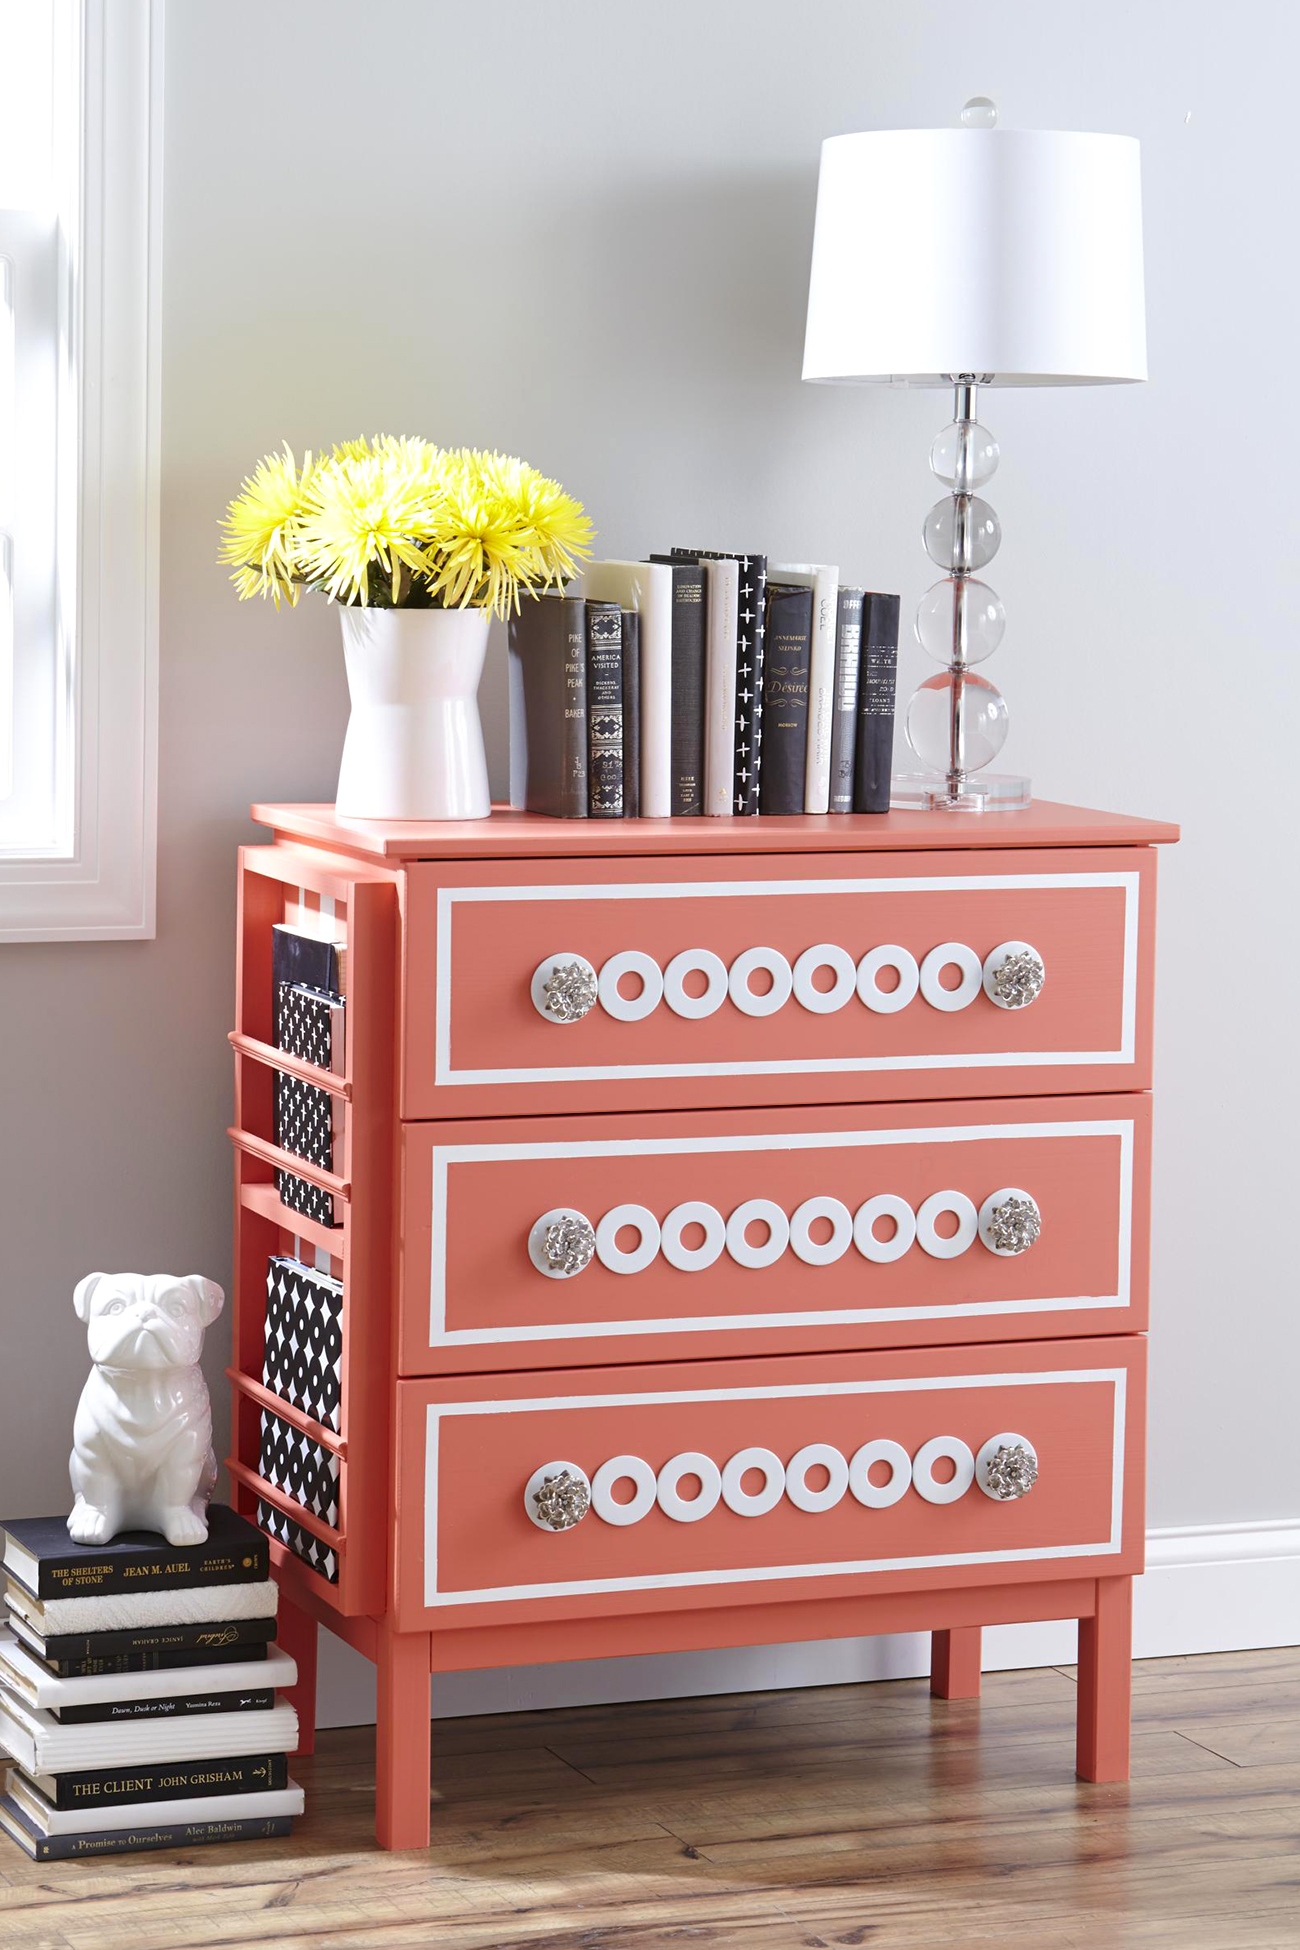
And the best part-the overlays!
Oh LOVE, LOVE this overlay!
I have to say I had some issues with it fitting but the finished product, wow!
I found them HERE.
This company is amazing the owner emailed me right away so concerned.
The BEST customer service on the planet!

I primed & sprayed these white.
I adhered it Liquid Nails with a small brush & it was so easy.
Tip- don’t over do it with the glue, a little goes a long way. 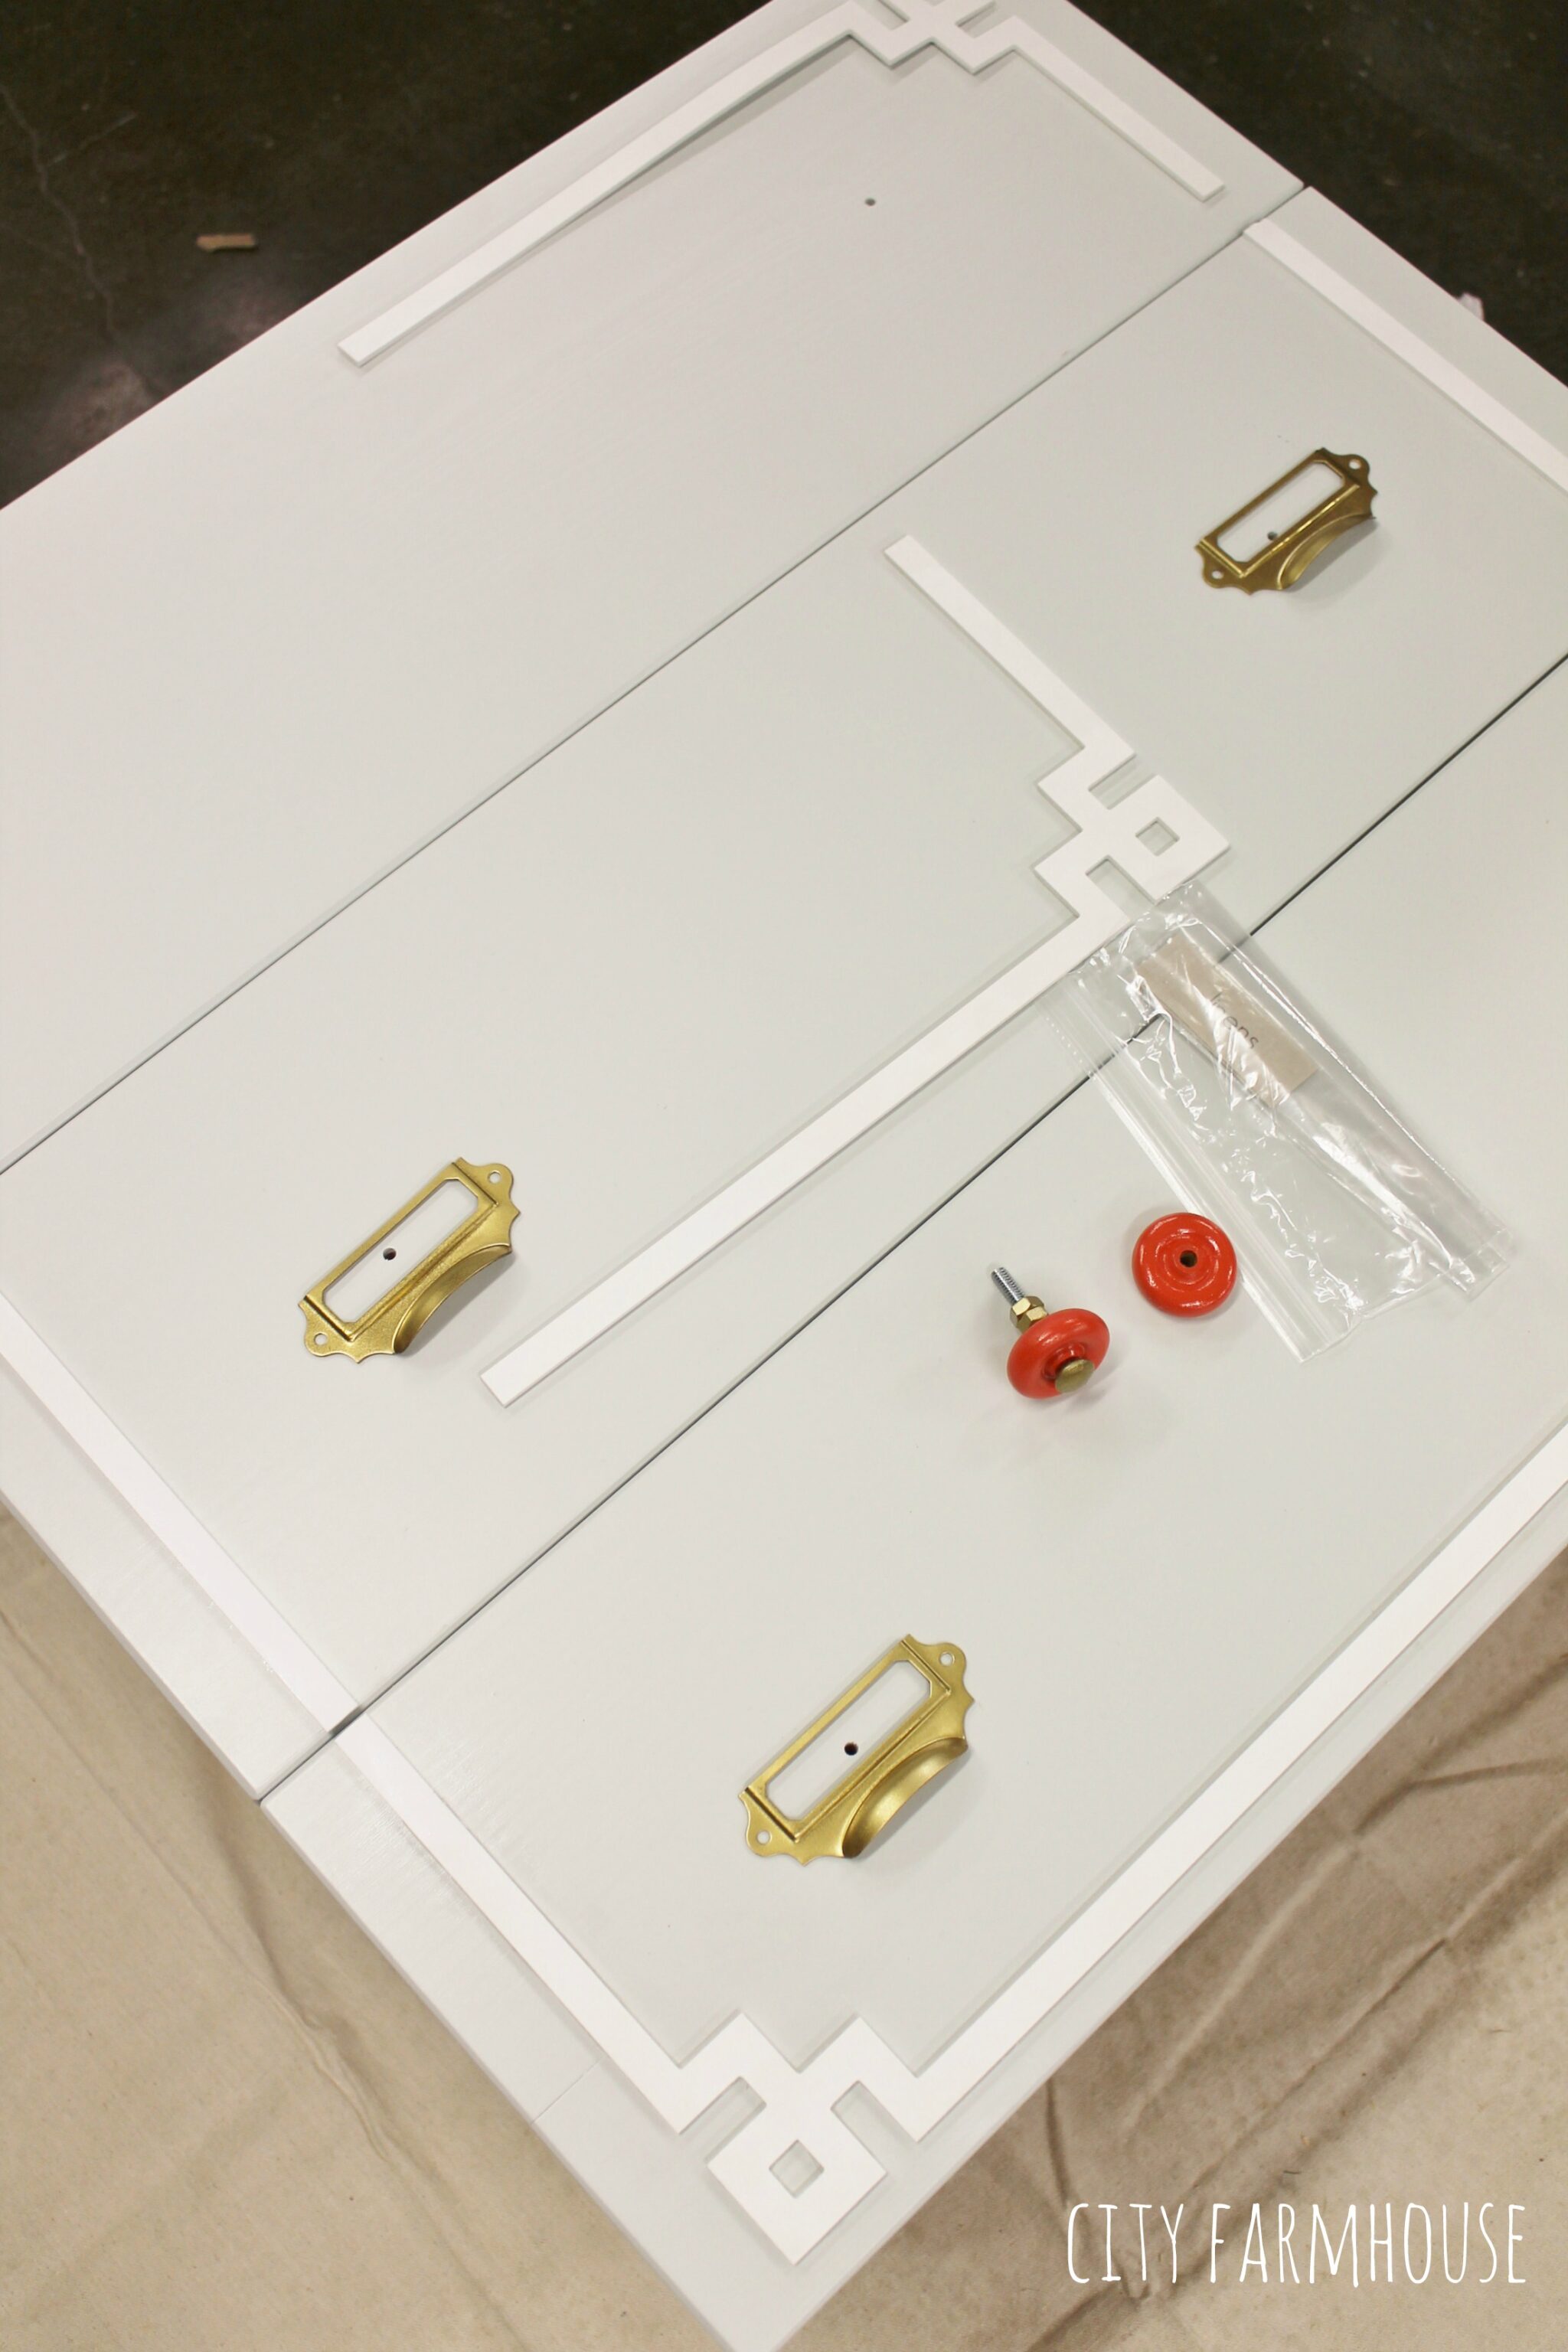 Another favorite part-
the hardware.
The bold knobs up at top are also a DIY & cost less than $1.00.
The inspiration for these came from some Anthropologie ones I saw {& bought}
but realized they were WAY too large, they would over power the piece.
But the color I wanted to use.
I bought wheels at the craft store
{for a model car},
painted them MS Geranium,
&
sprayed them with Modge Podge High Gloss so they were super shiny.
I used carriage bolts for the center, used some bolts to add distance from the draws
& to secure in my back.
I sprayed all the hardware gold.

The vintage library pulls I found HERE.
I also sprayed them to match & used linen paper to label the draws for
easy accessibility for guests.
I created the labels HERE.
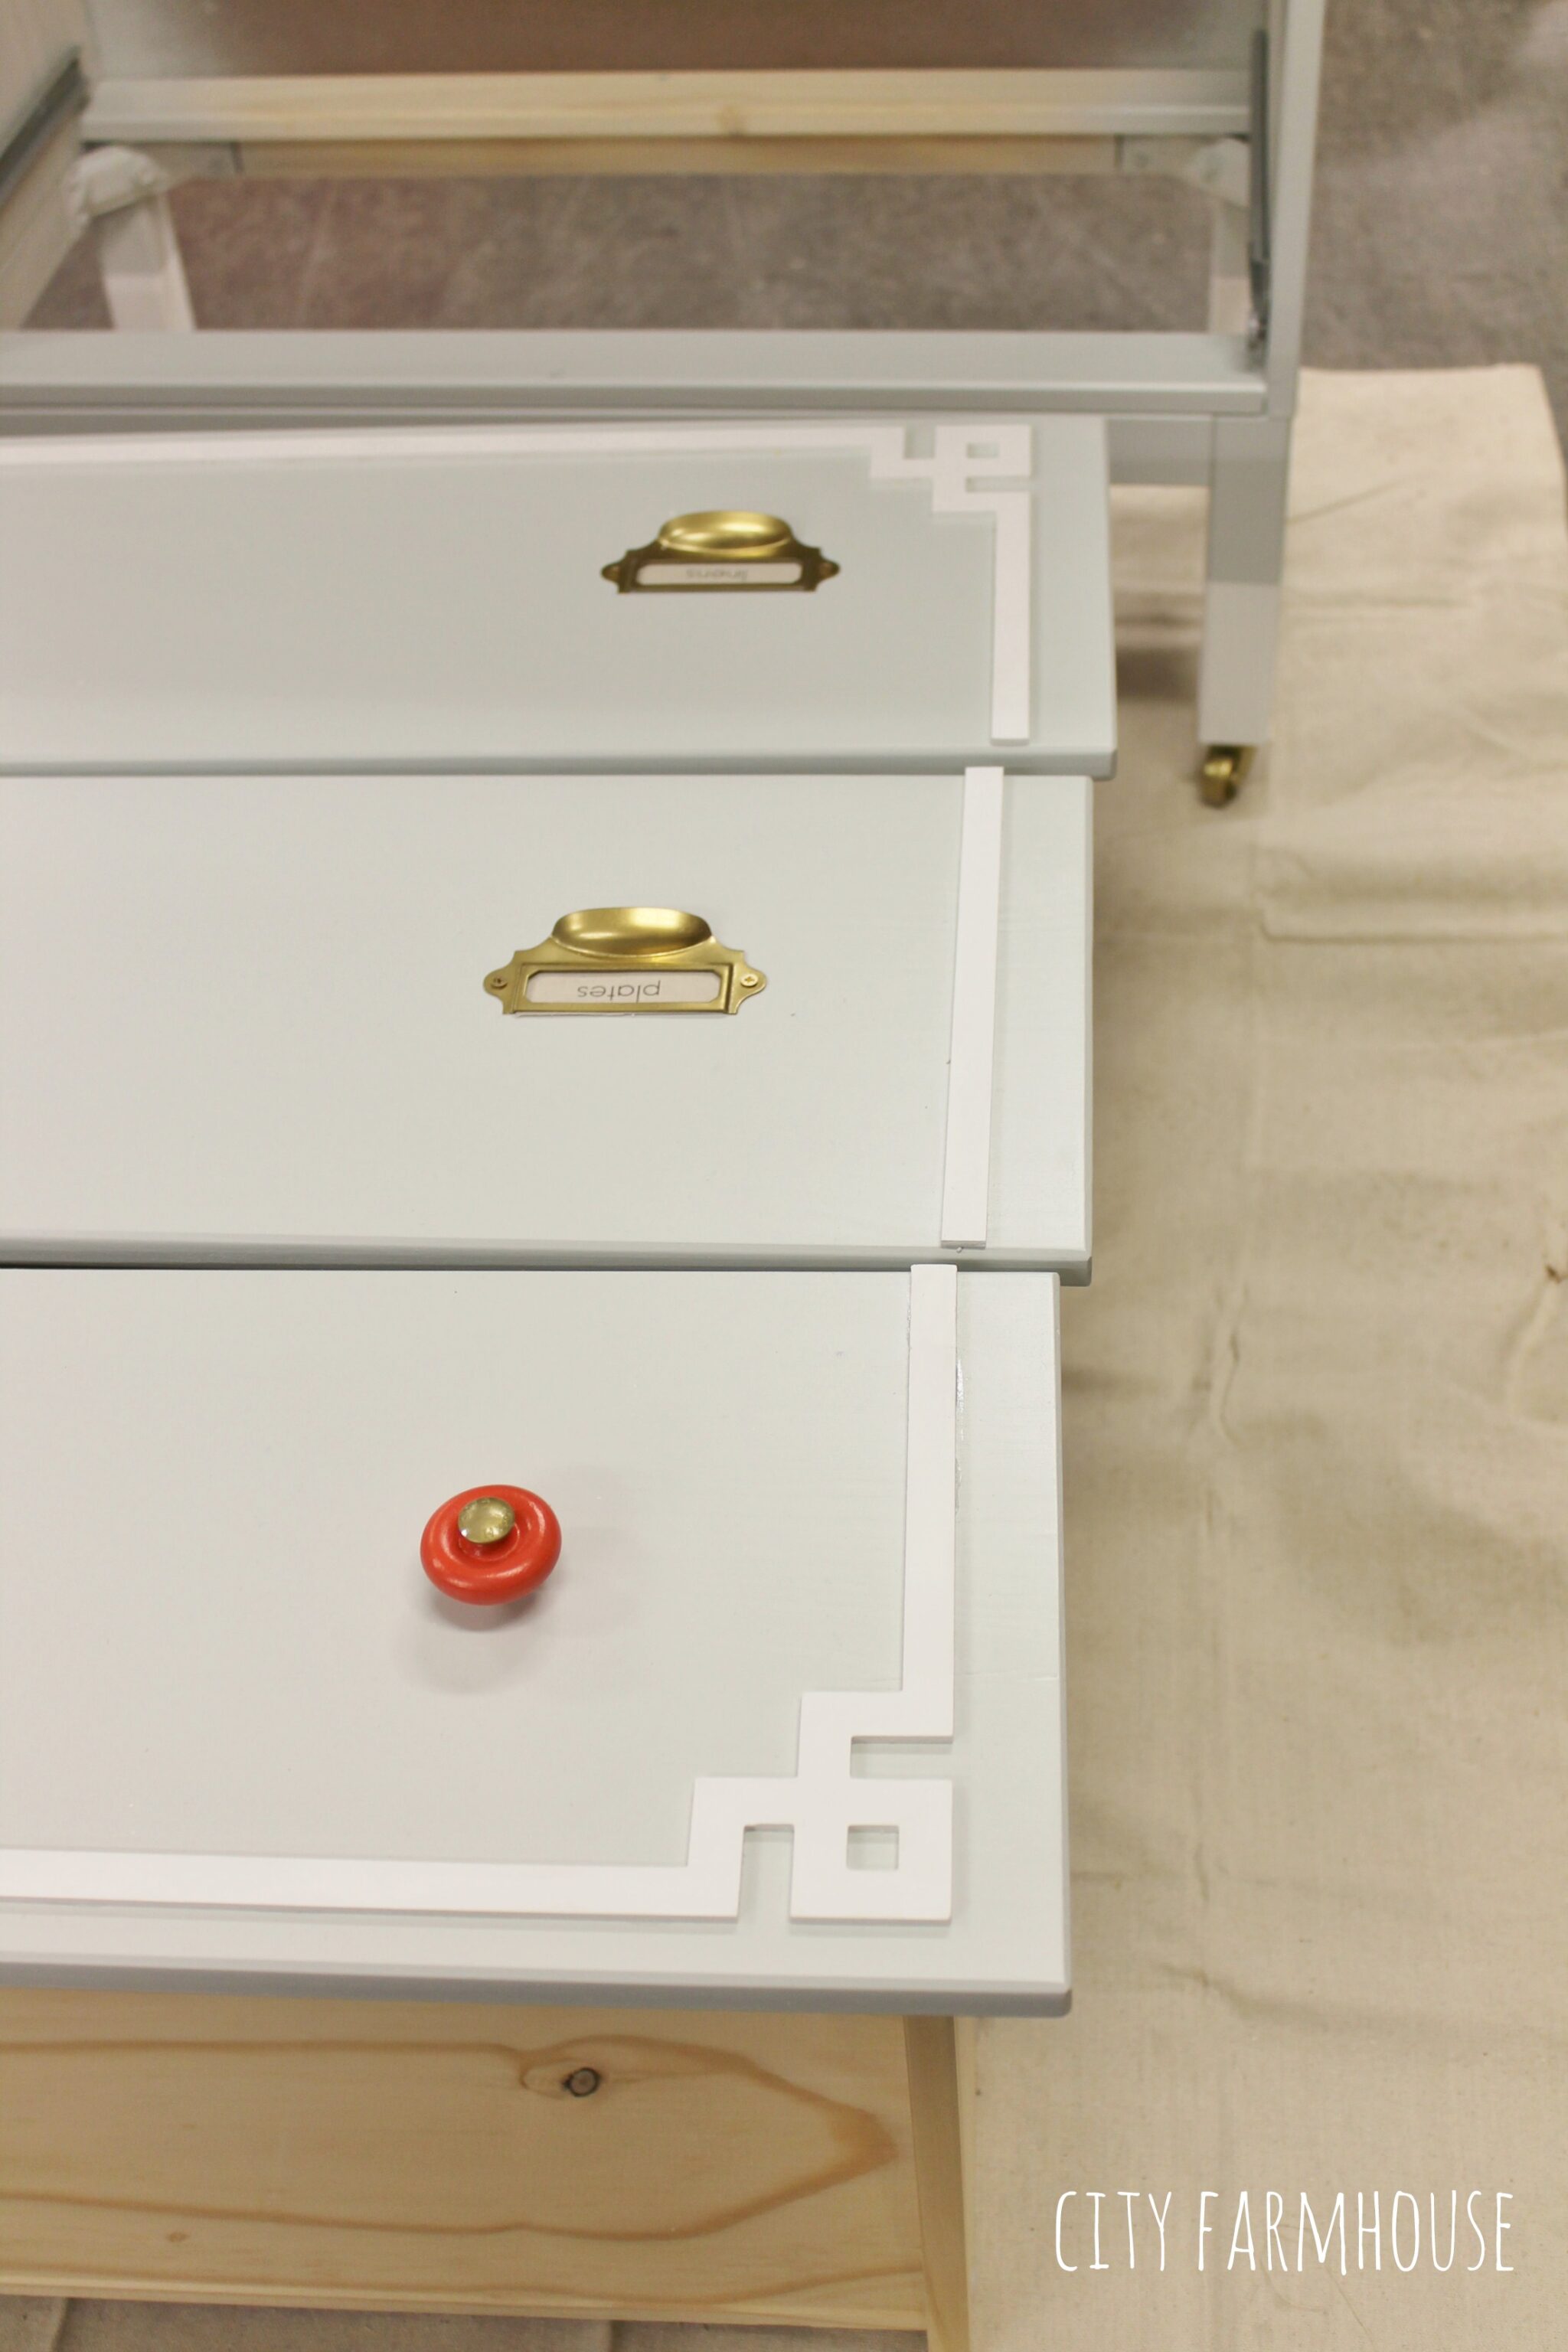
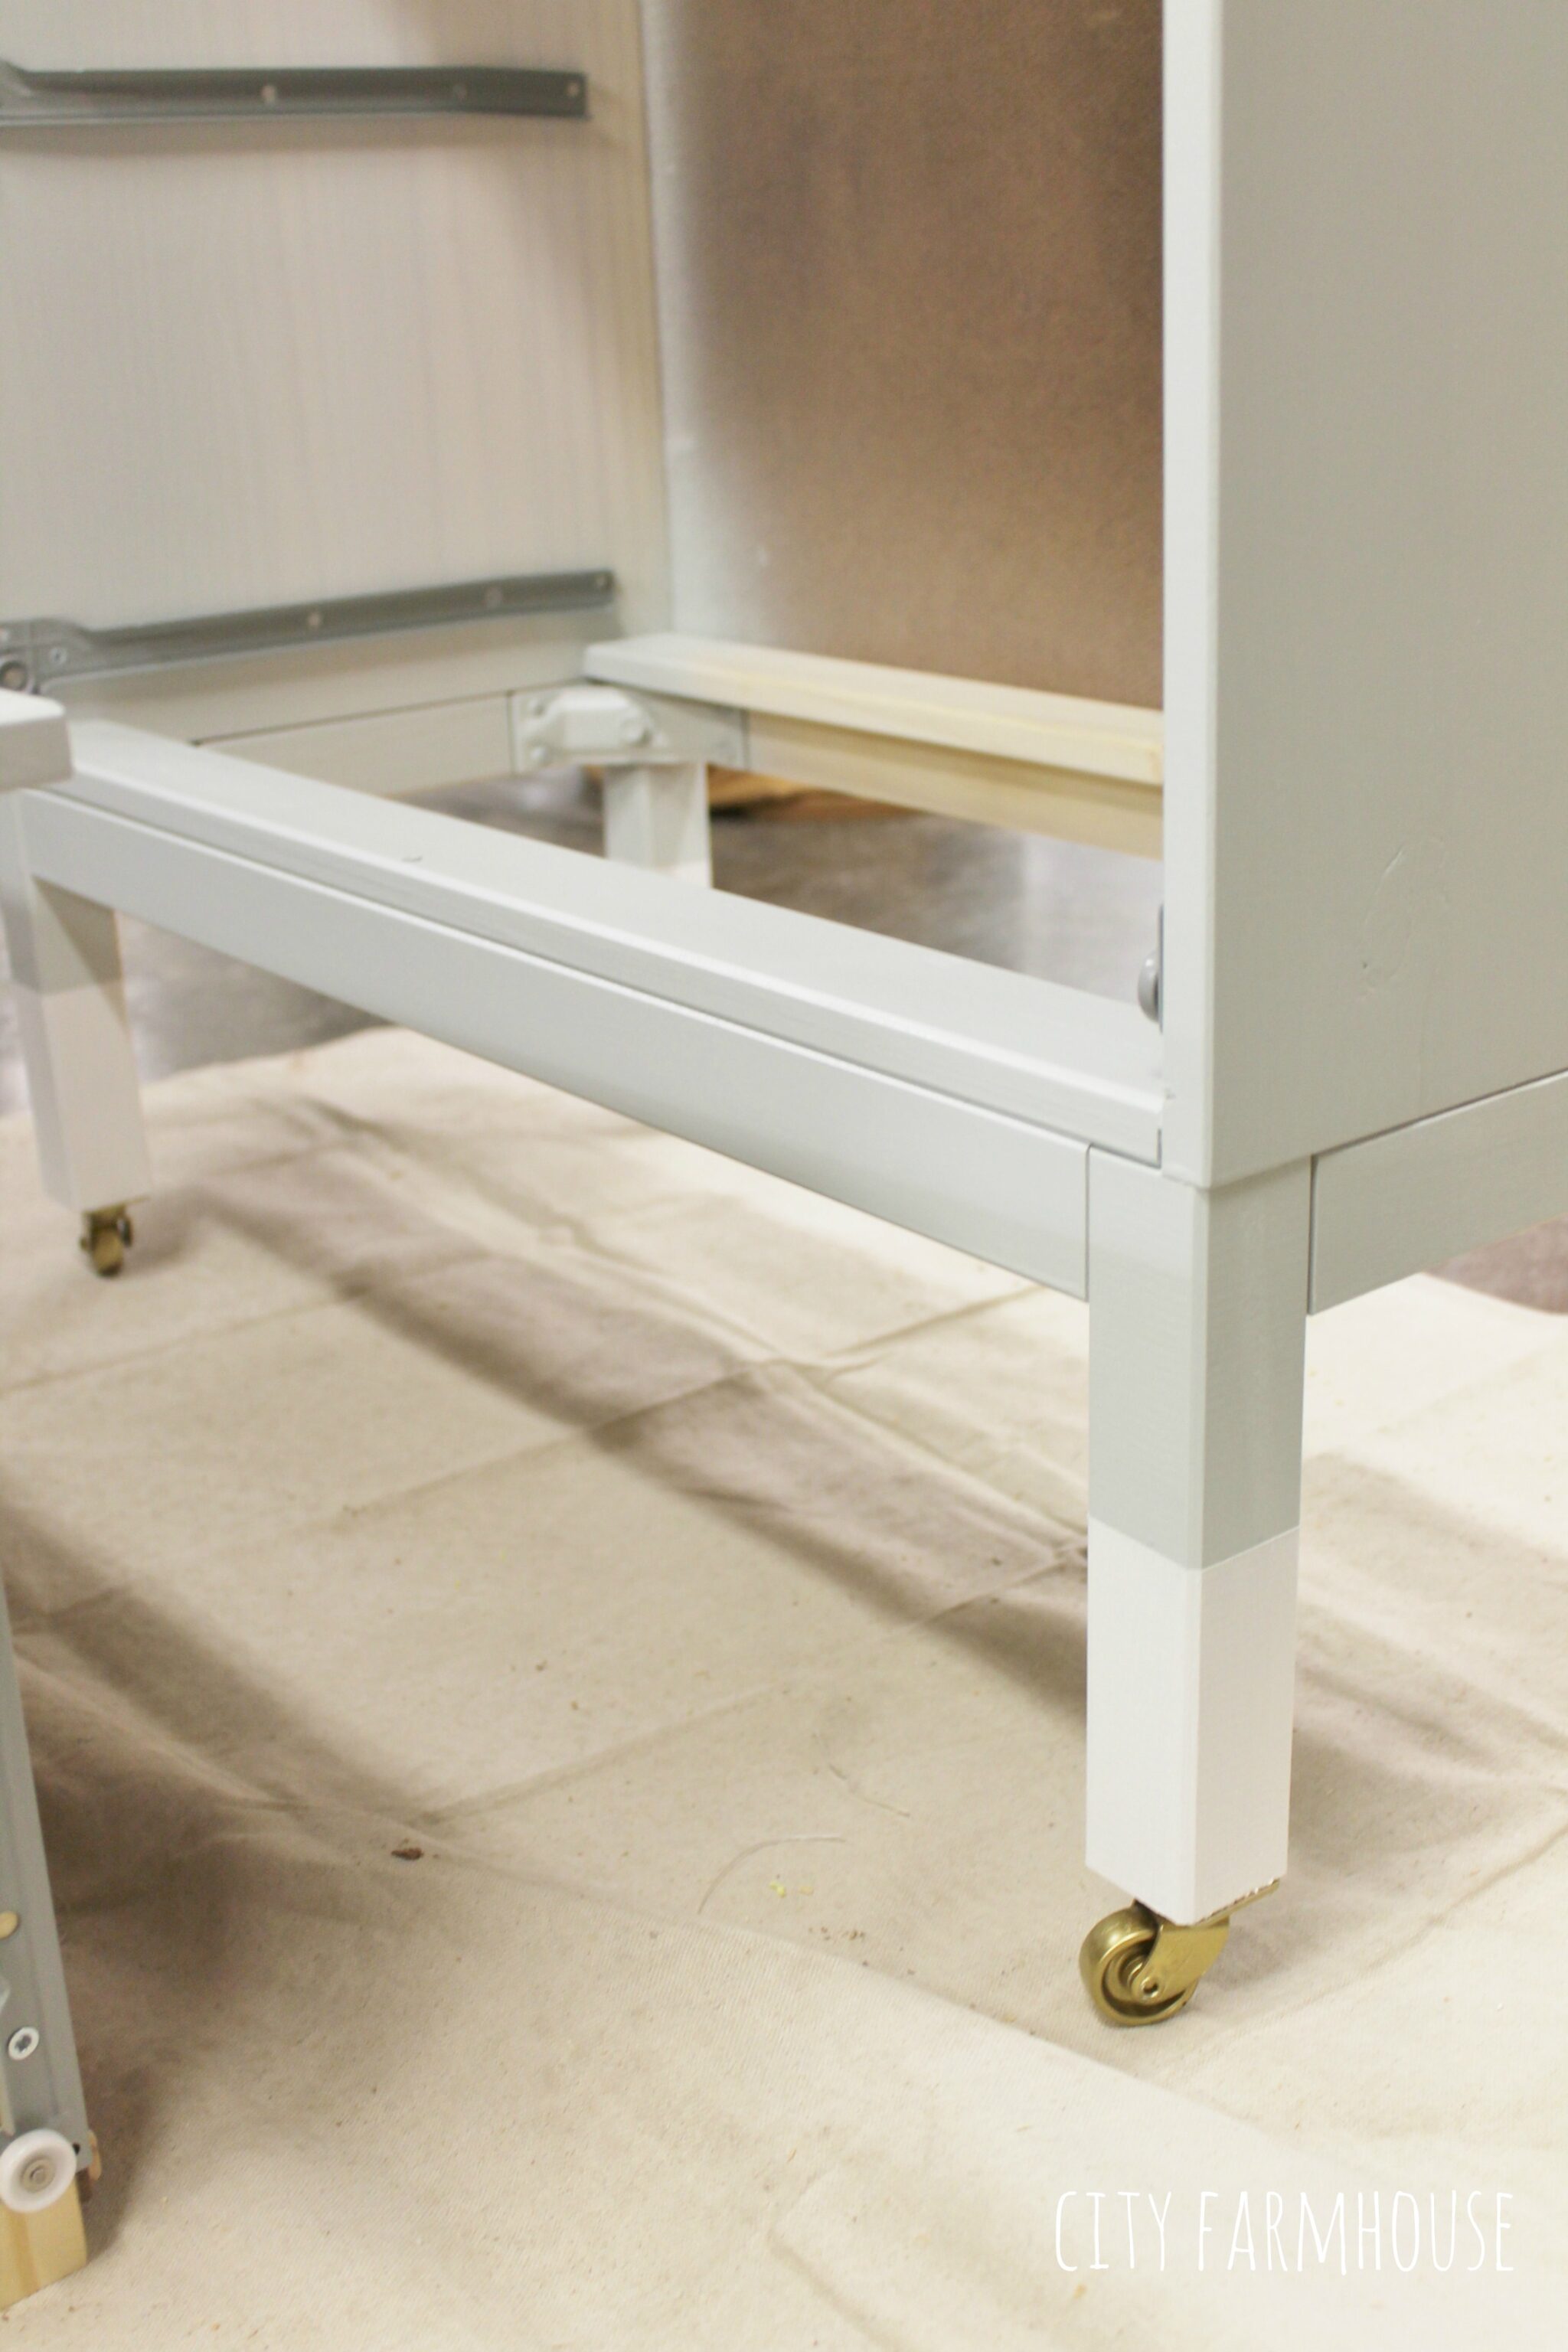
Did you notice the dipped leg?
Was a little unsure if I would do it
but it felt right on project day,
so I did & I am so happy with it!
All I did was measure 2/3″ up the leg which I think was 4″ and taped off
& painted 2 coats of a crisp white.
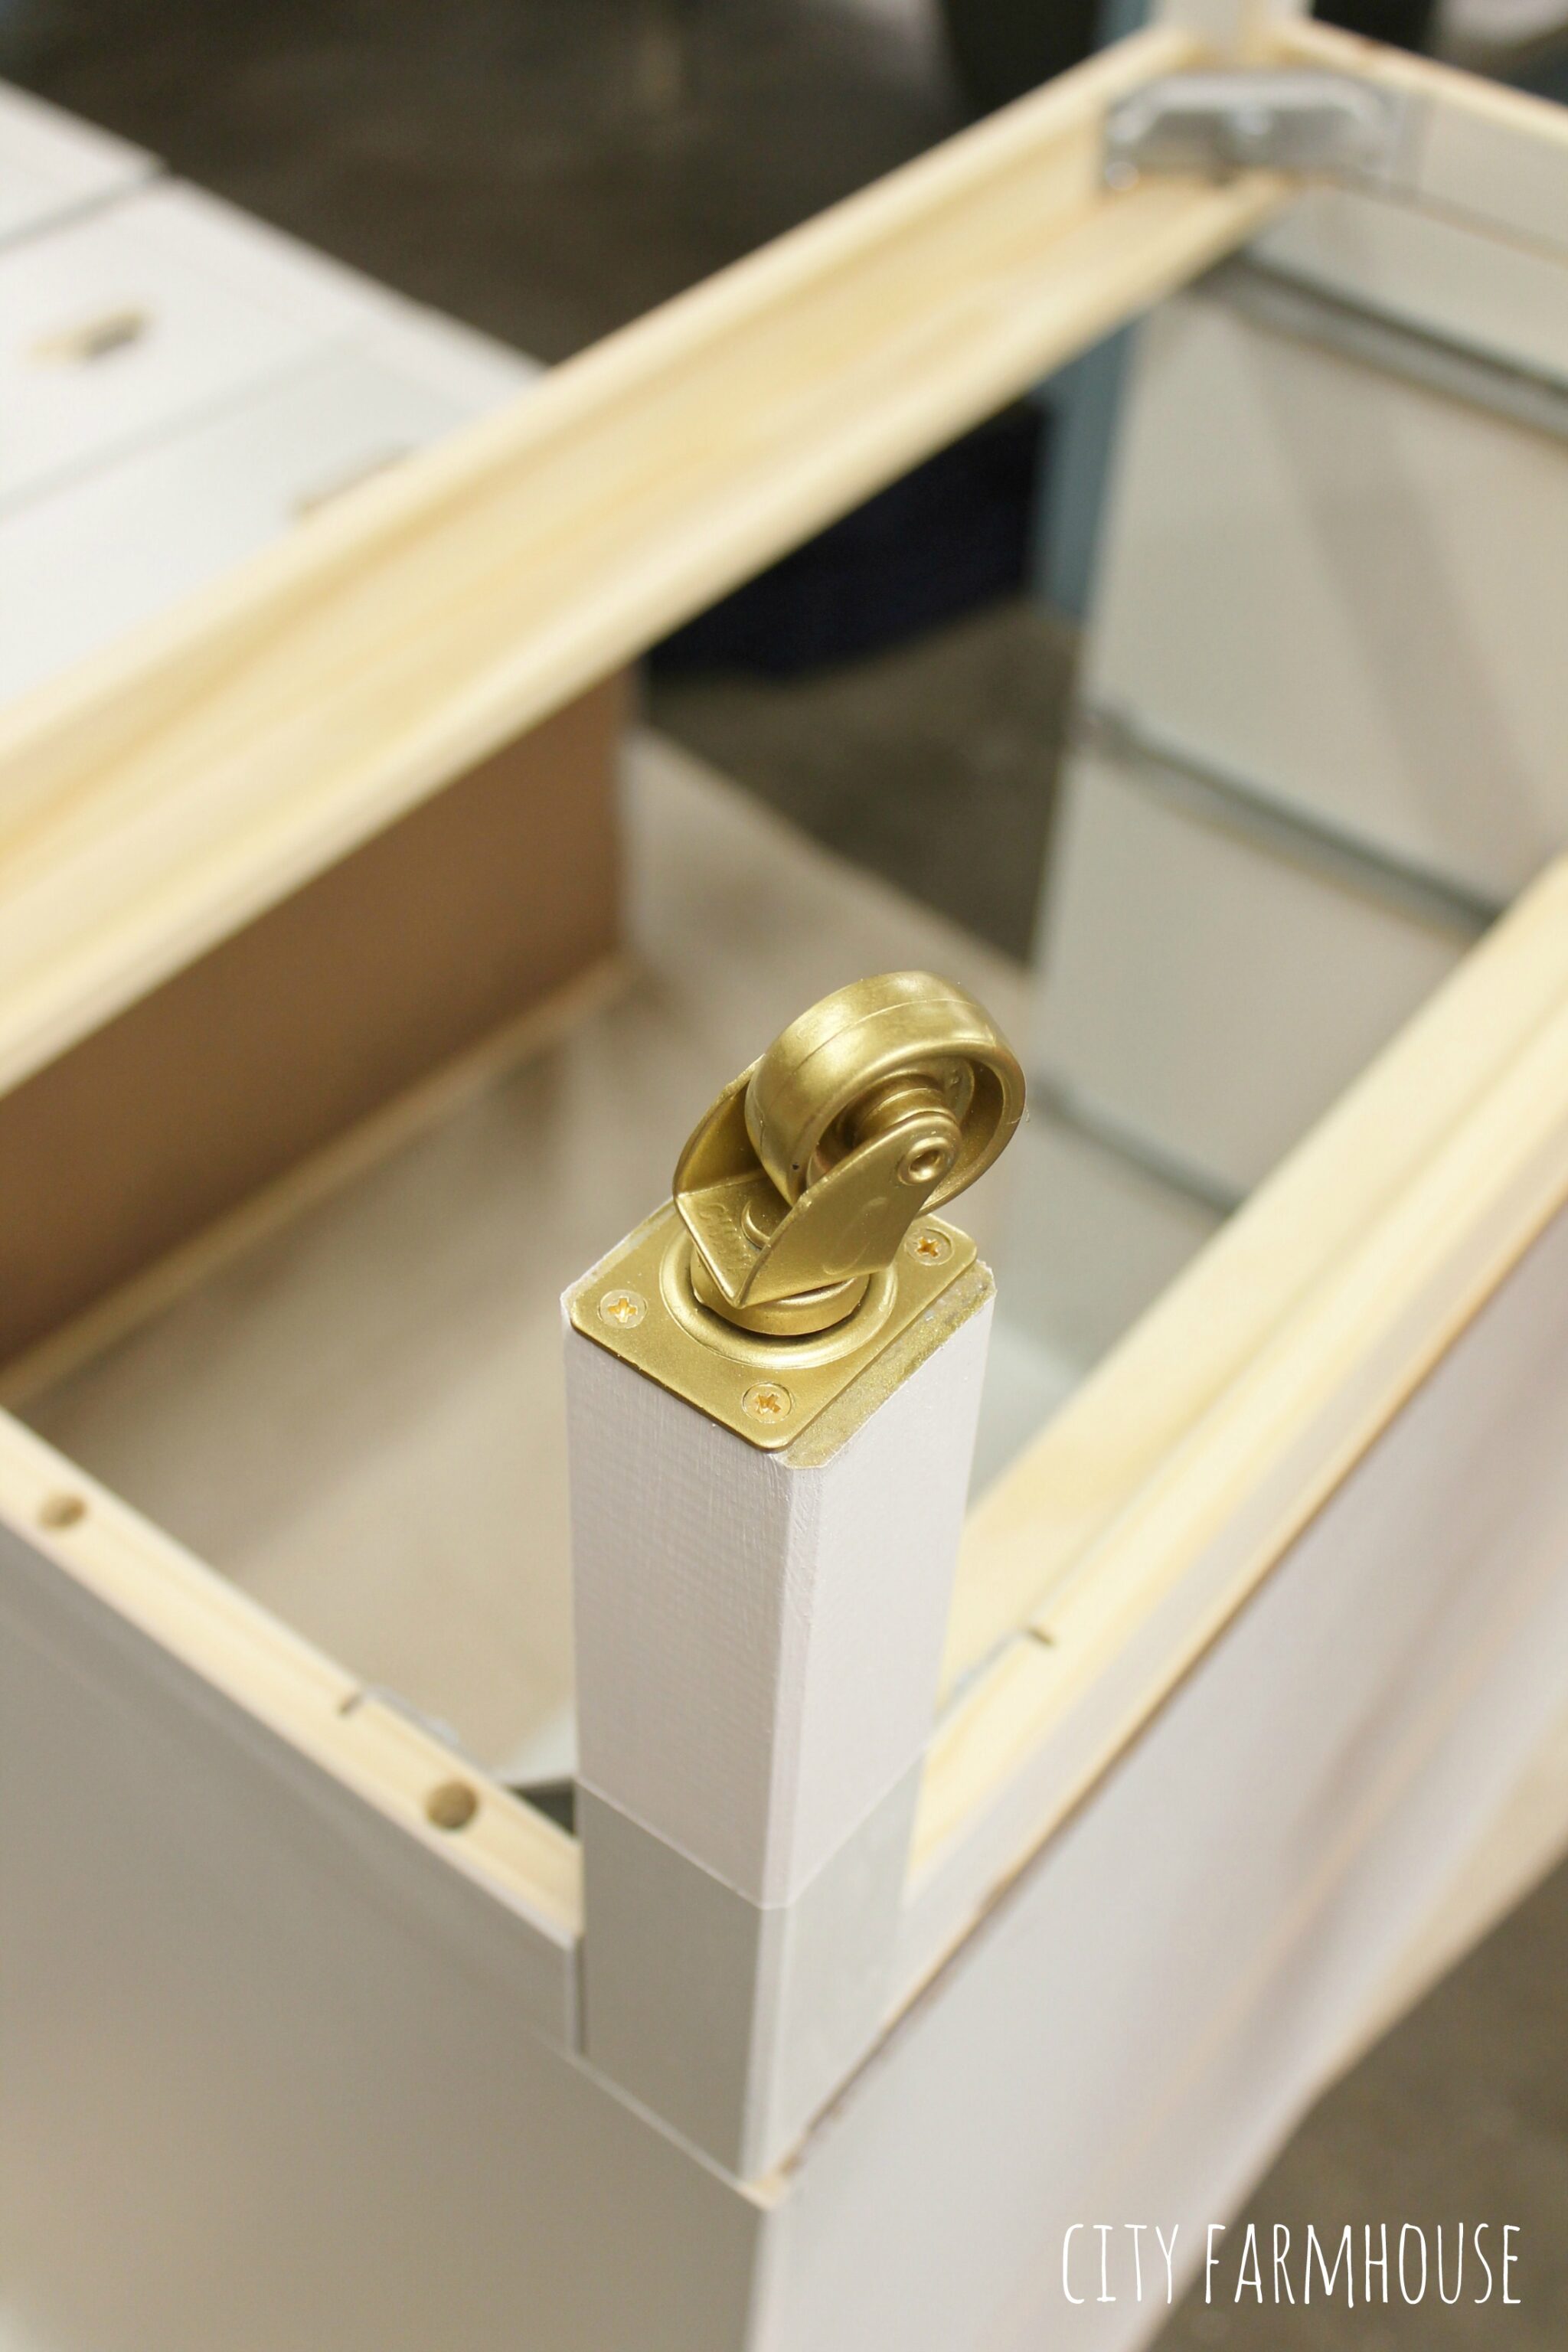
The casters…
I sprayed them gold.
If you wish to try this use a primer first for plastic:).
Here is a fabulous close up, style so beautifully by Diane from BHG!
I had my sketch book ready when we met on project day
& she completely nailed everything I could have wanted
and then some!
Here are the other beautiful Ikea Hacks from Makeover Madness,
Secretary by In My Own Style-The Winner!
Click HERE to see here tutorial.

Wood Stained Bar by My Fabuless Life.
Click HERE for the tutorial.

Coral Dresser With Book Shelf by Thistlewood Farm
Click HERE to read the tutorial.
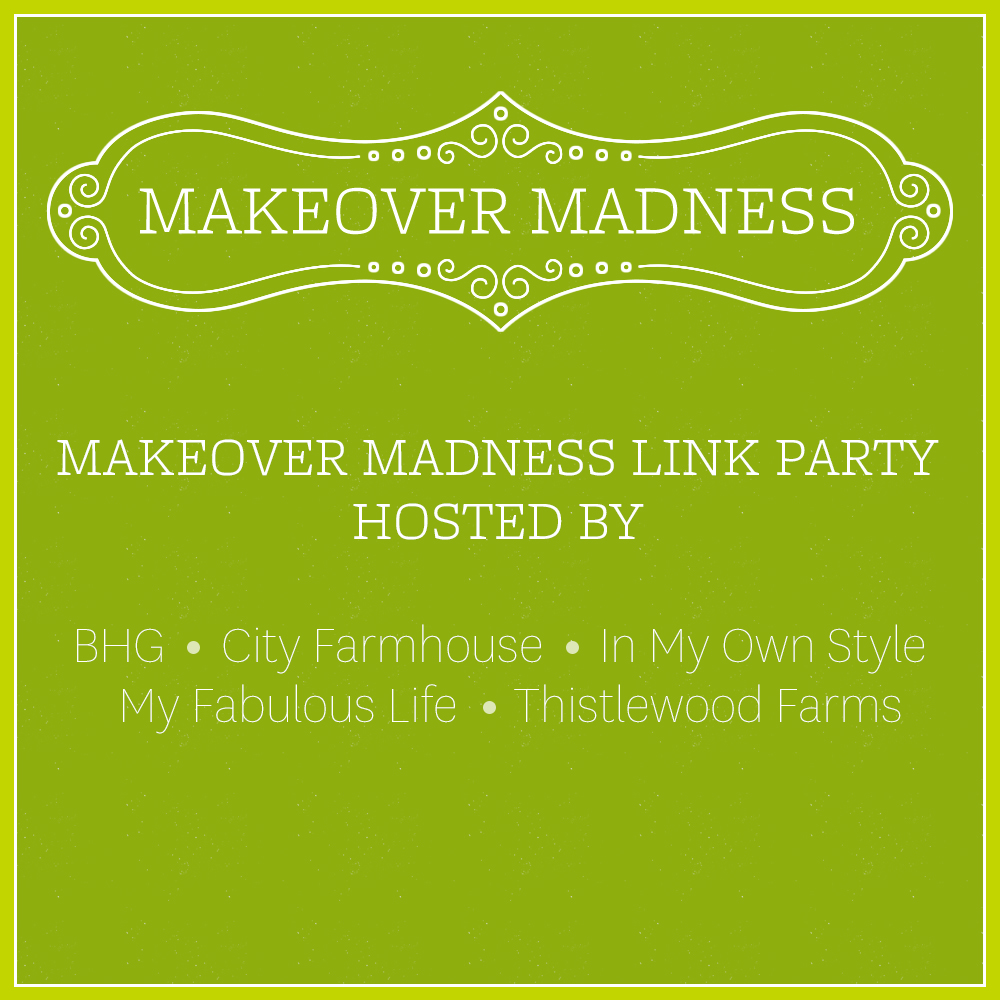
As a part of Better Homes and Gardens’ Makeover Madness challenge, BHG, City Farmhouse, In My Own Style, My Fabuless Life and Thistlewood Farms are hosting a link party! On April 16th, each of the bloggers will be sharing a tutorial for their project that they created for the Makeover Madness final challenge along with the link party. Add your best makeover project to the party to have it shown on all five blogs! We’ll be sharing our favorite projects on a Makeover Madness Pinterest board and on April 23rd we’ll announce our top five favorite projects from the party!
Lets party!!!

I love all the great transformations. Each one is so unique.
Mary @ Orphans With Makeup
What a great party! Thanks for hosting! Life to the full! Melissa @ DaisyMaeBelle
Your makeover turned out fabulous! (Of course I voted for it.) 🙂
Thanks for hosting the awesome BHG link party!
All the projects are beautiful!! Yours was my favorite..Love the overlays, the colorful knobs and the dipped legs. I love it all!! Thanks for hosting this amazing link party!
Love all the makeovers!
Love all of the makeovers. Thanks so much for hosting.
Thank you so much for hosting!!! How fun!! Your dresser rocked Jen, it was so awesome!!! I’m so proud of you 🙂 XO
What incredible transformations!! So inspiring!
~Abby =)
I really loved this, Jen! Would you tell me more about how you made the towel bar? I’ve been trying to figure out a paper towel holder solution for my kitchen and this this may be just the piece I’ve been missing!
Hey Jen! Sure it is a rod from Lowes, in the sheet metal isle. I took to eye hooks, make sire they are slightly bigger than the diameter of rod. You can also cap it off with butterfly bolt. I used the washers to hide the where I screwed into the wood. Good Luck Jen!
Oh…so it’s a threaded rod you used? I was wondering what a riveted rod was! 🙂
Yup Becky, that is exactly what it is:). Enjoy your weekend! Jen
Thanks for hosting, Jen! LOVE how your’s came out. The grey and detailing are gorgeous. Love all the others too. x
Love all the projects but your dresser is such a beautiful transformation. I love the dipped legs and the overlay detail. I also am blown away by your vision to use model car tires as knobs!!!