
The Easiest Planked Wall {using minimal tools}
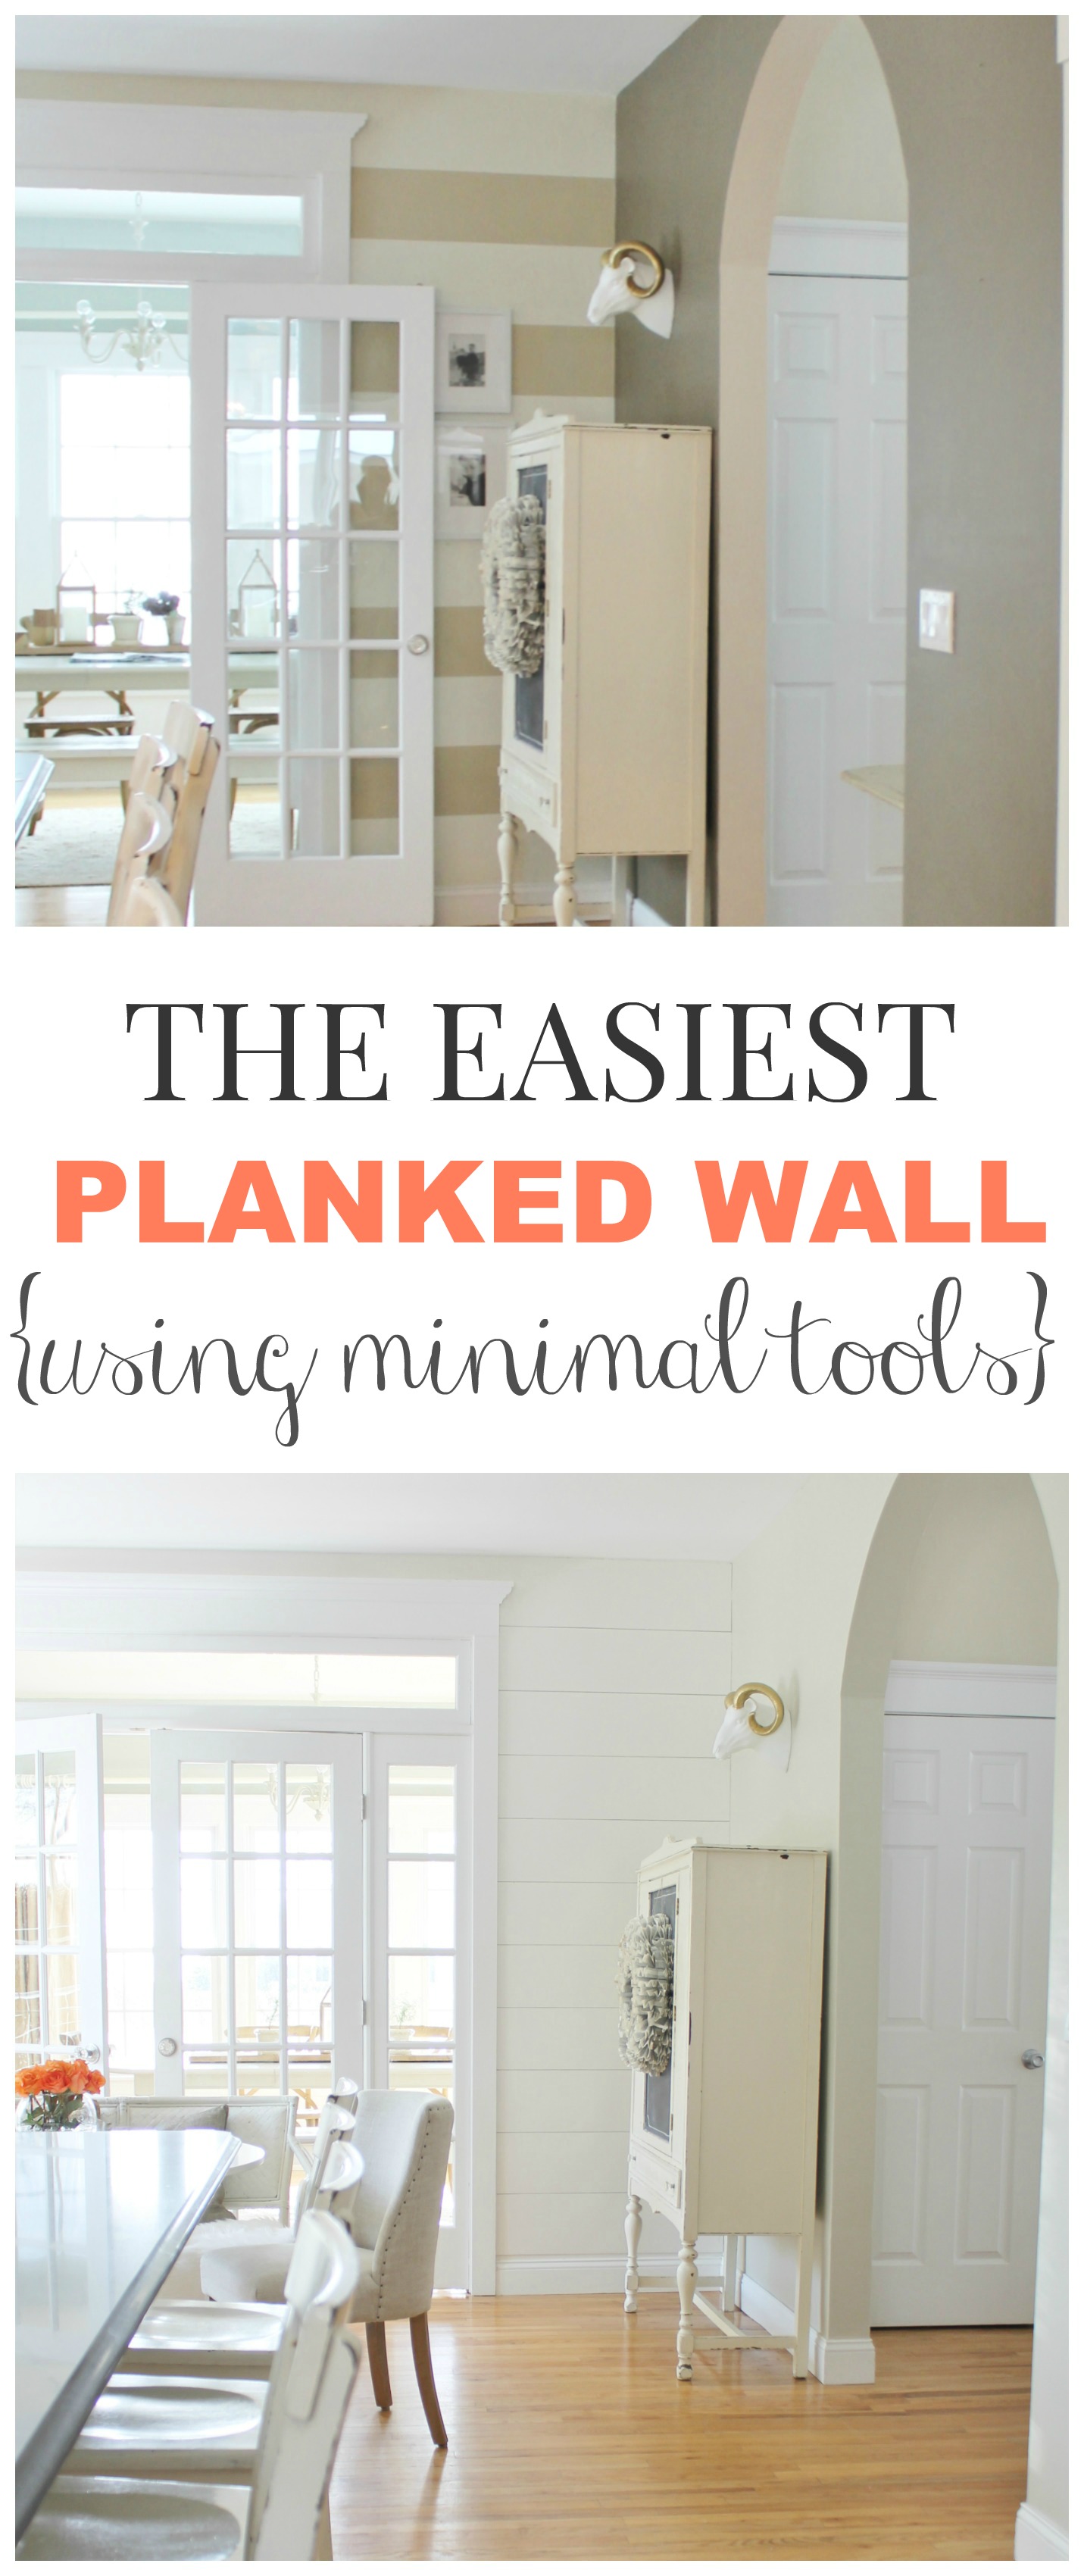
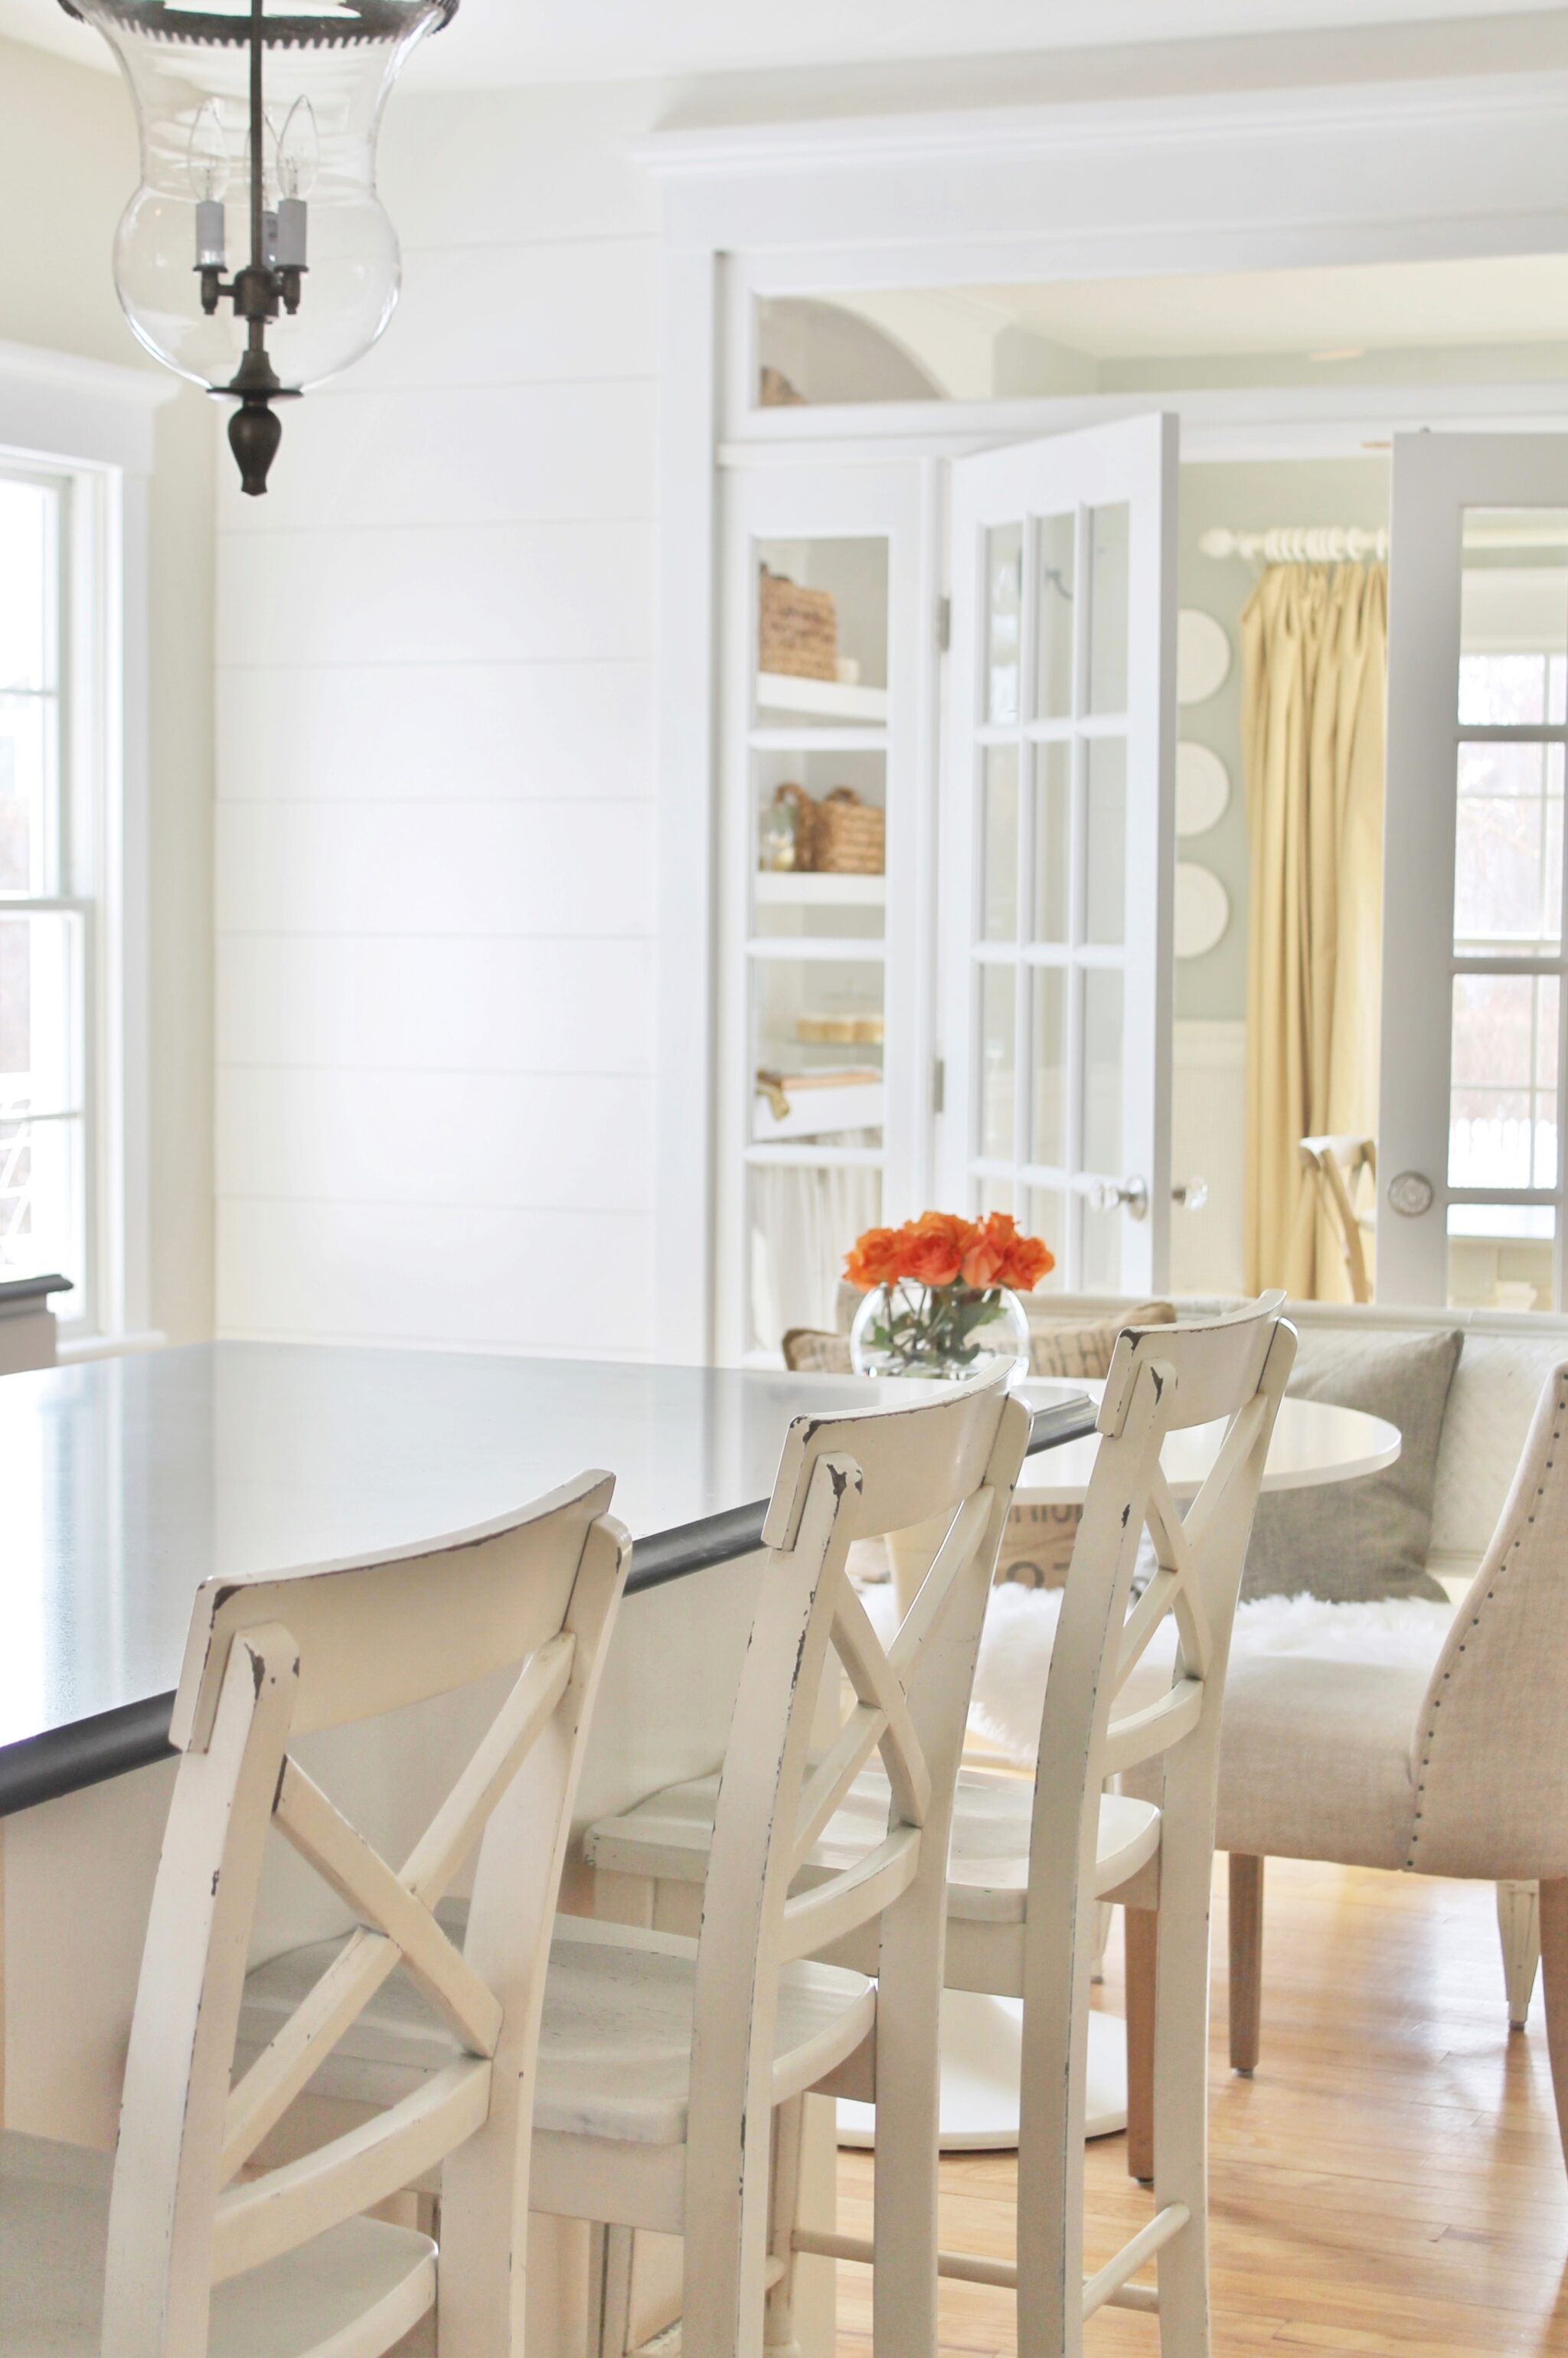
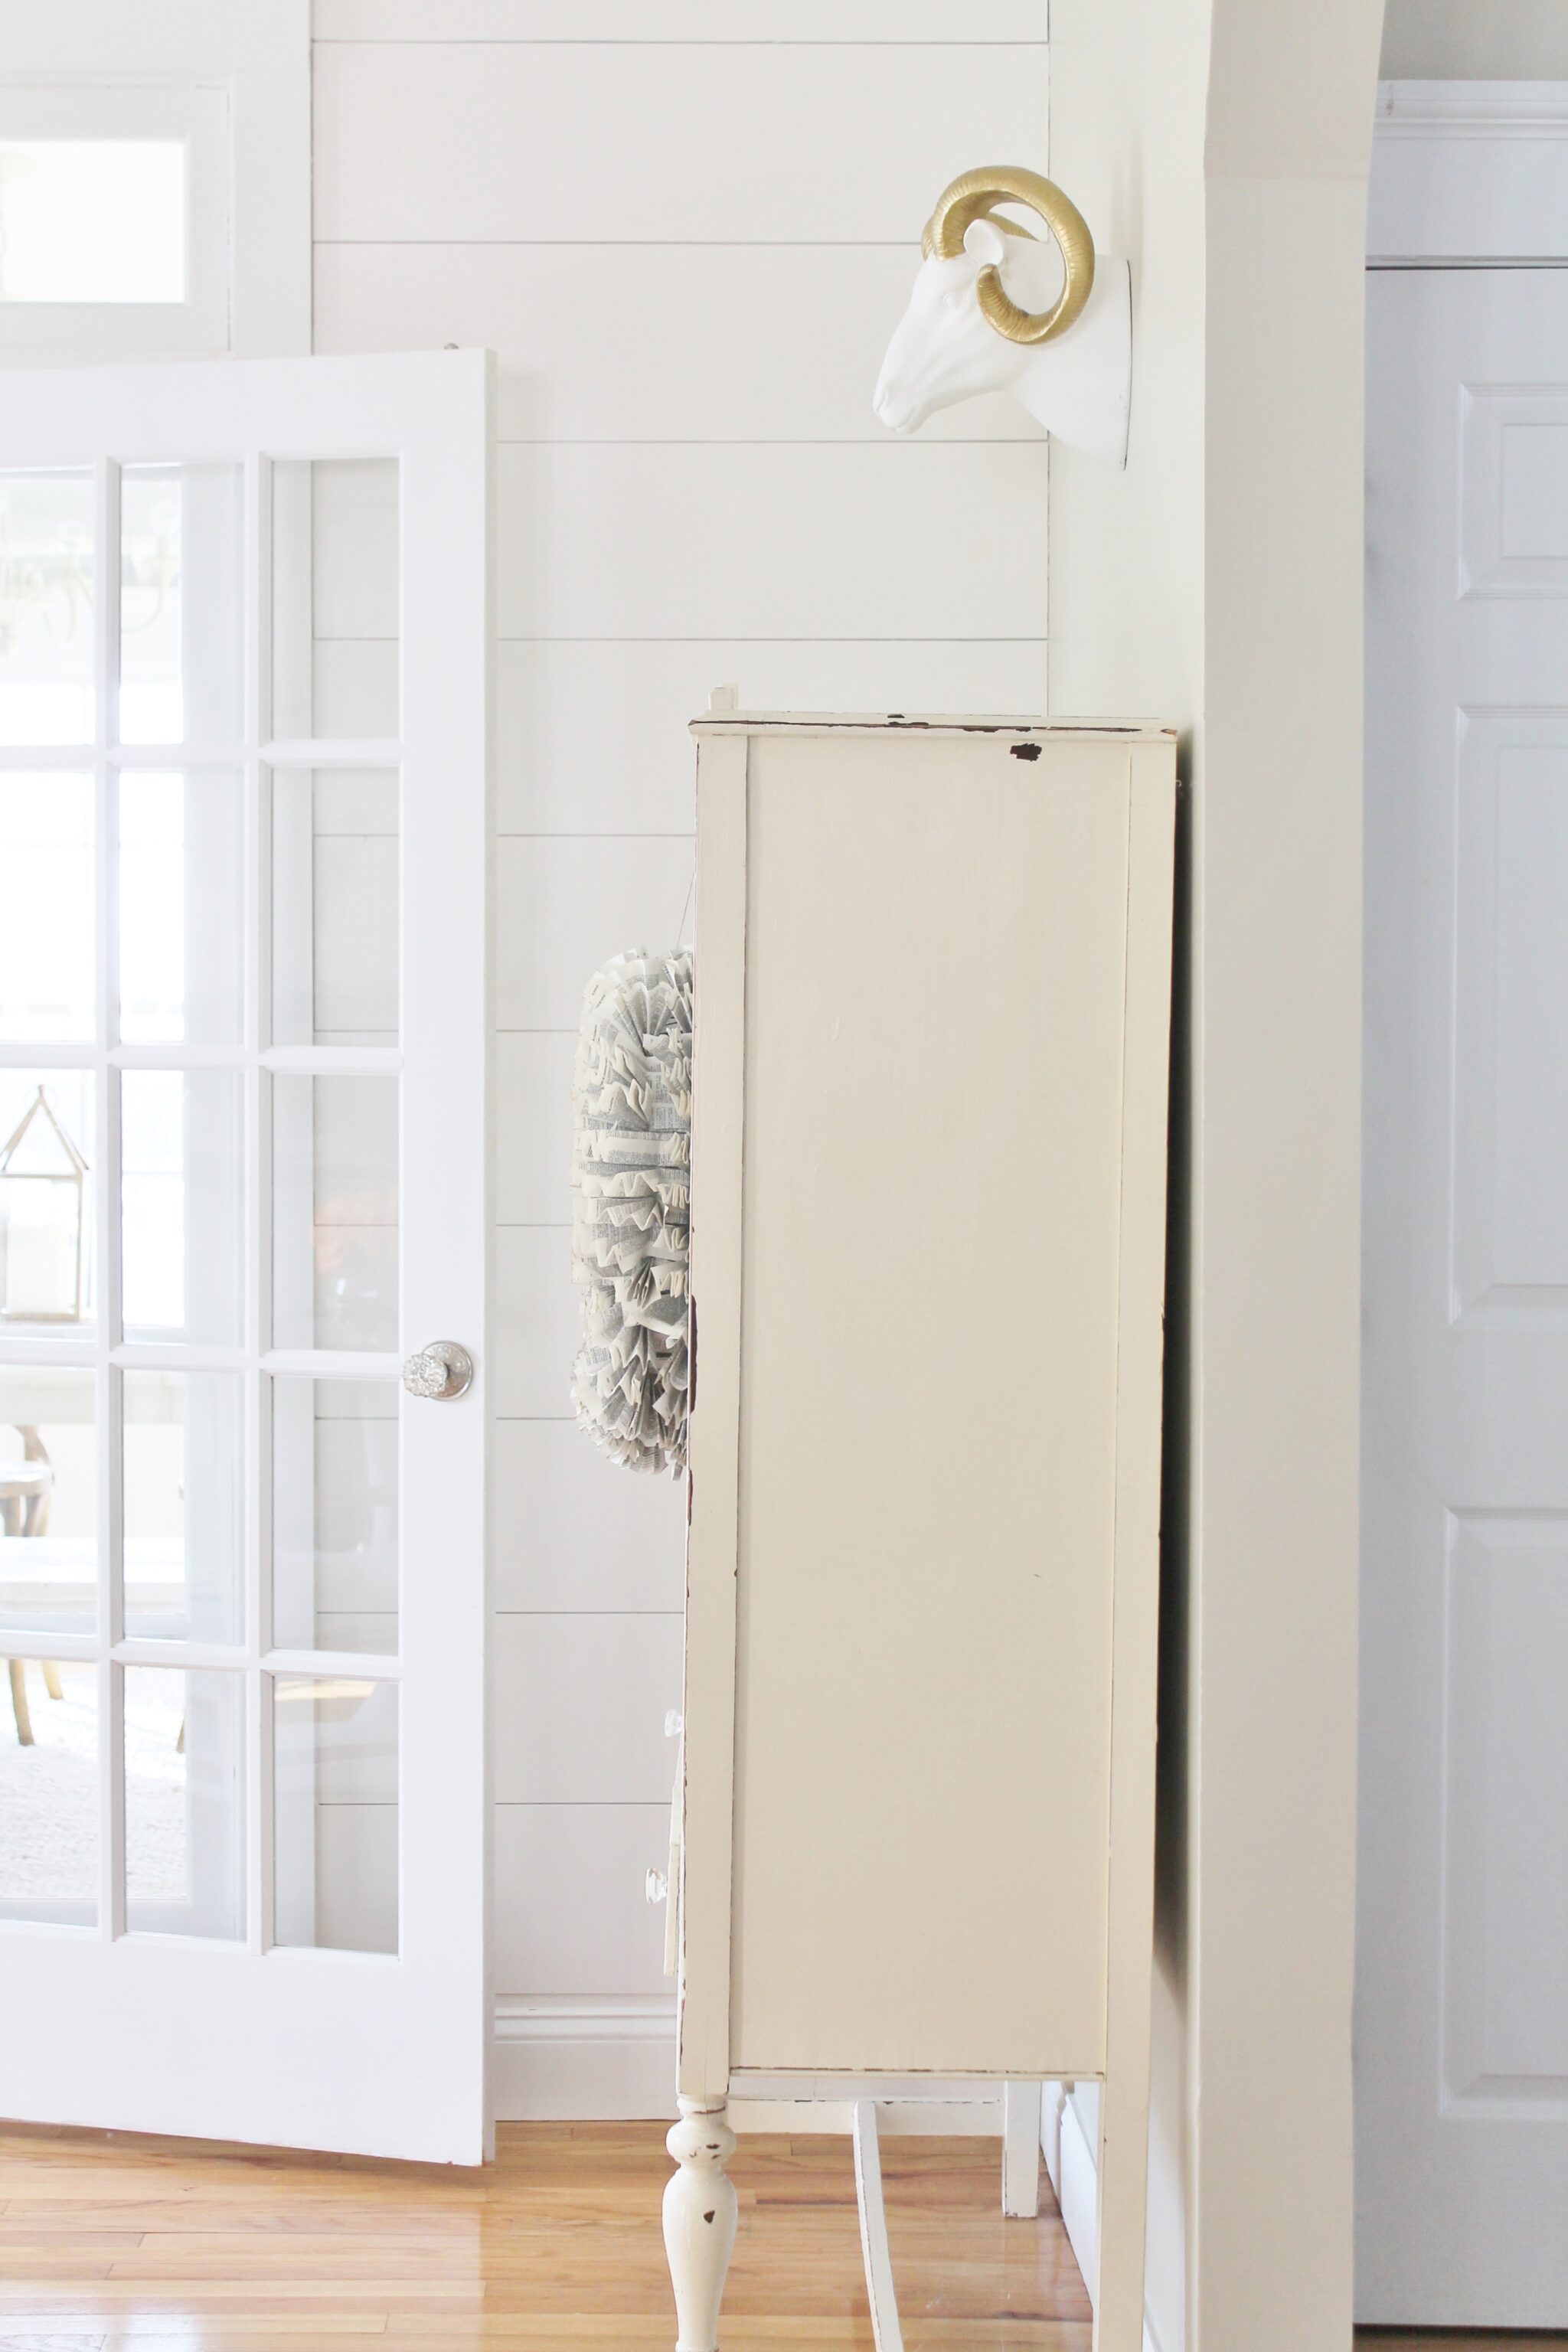
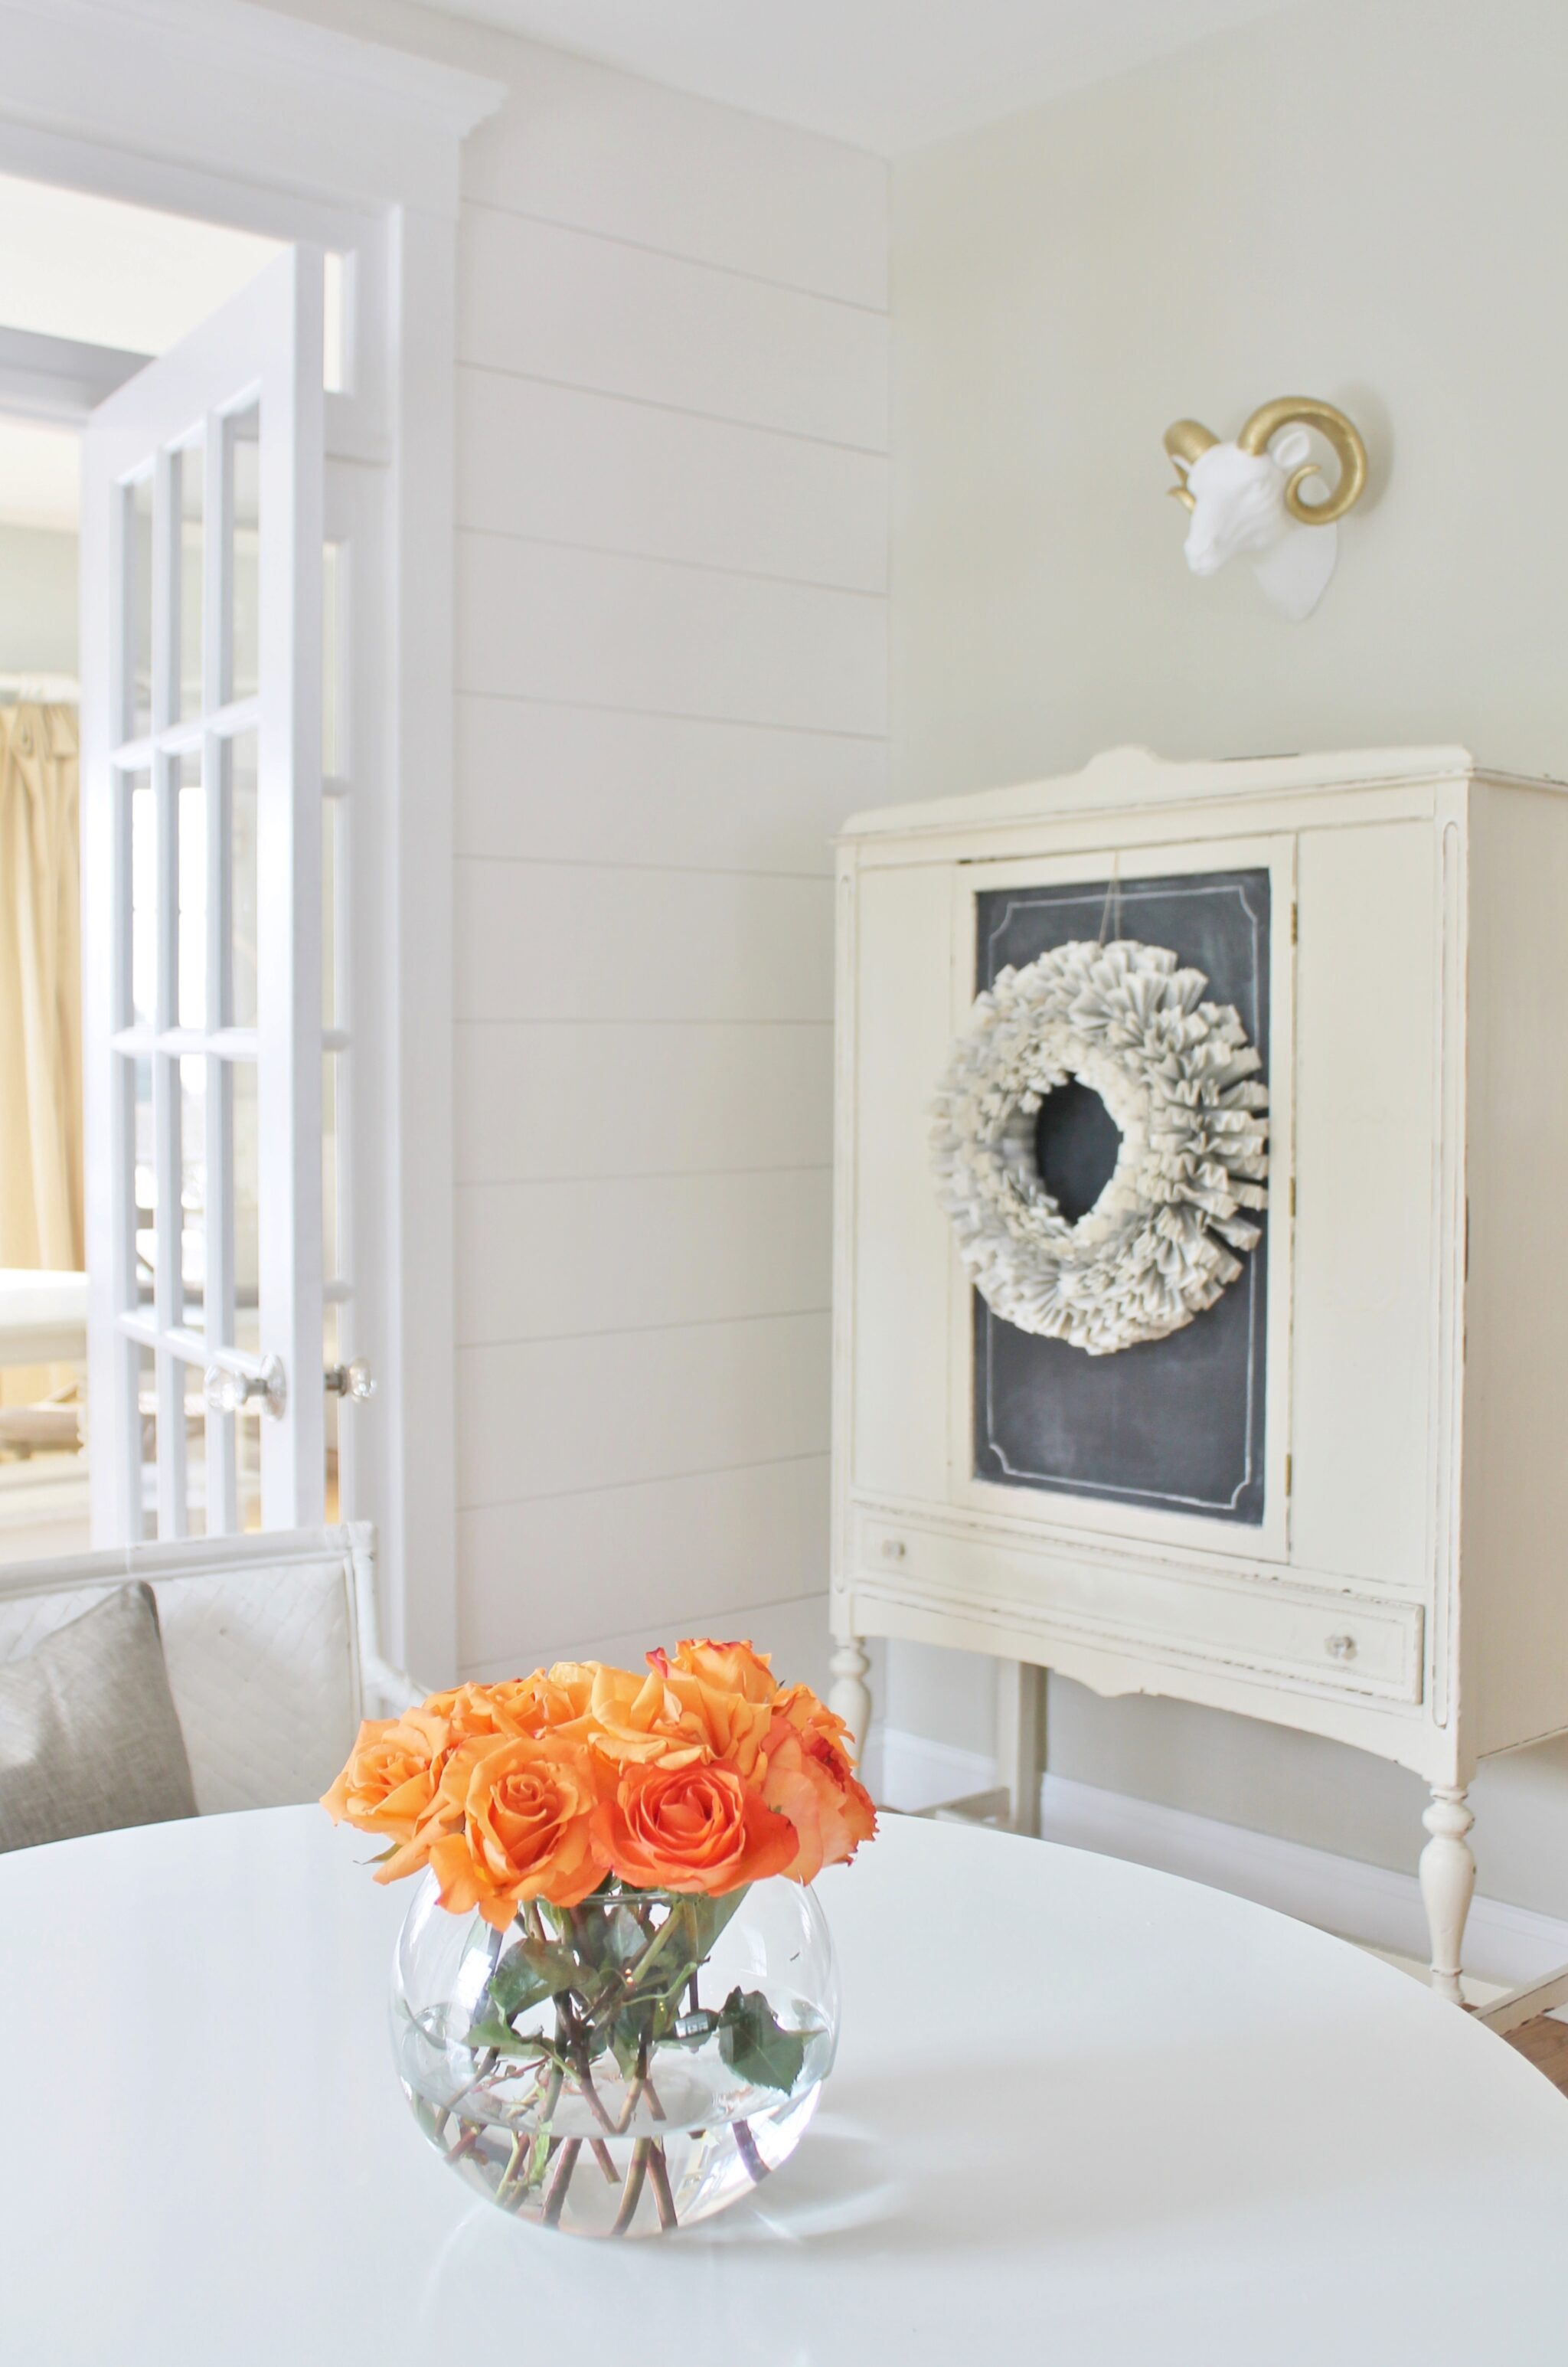
Hi friends! I know it has been a little quiet around here, I have been busy working on my kitchen. Do you ever get to a point with your home that you have so many things to do that you let some bigger projects {that maybe give you anxiety at the thought} go? Well that has been my kitchen. When I first saw it 4+ years ago, it was love at first sight but after moving in I had this grand idea that the walls needed to have contrast with my cream cabinets. So I went dark and liked it for a few months & then of course I wanted to change it. I kept the color for 3 years, yikes! It was such a pain to paint, to get behind the cabinets I had to squeeze my head at an angle, it was tough needless to say. So I waited & waited and FINALLY last week I went for it. I painted the kitchen Valspar Oatlands Subtle Taupe {more to come} and created a planked wall {Valspar Oyster} leading into my dining room. I have wanted to do this planked wall for years but was scared I would either mess it up or would have to invest big $$$ in buying power tools to do it. Well I was wrong! I am so excited to share with you the EASIEST way to create a planked wall-using minimal tools.
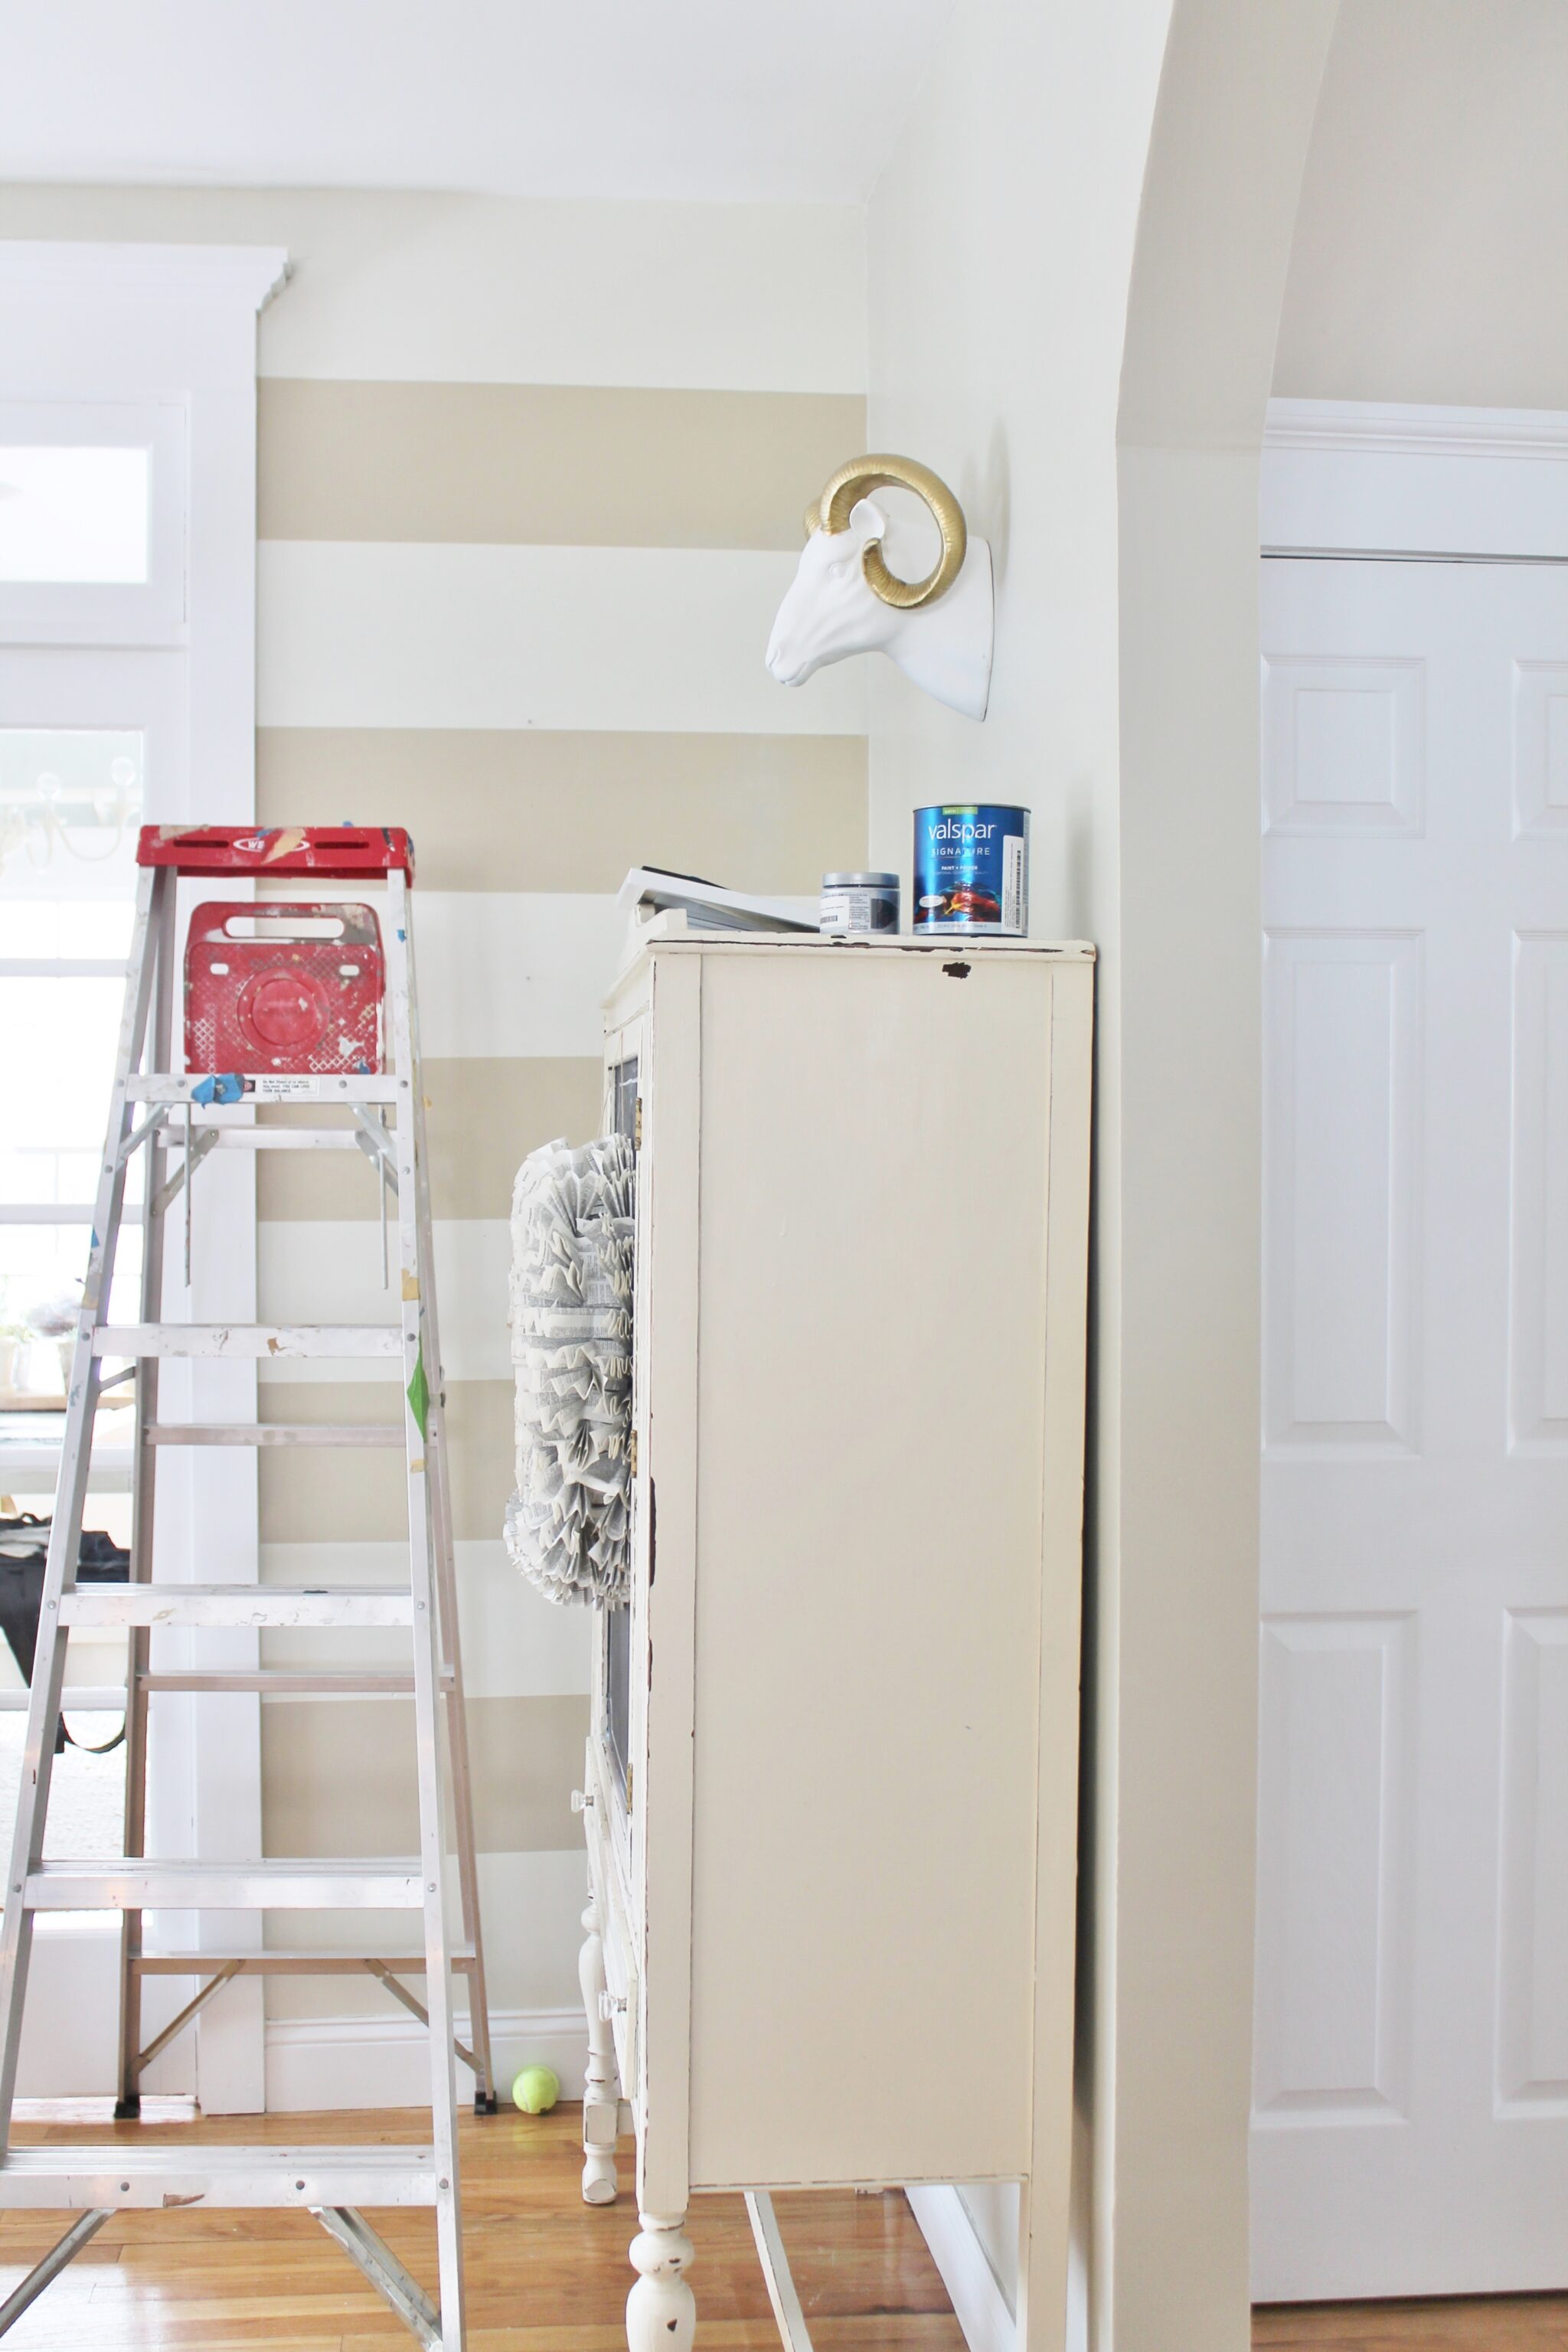
The Before…..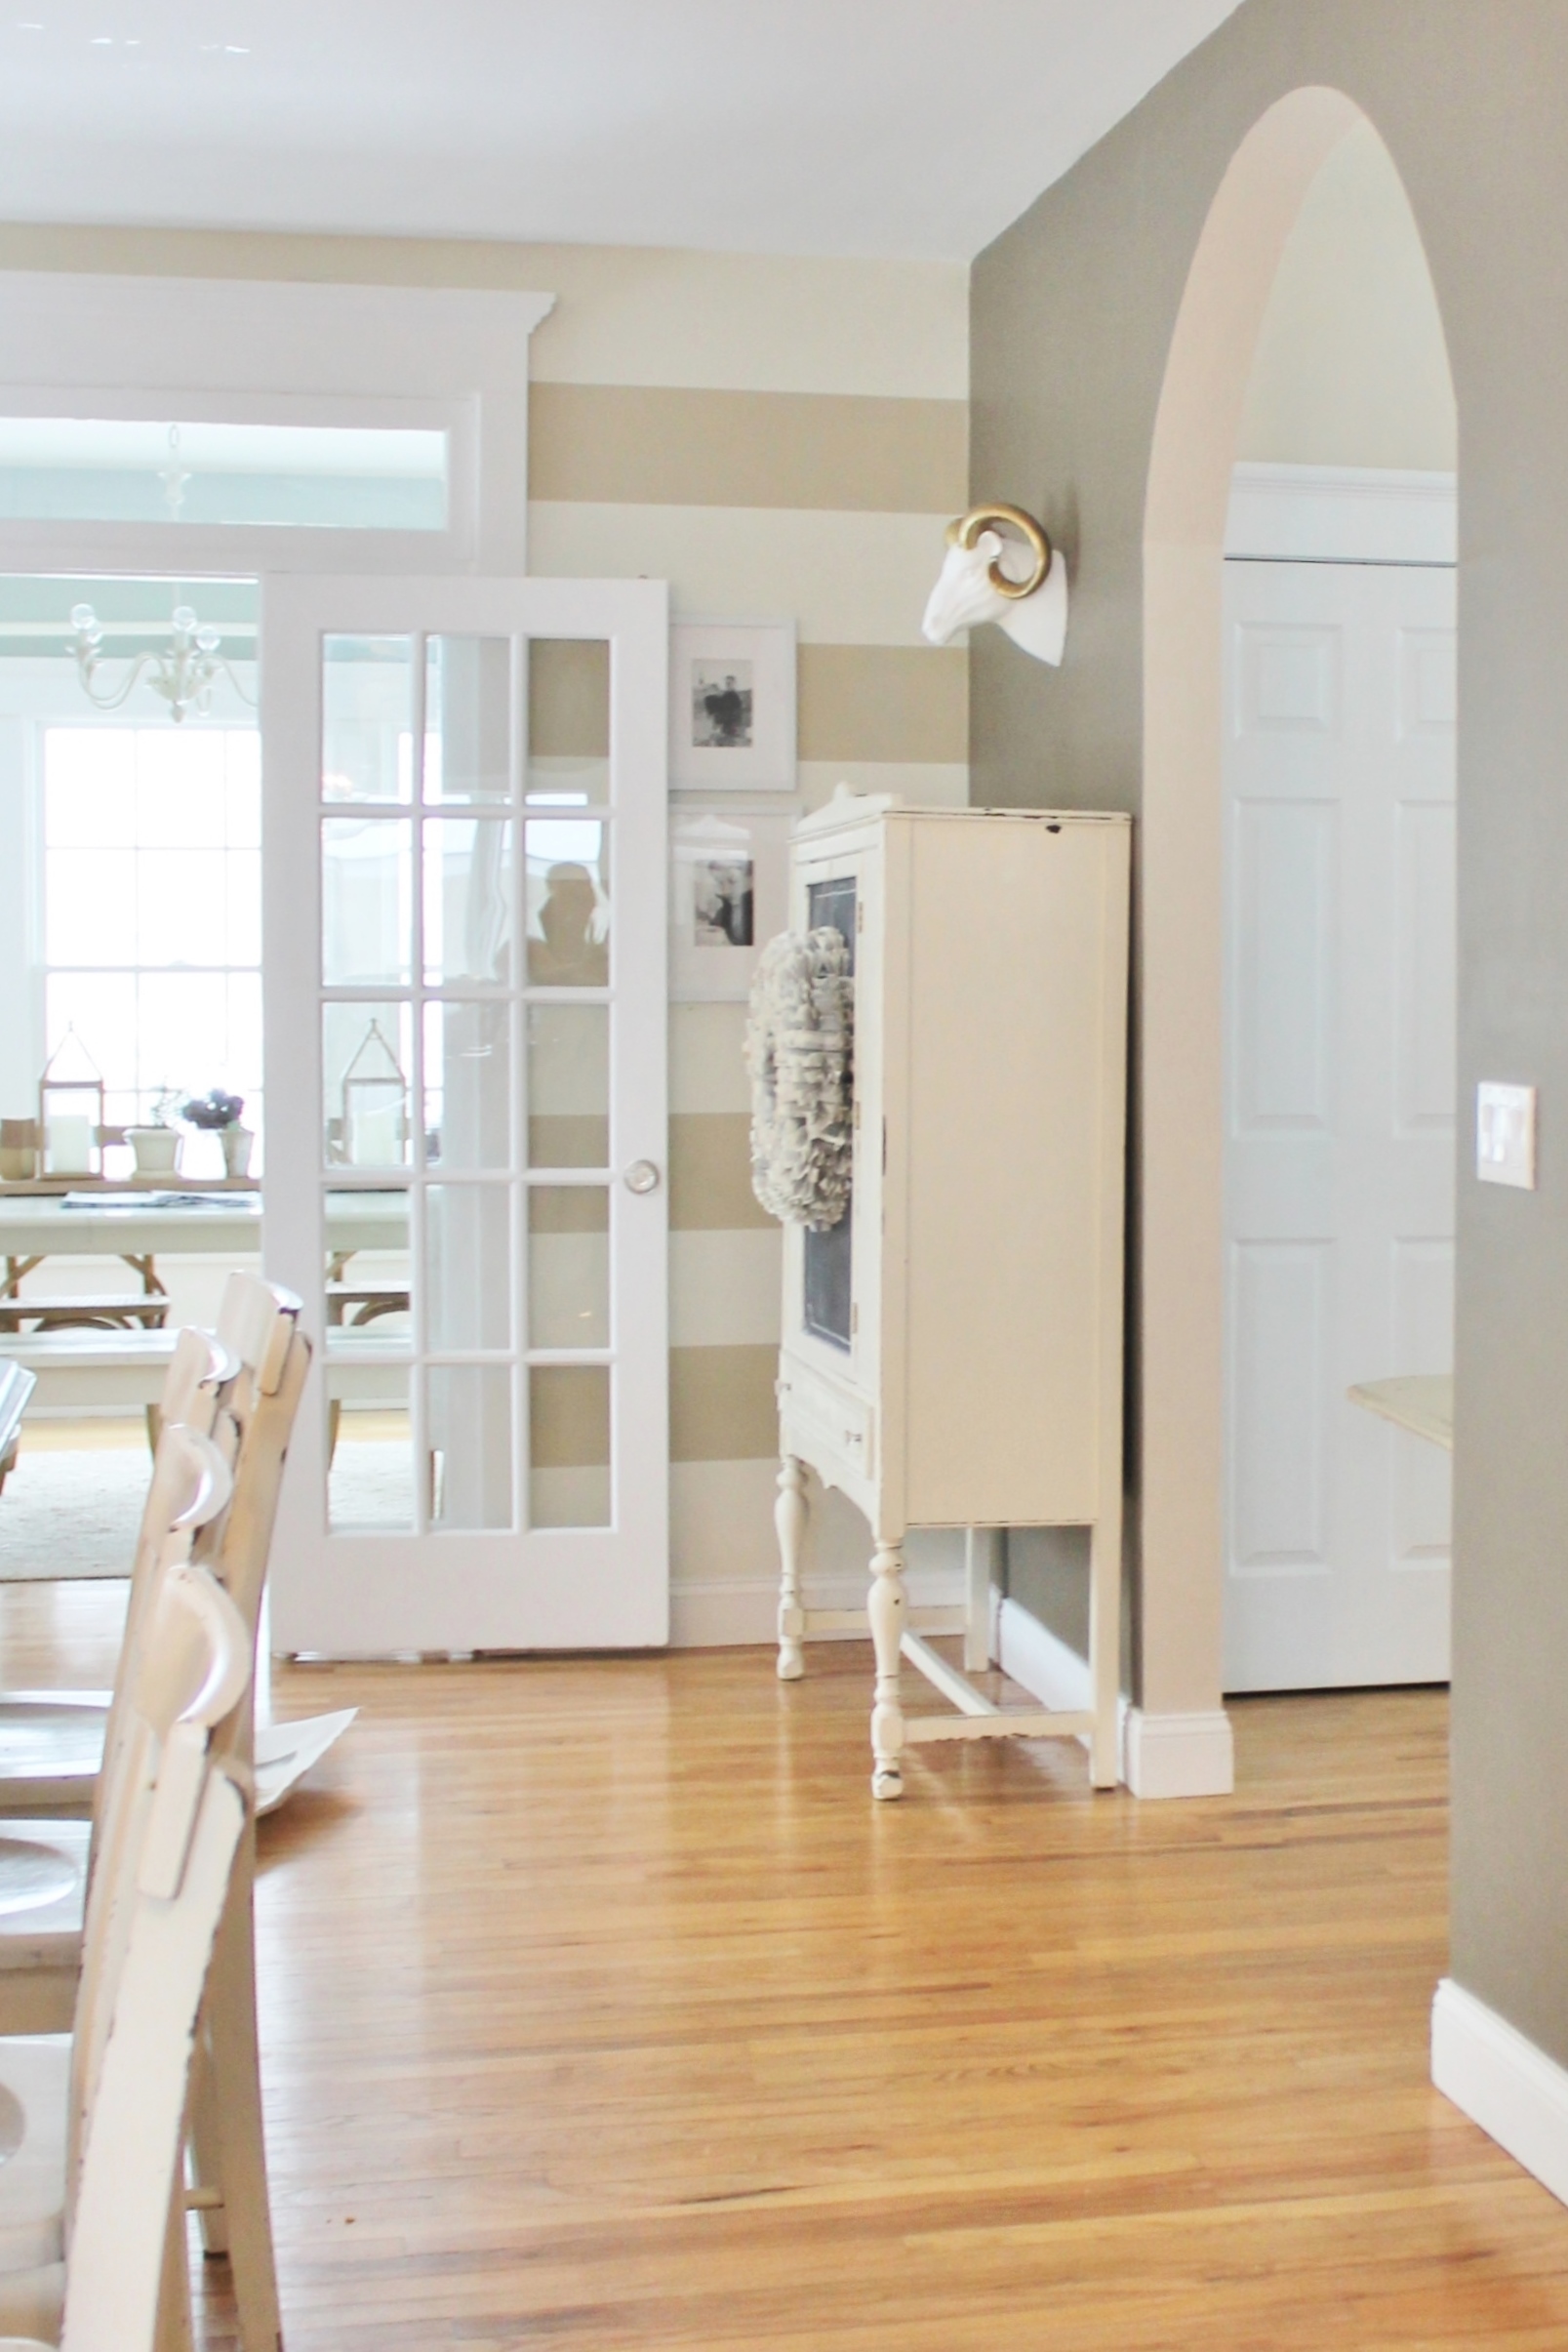
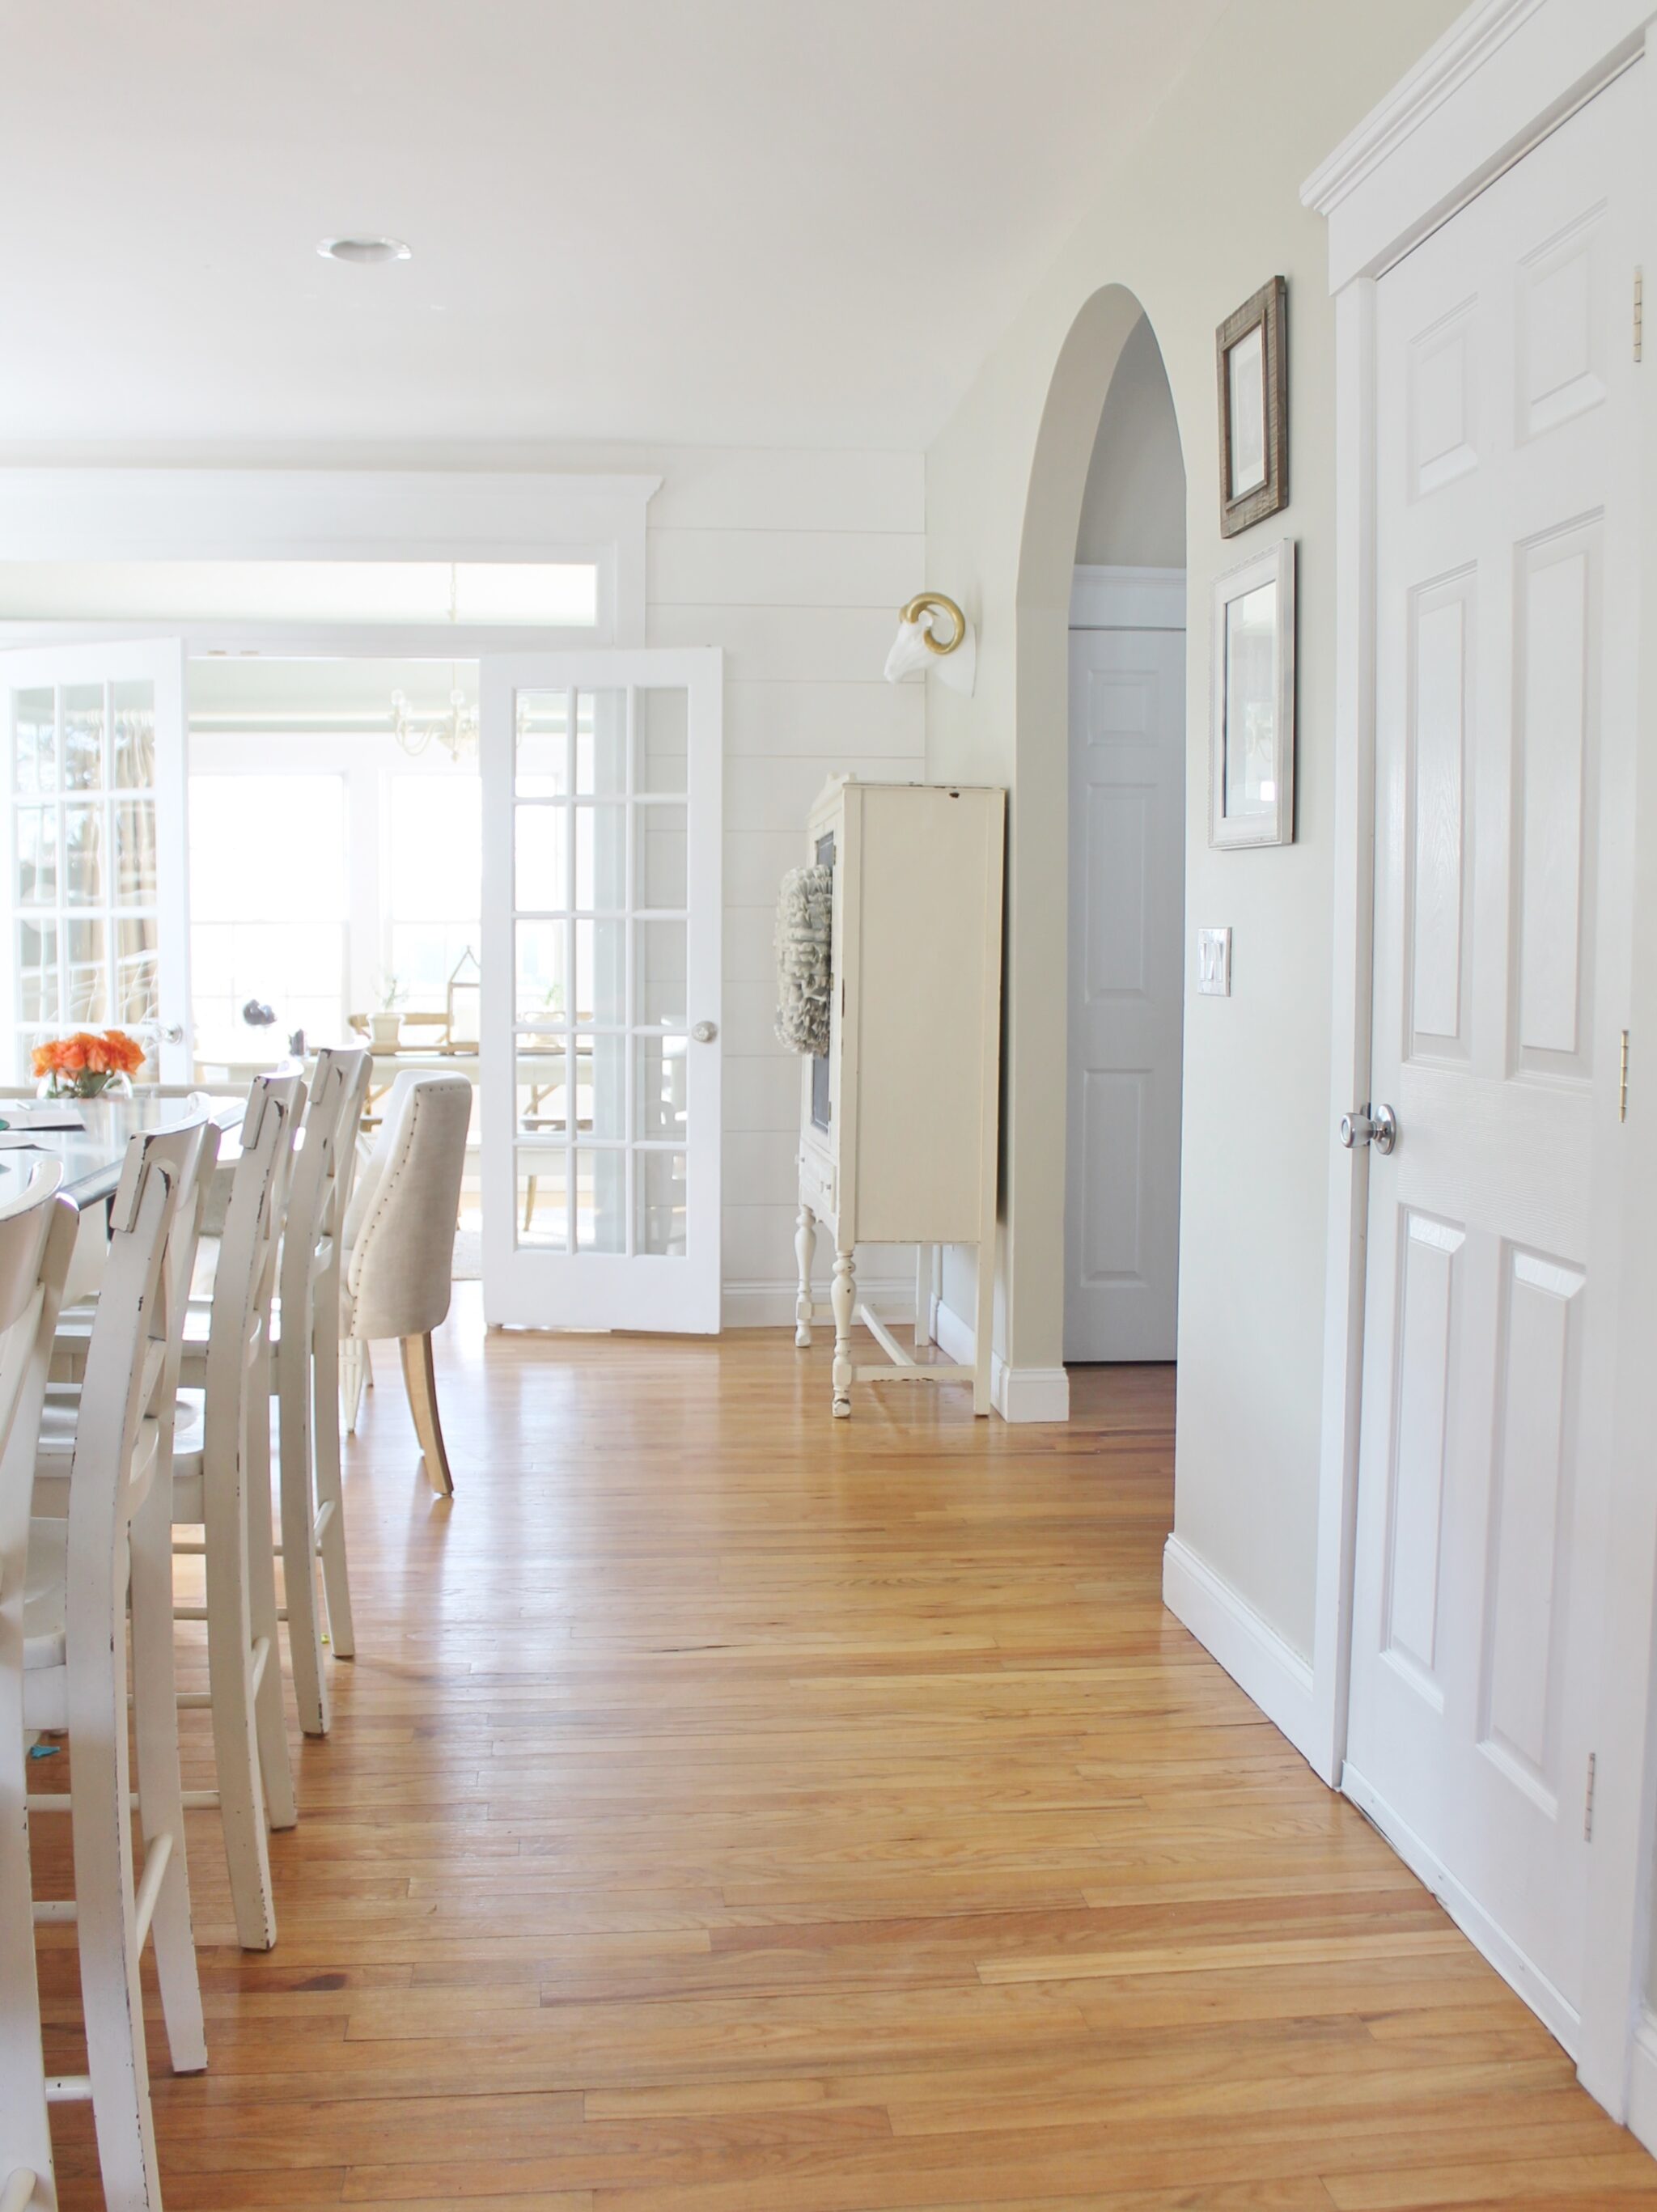
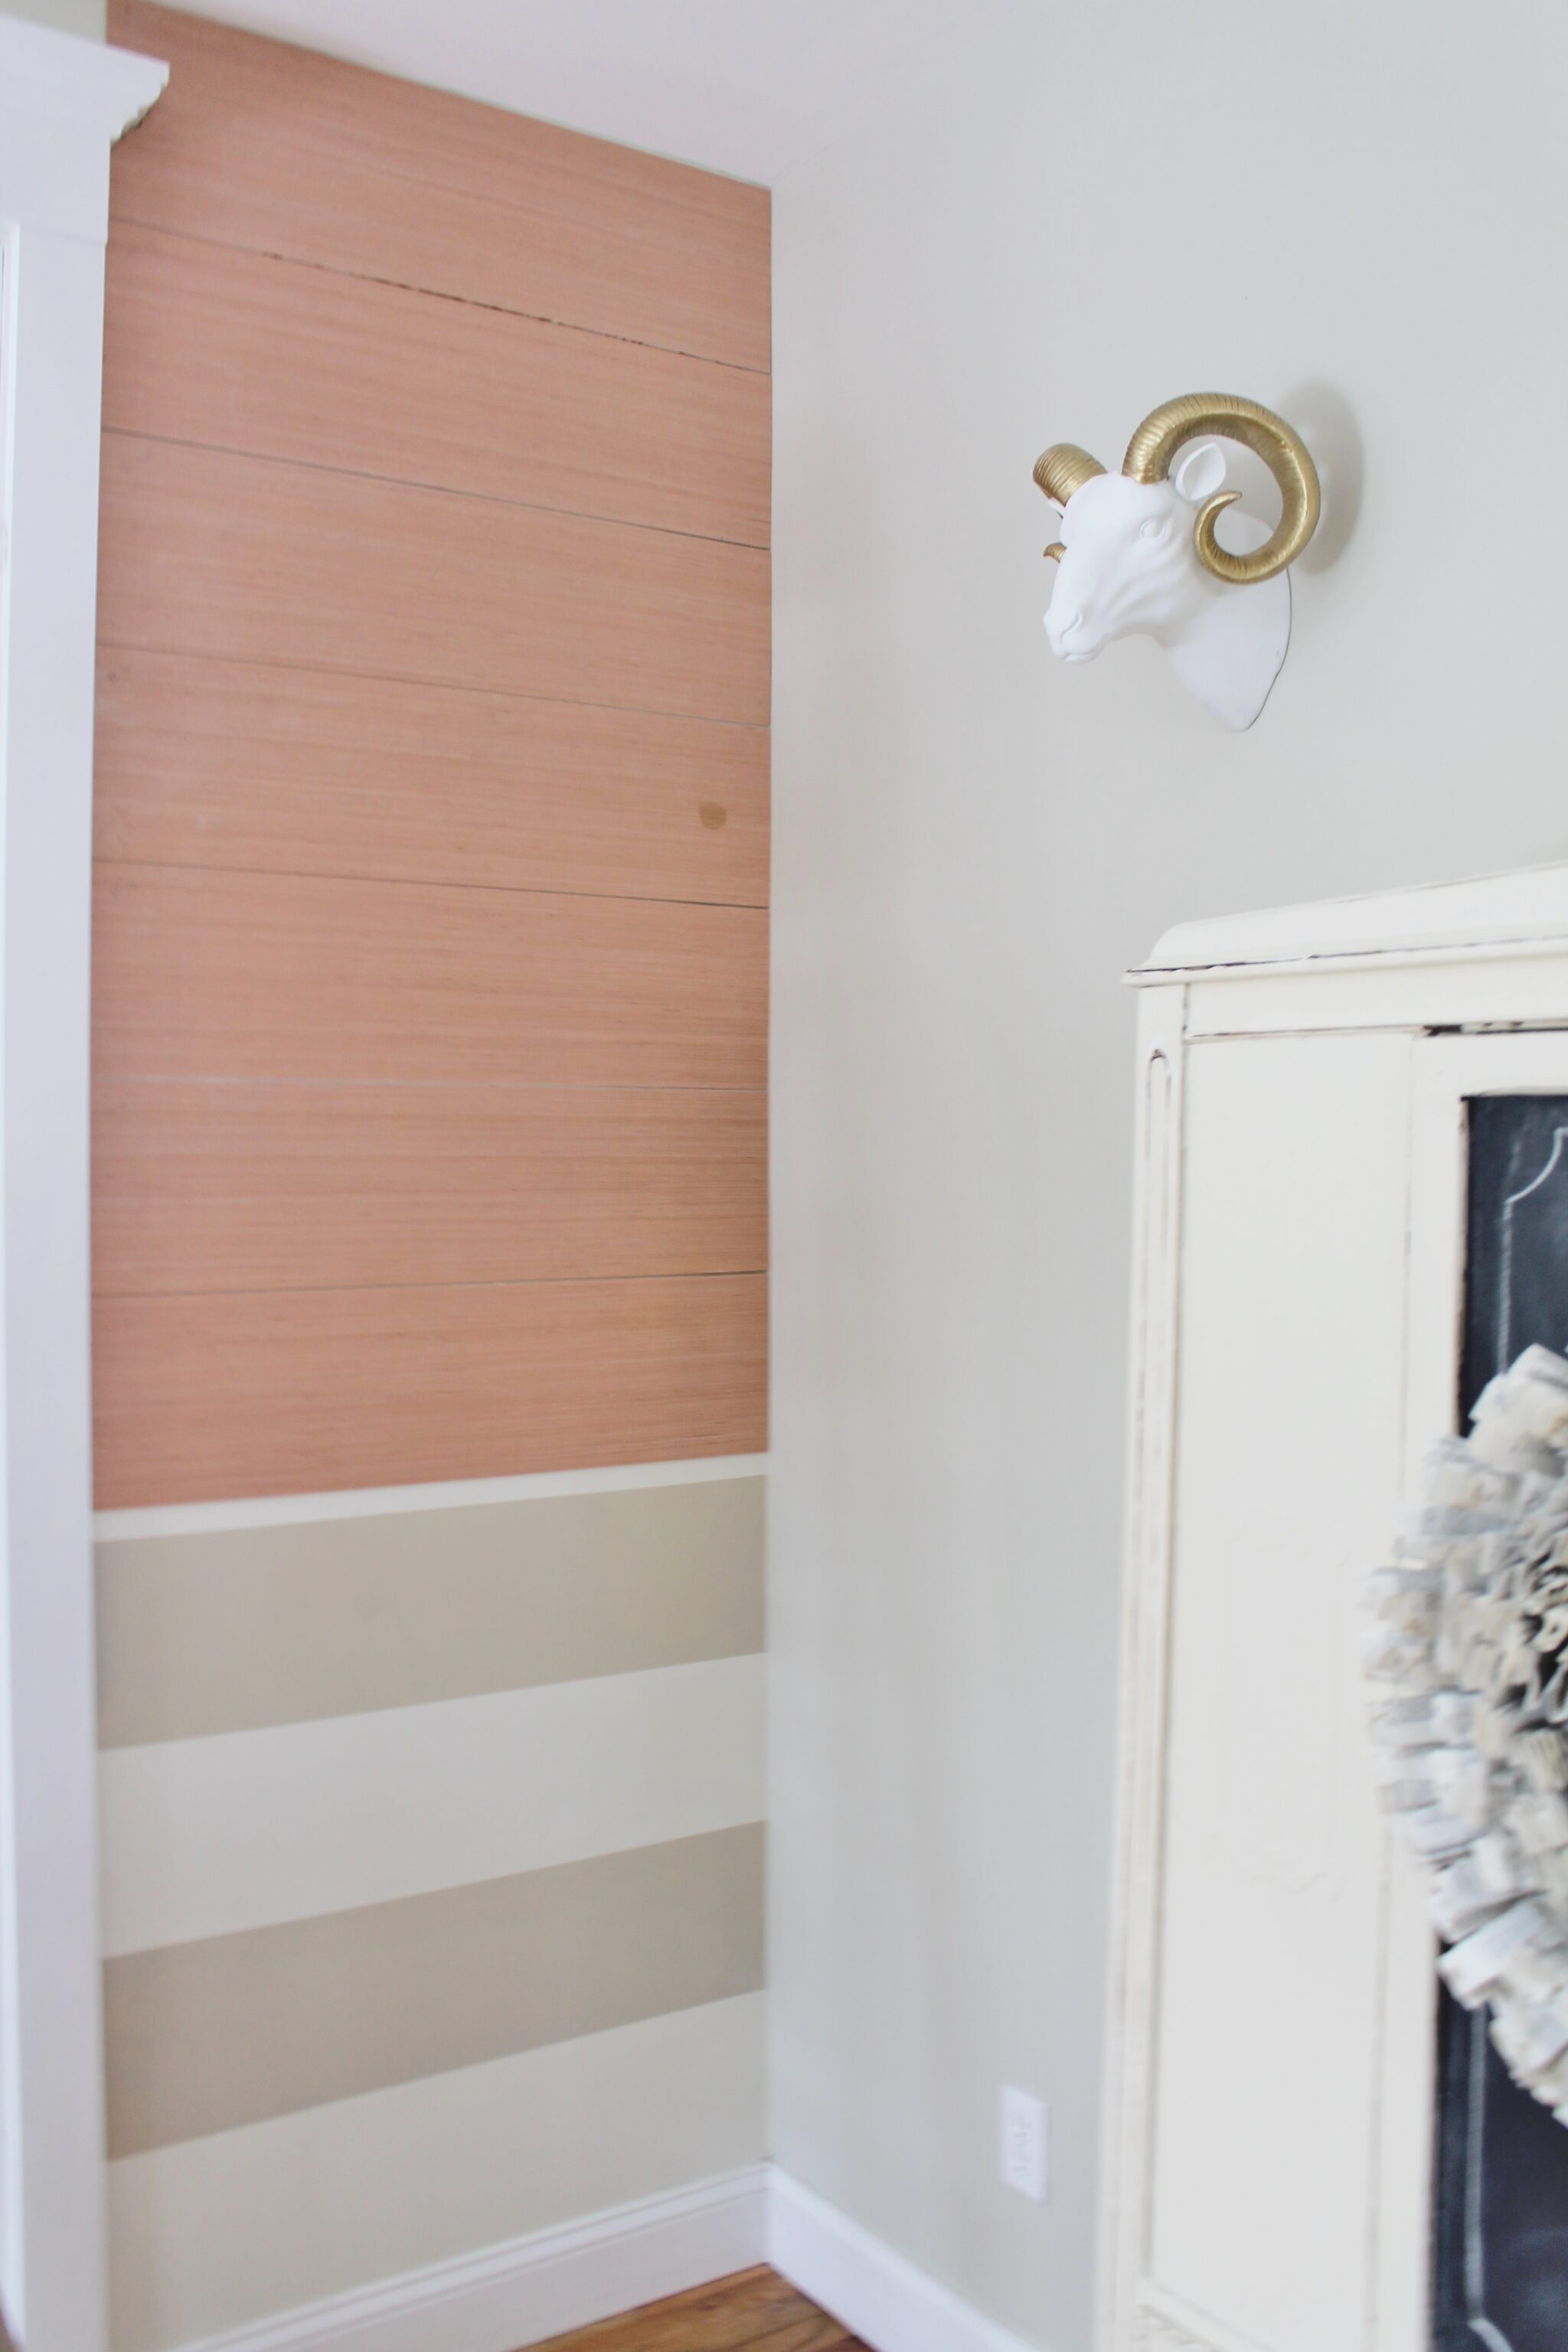
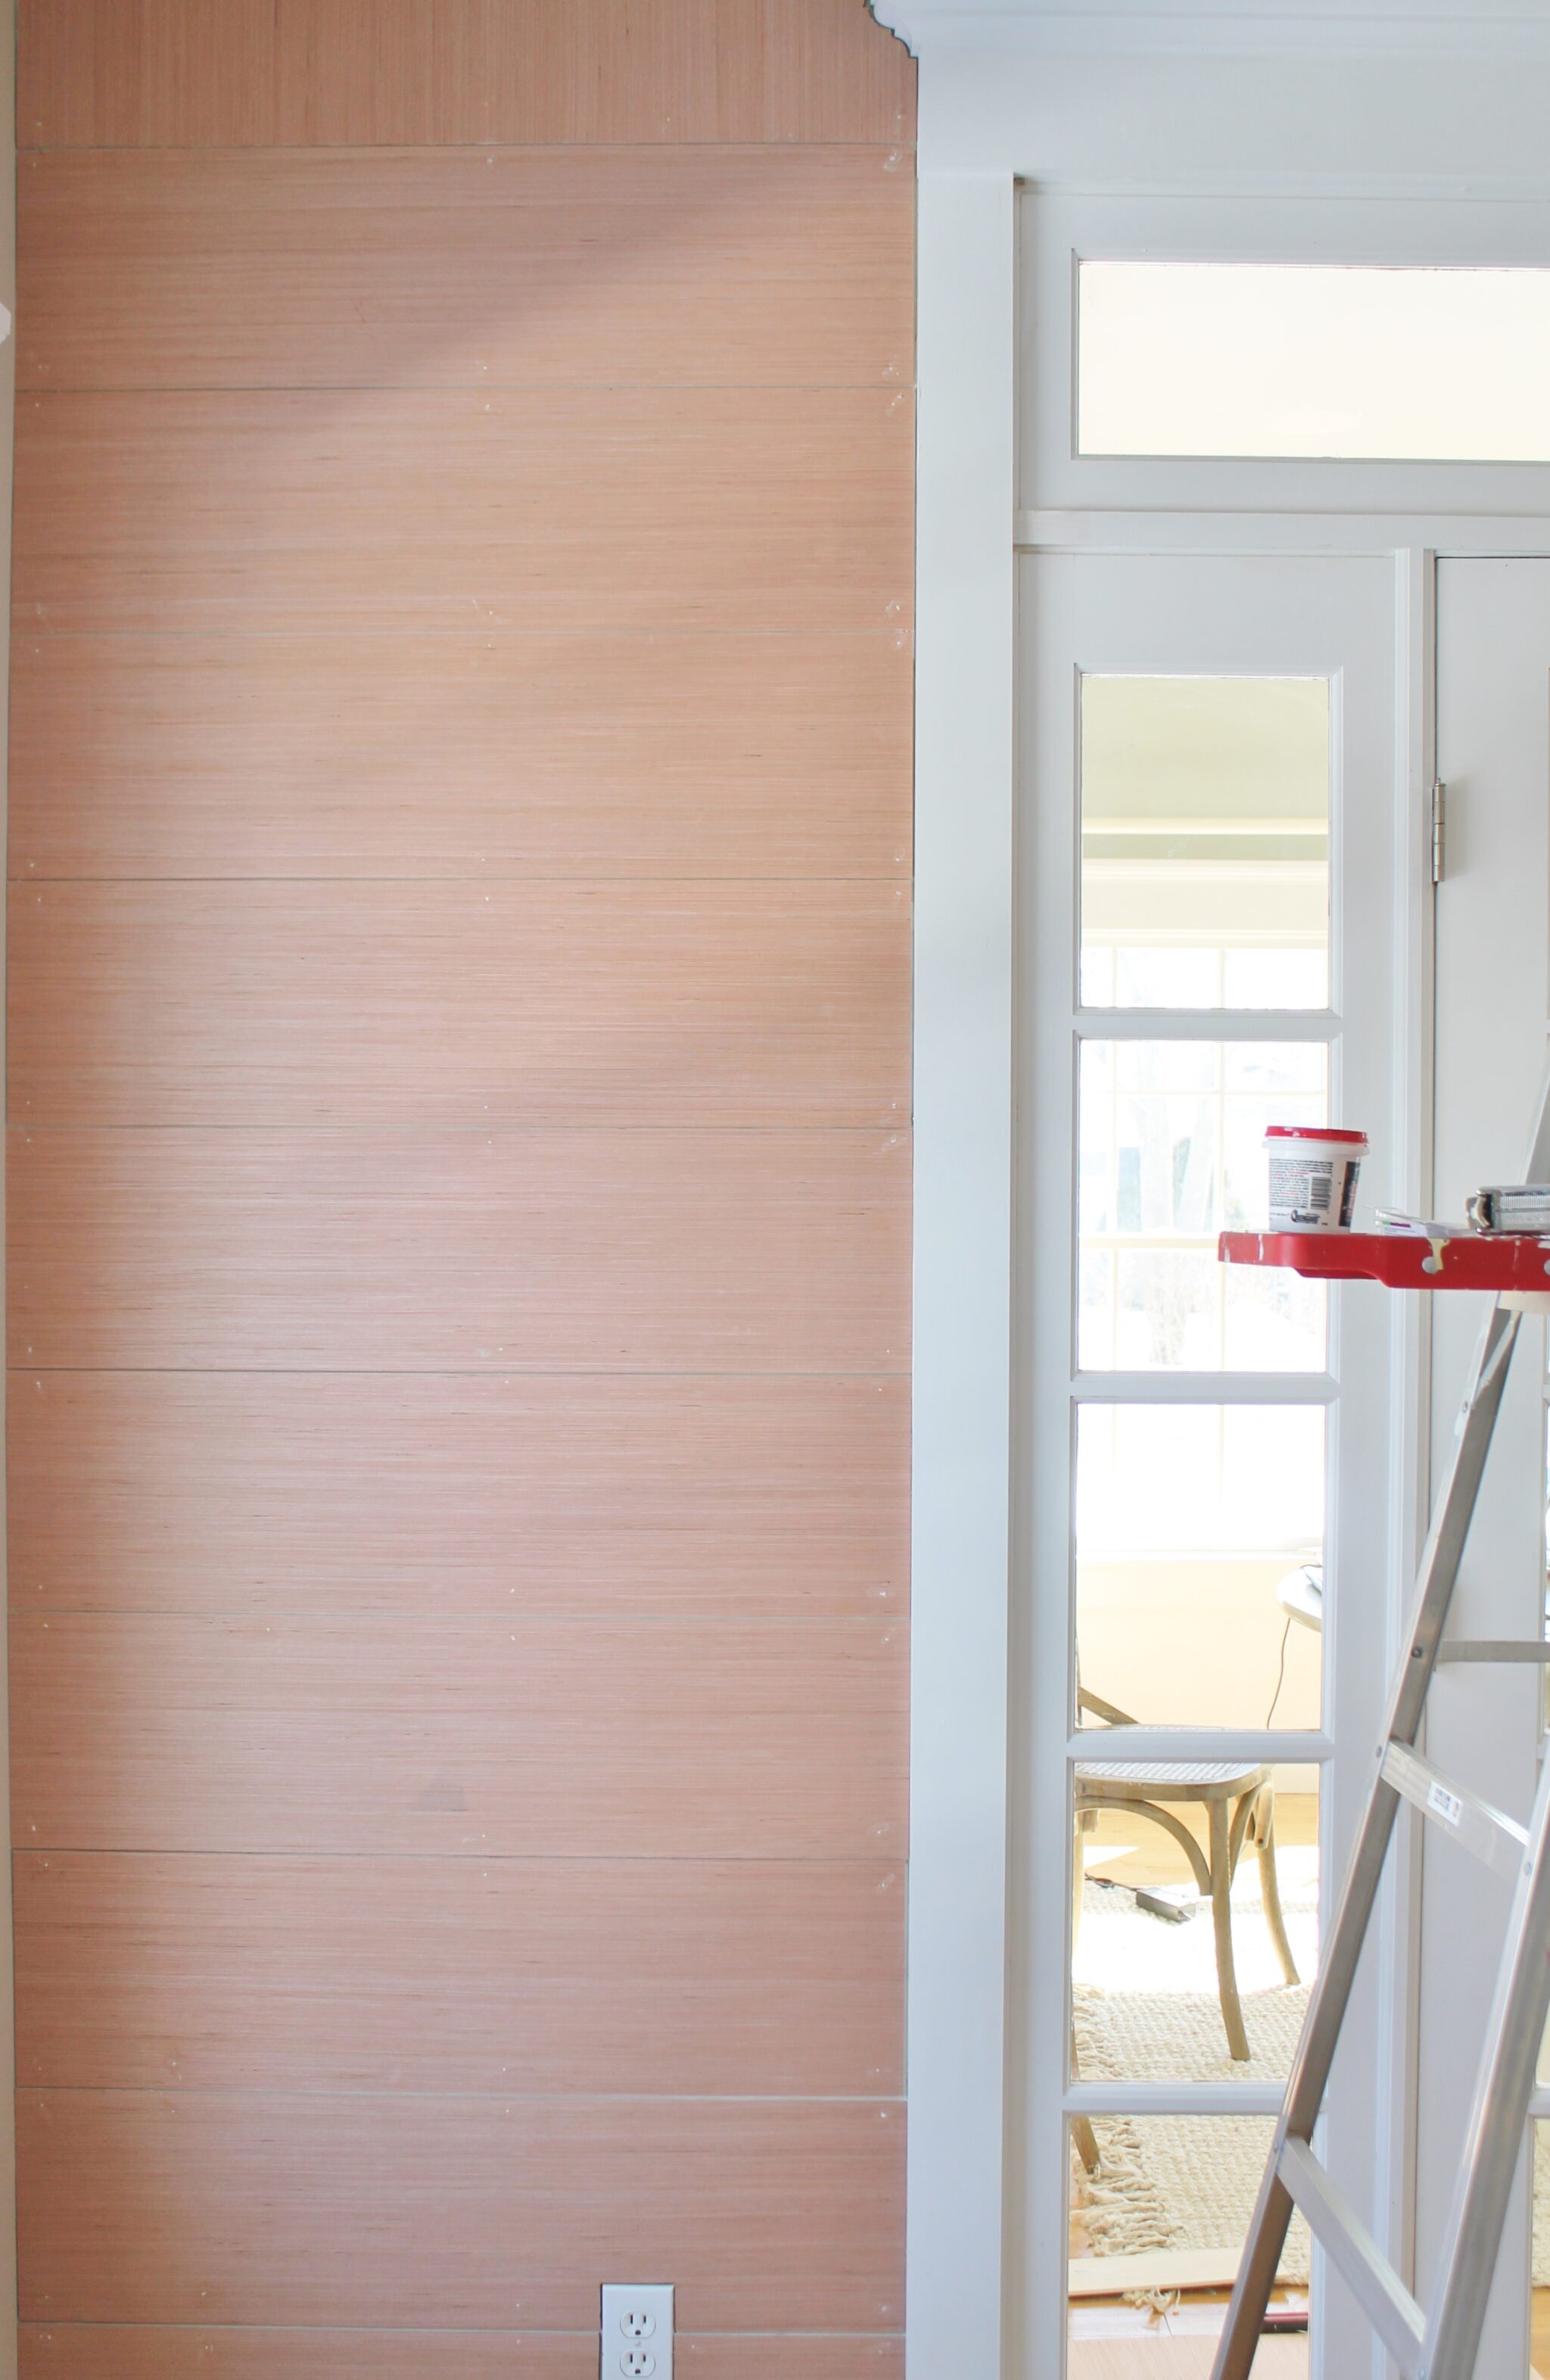
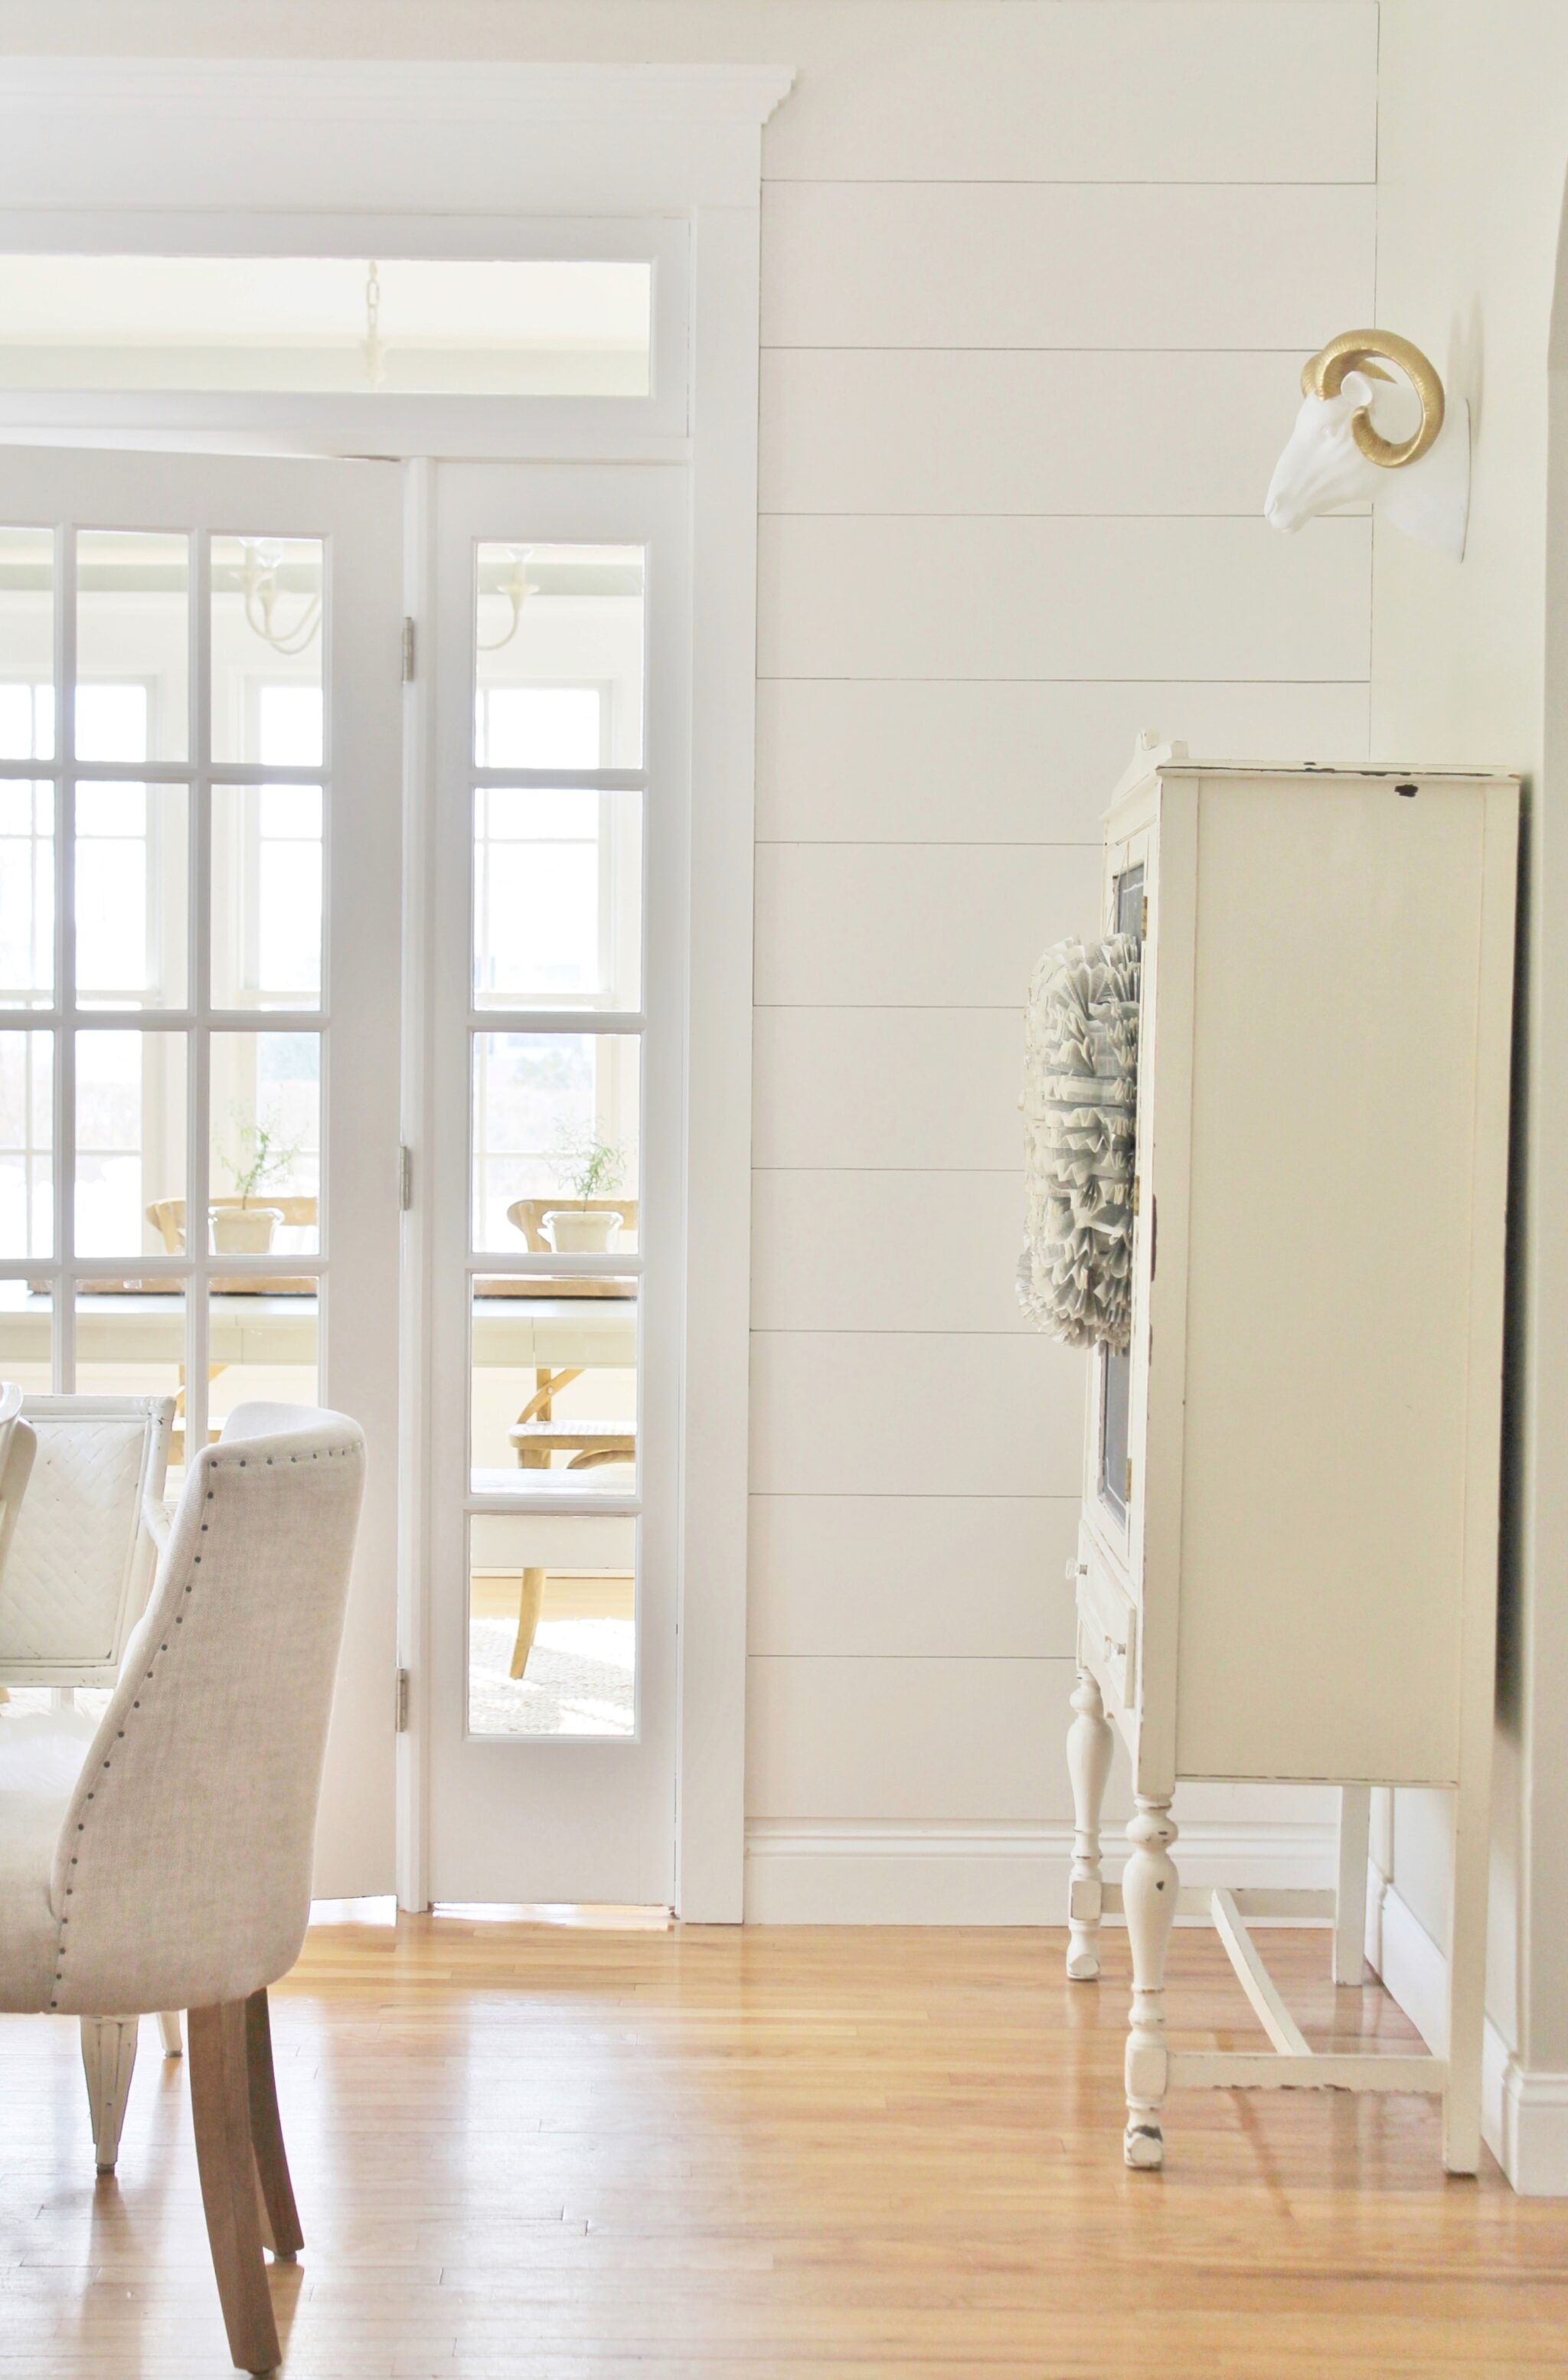
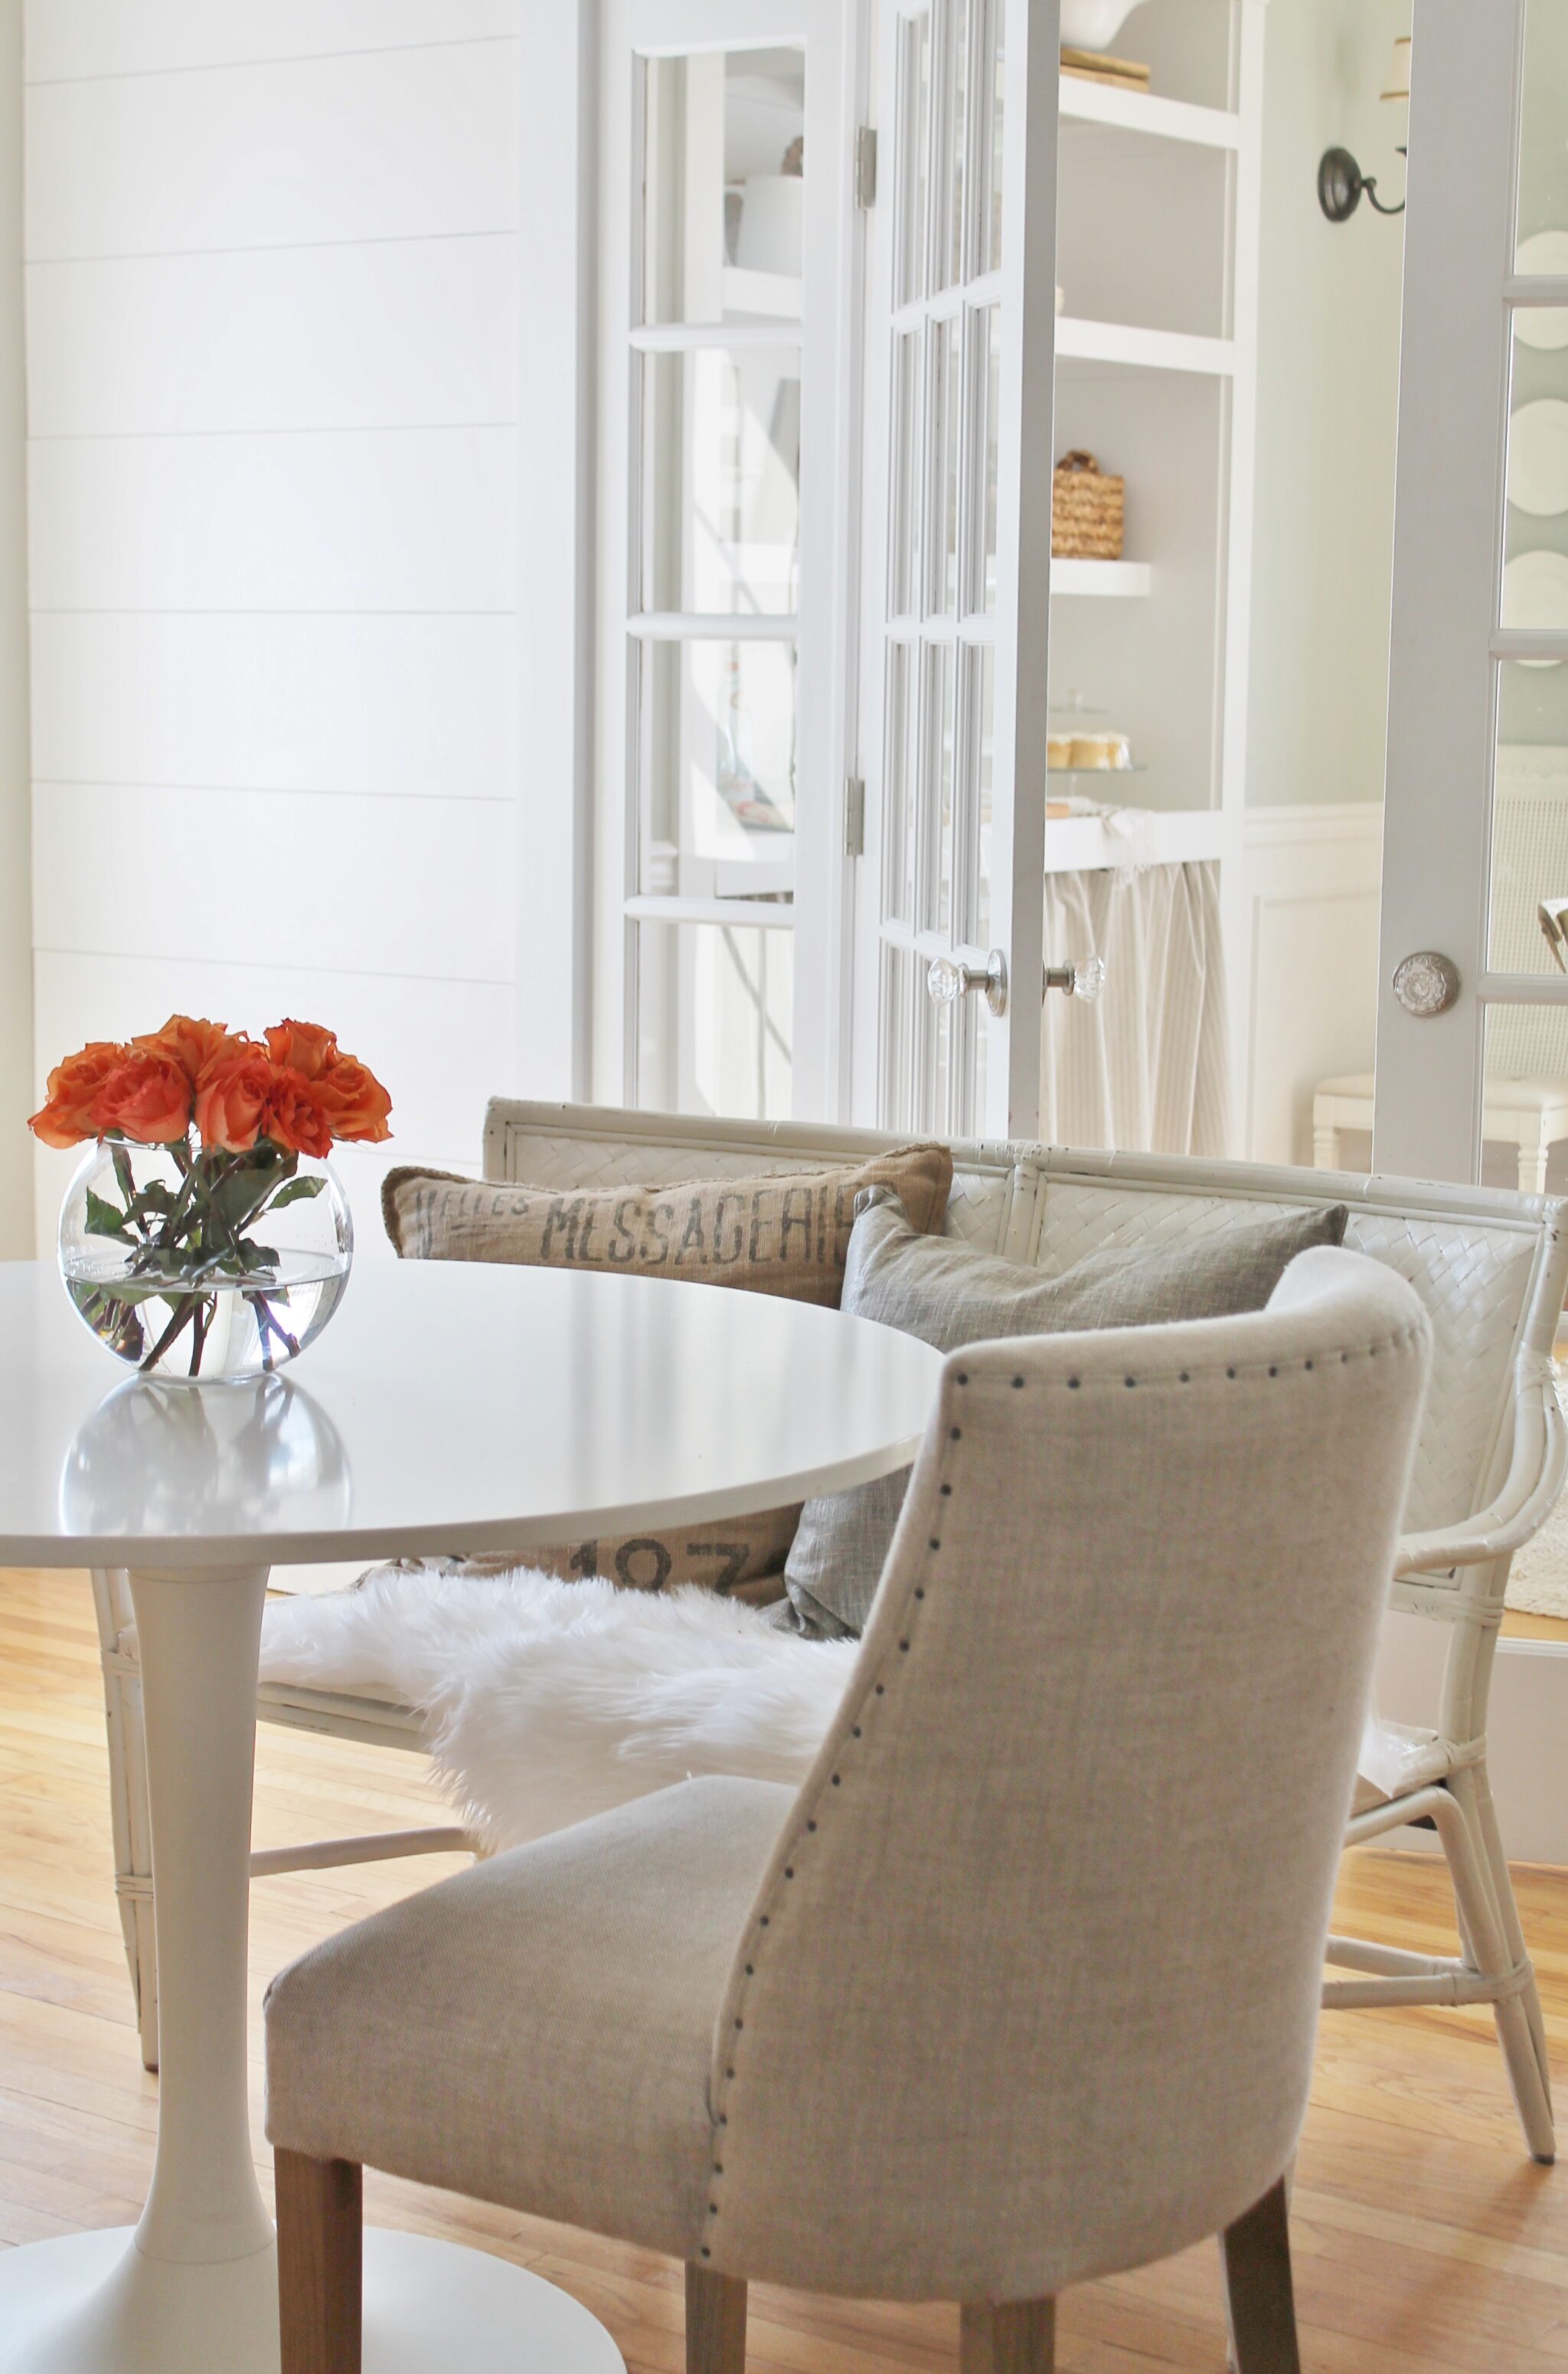
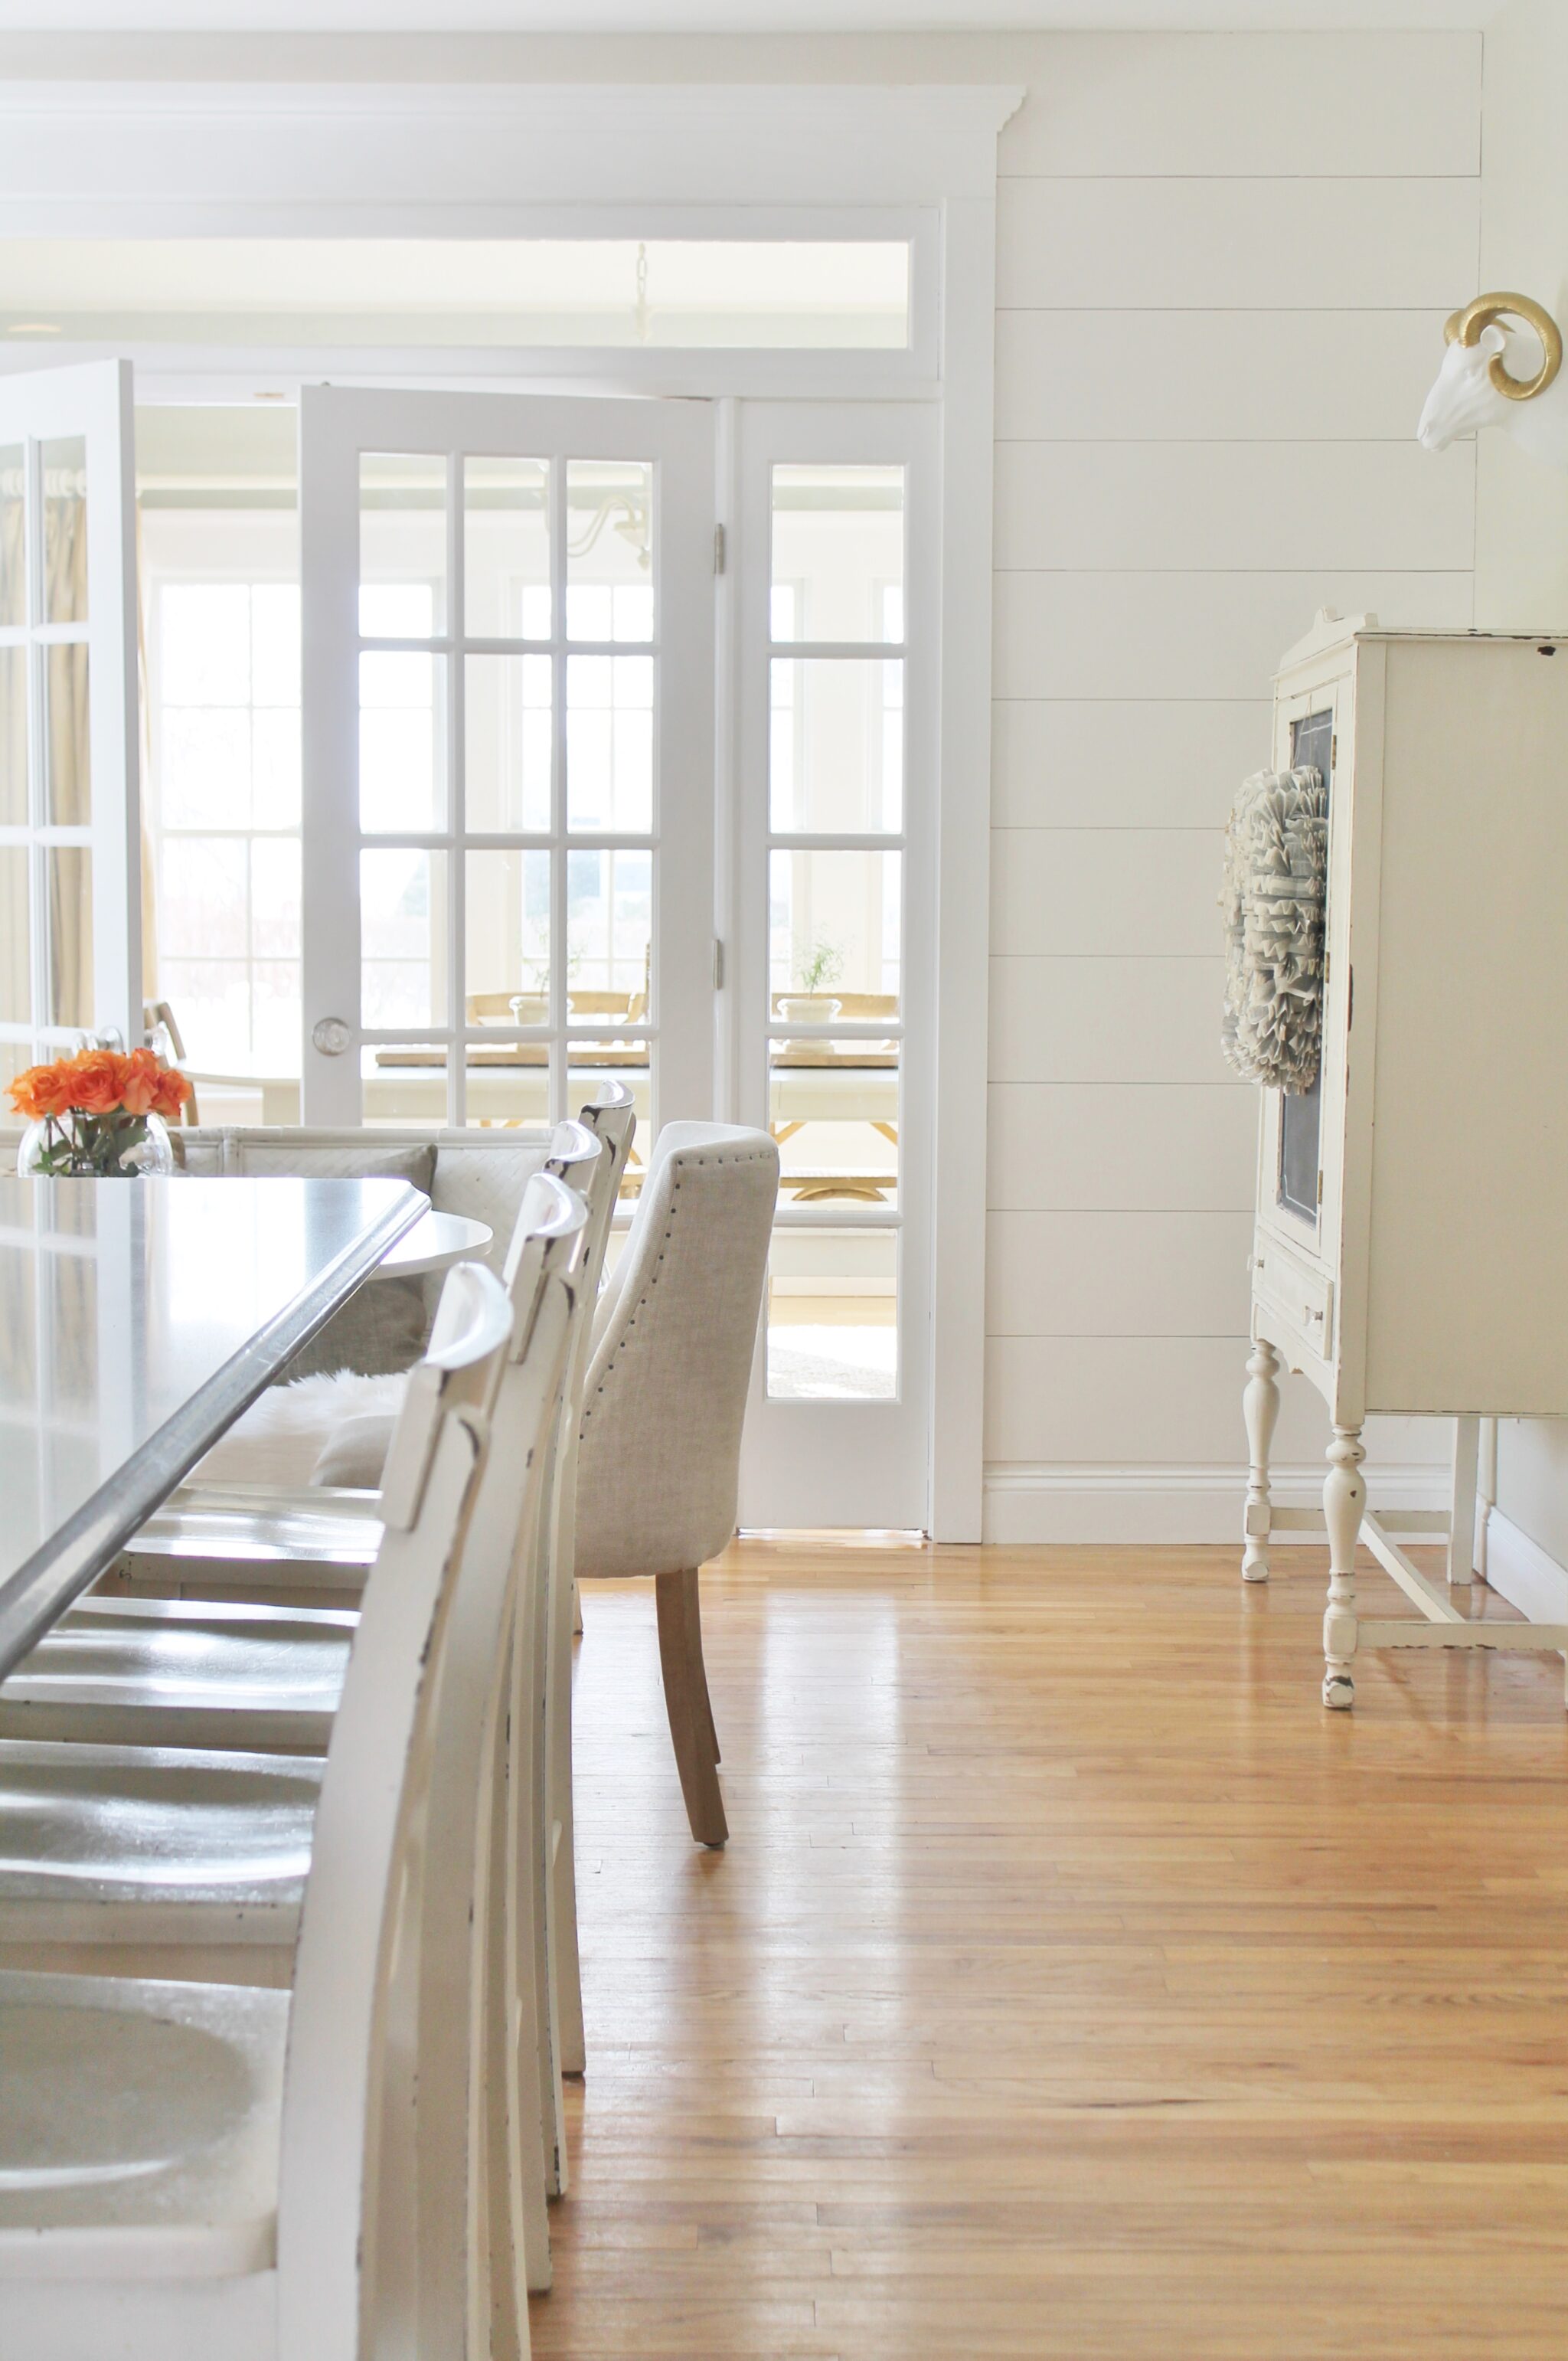
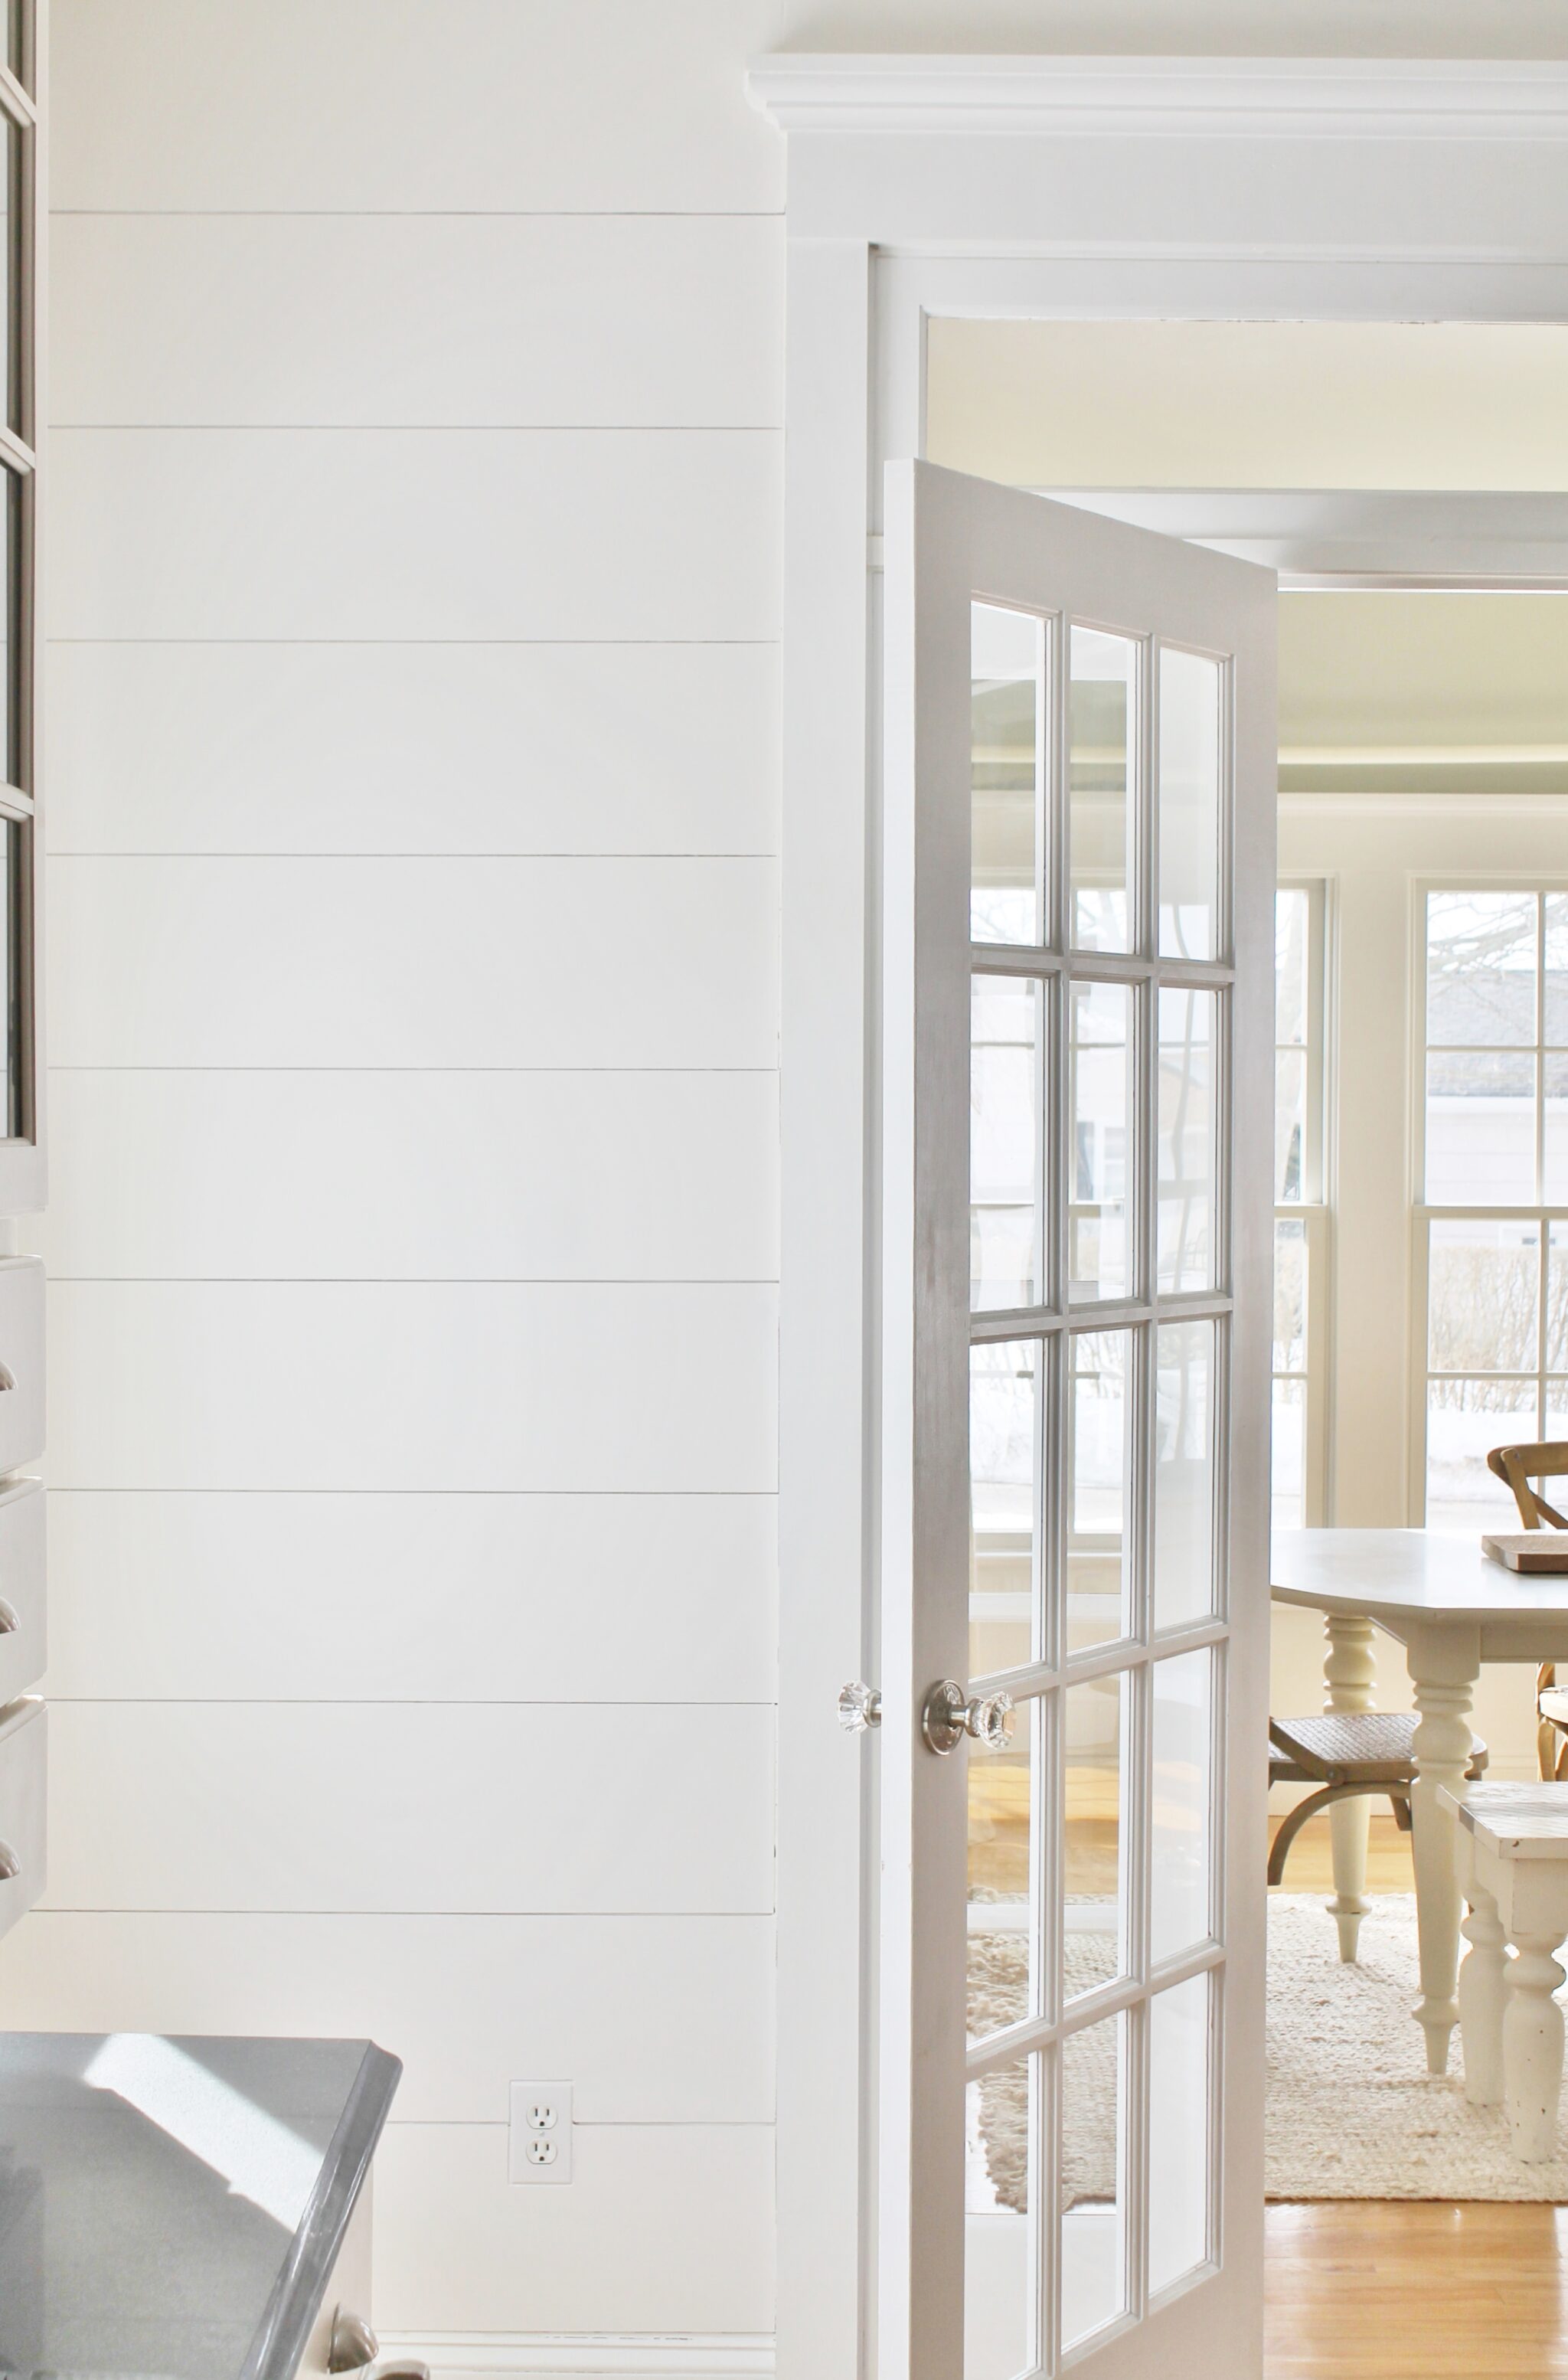
The After…..
I was able to do this planked wall and give my kitchen that modern farmhouse look for under $70!
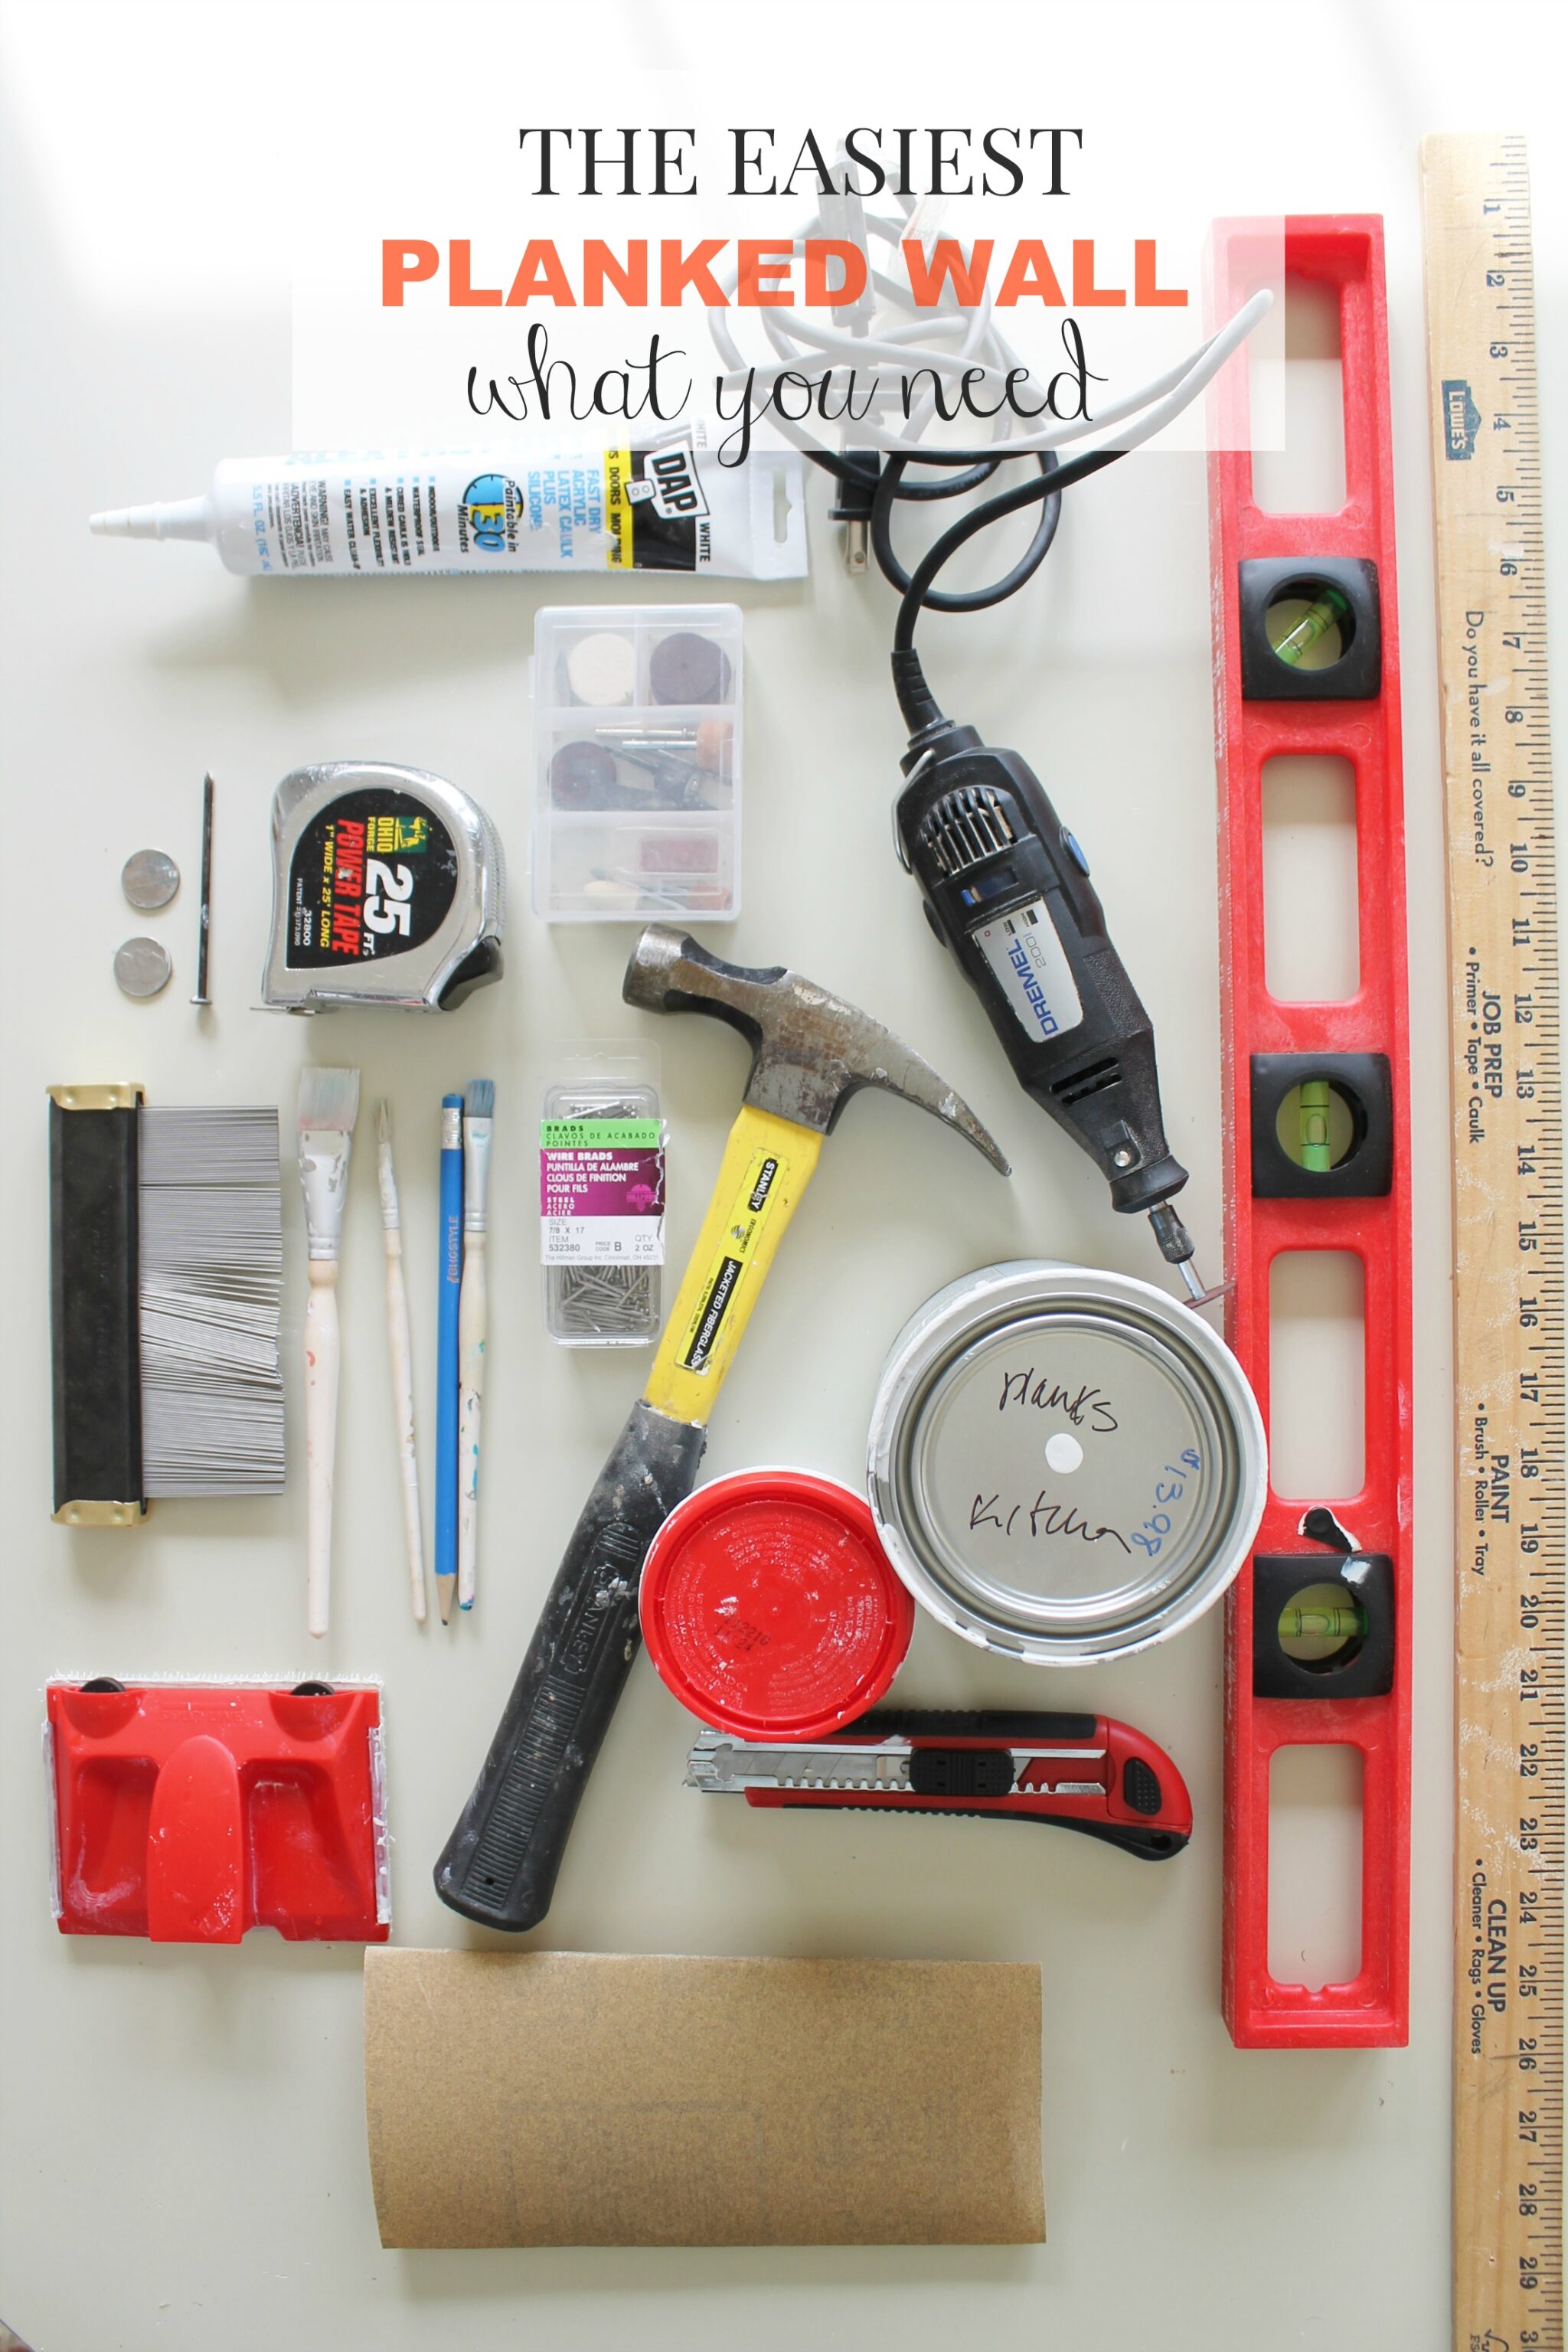
What you will need to create a planked wall….
your boards-I used a 1/4″ plywood
painters tape {not shown}
Dremel
extra mini saw bits for the Dremel
template tool for molding
hammer
7/8″ finishing nails
large long nail {to sink nails}
sandpaper
ruler
level
pencil
small paintbrushes
edger
paint {Valspar-Oyster}
exacto knife
nickels
tape measure
spackle
caulk
BIG TIP!!! This is the key to keeping it simple. Measure your wall and draw out your cuts, make sure you allow for your nickel seam in between each board. Take it to your home improvement store, I went to Lowe’s, the staff at mine is so helpful and have them cut the boards. Mine were 9″ in height, with one at 10″. Just be clear about your measurements and cuts. This will save you money & time.
This is after I painted with Valspar Oatlands Subtle Taupe, I still had the stripes but not for long {smile}.
This was the part I feared most, how to make the cuts around my french door molding. The guys at Lowe’s suggested this template tool and for $7 it was so worth it. Then they suggested the Dremel to make my angular cuts, what an amazing little tool! I got the floor sample for half off but they are under $40 ish.
I just lightly sanded my edges. You will need extra mini saw bits for this, they burn out quick. Be sure to work in a safe place and wear proper gear. The bits tend to break off so just be careful.

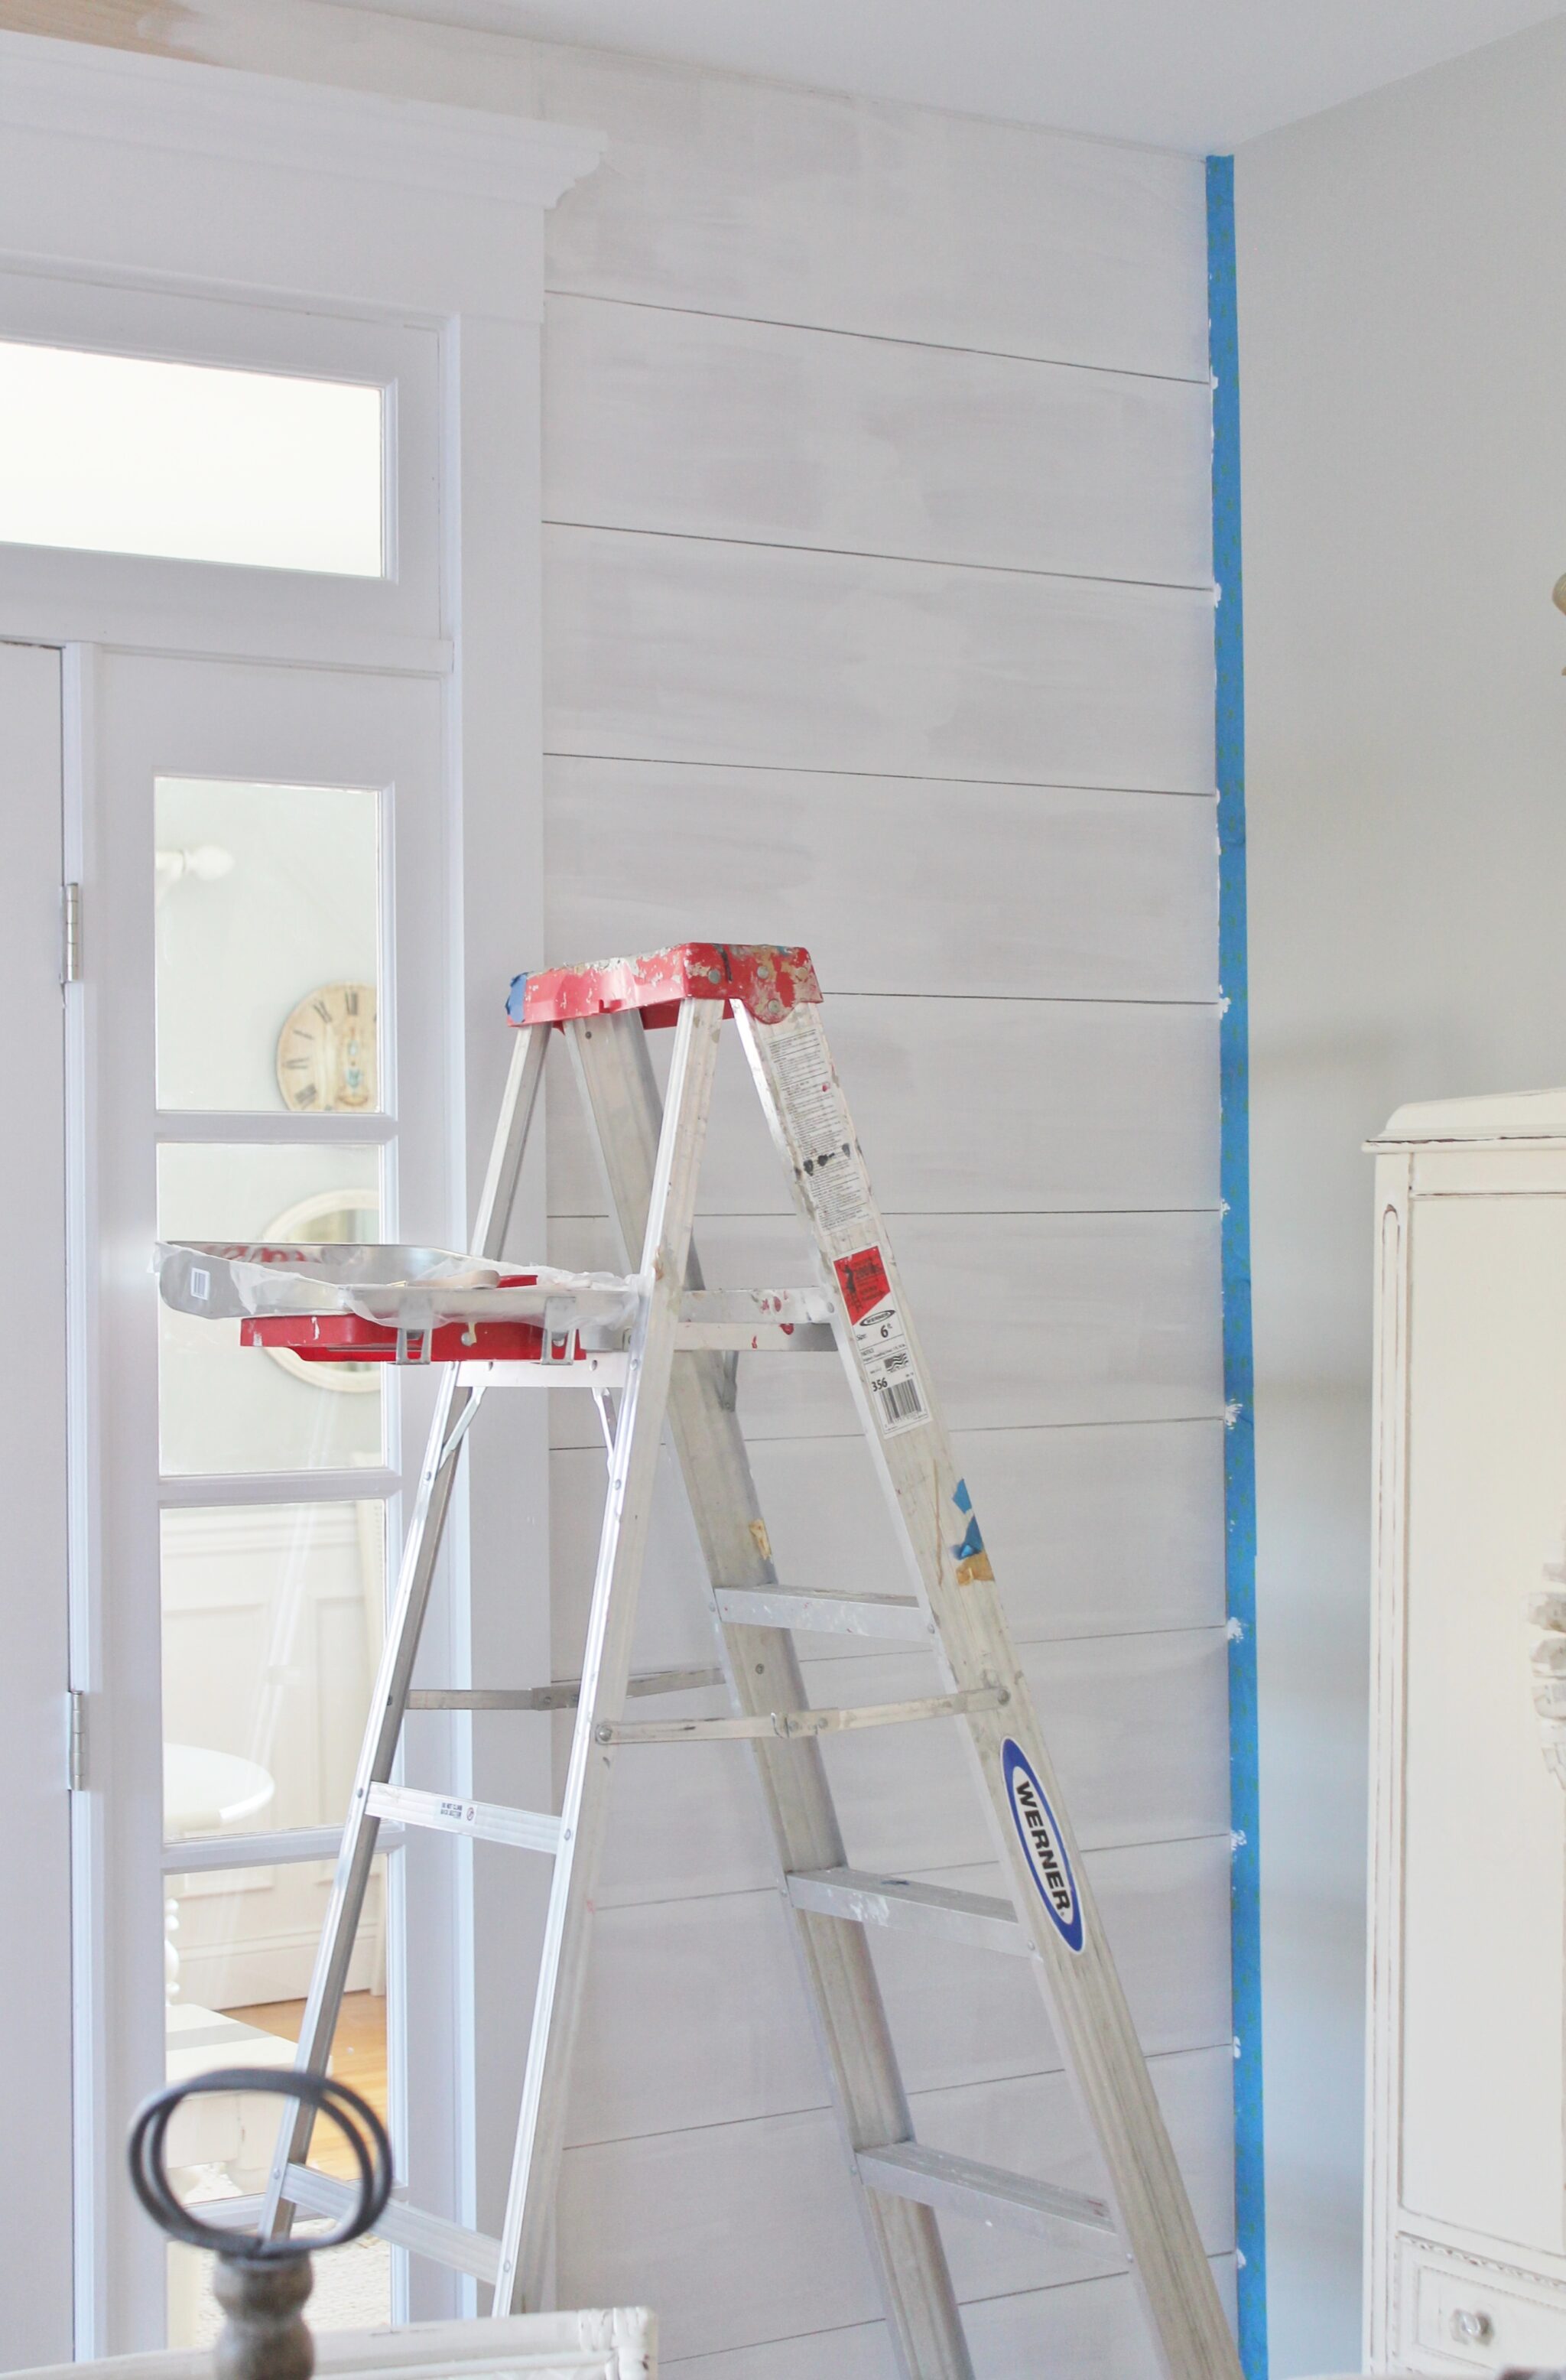
After I got my first few boards up it was smooth sailing. Instead of buying a nail gun I nailed them the old fashioned way, with a good old hammer. I used a larger nail to sink the holes.
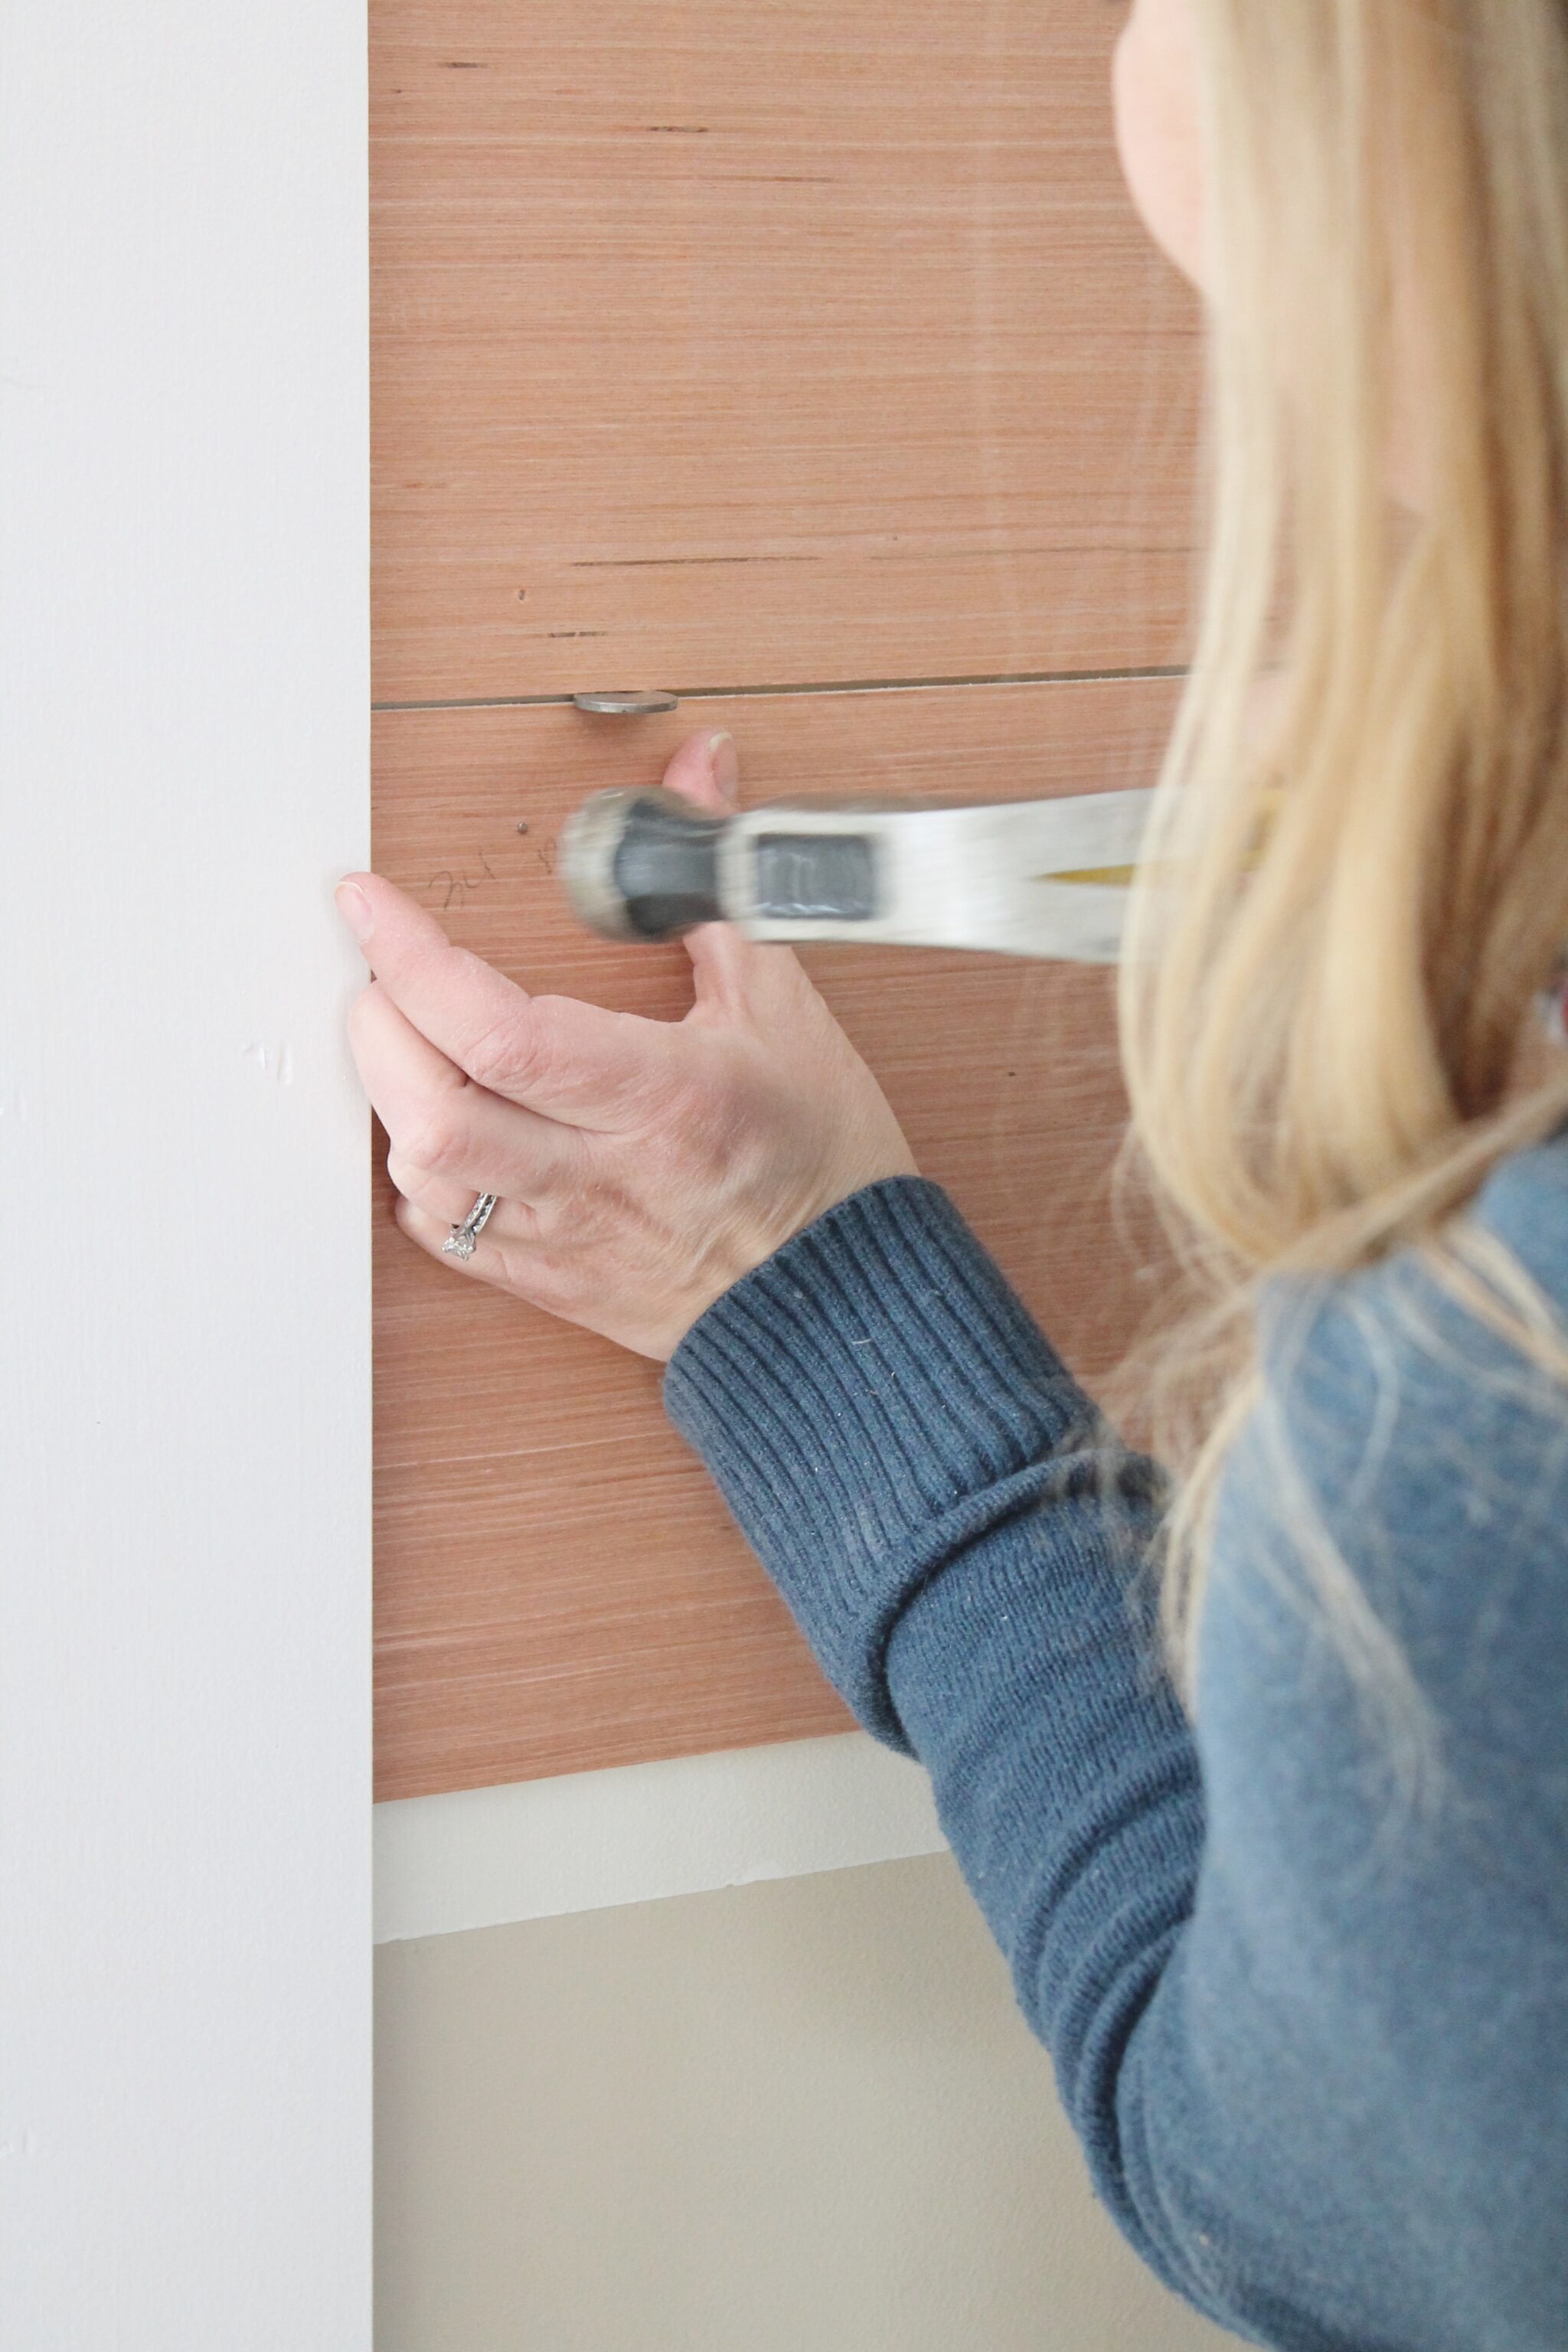
Once you have all of your planks up be sure to spackle & sand over your nail holes.
To paint in between each board I used a smaller paint brush, just one heavy coat. TIP- if your paint gets clumpy in the cracks use a thick piece of card stock & slide it through.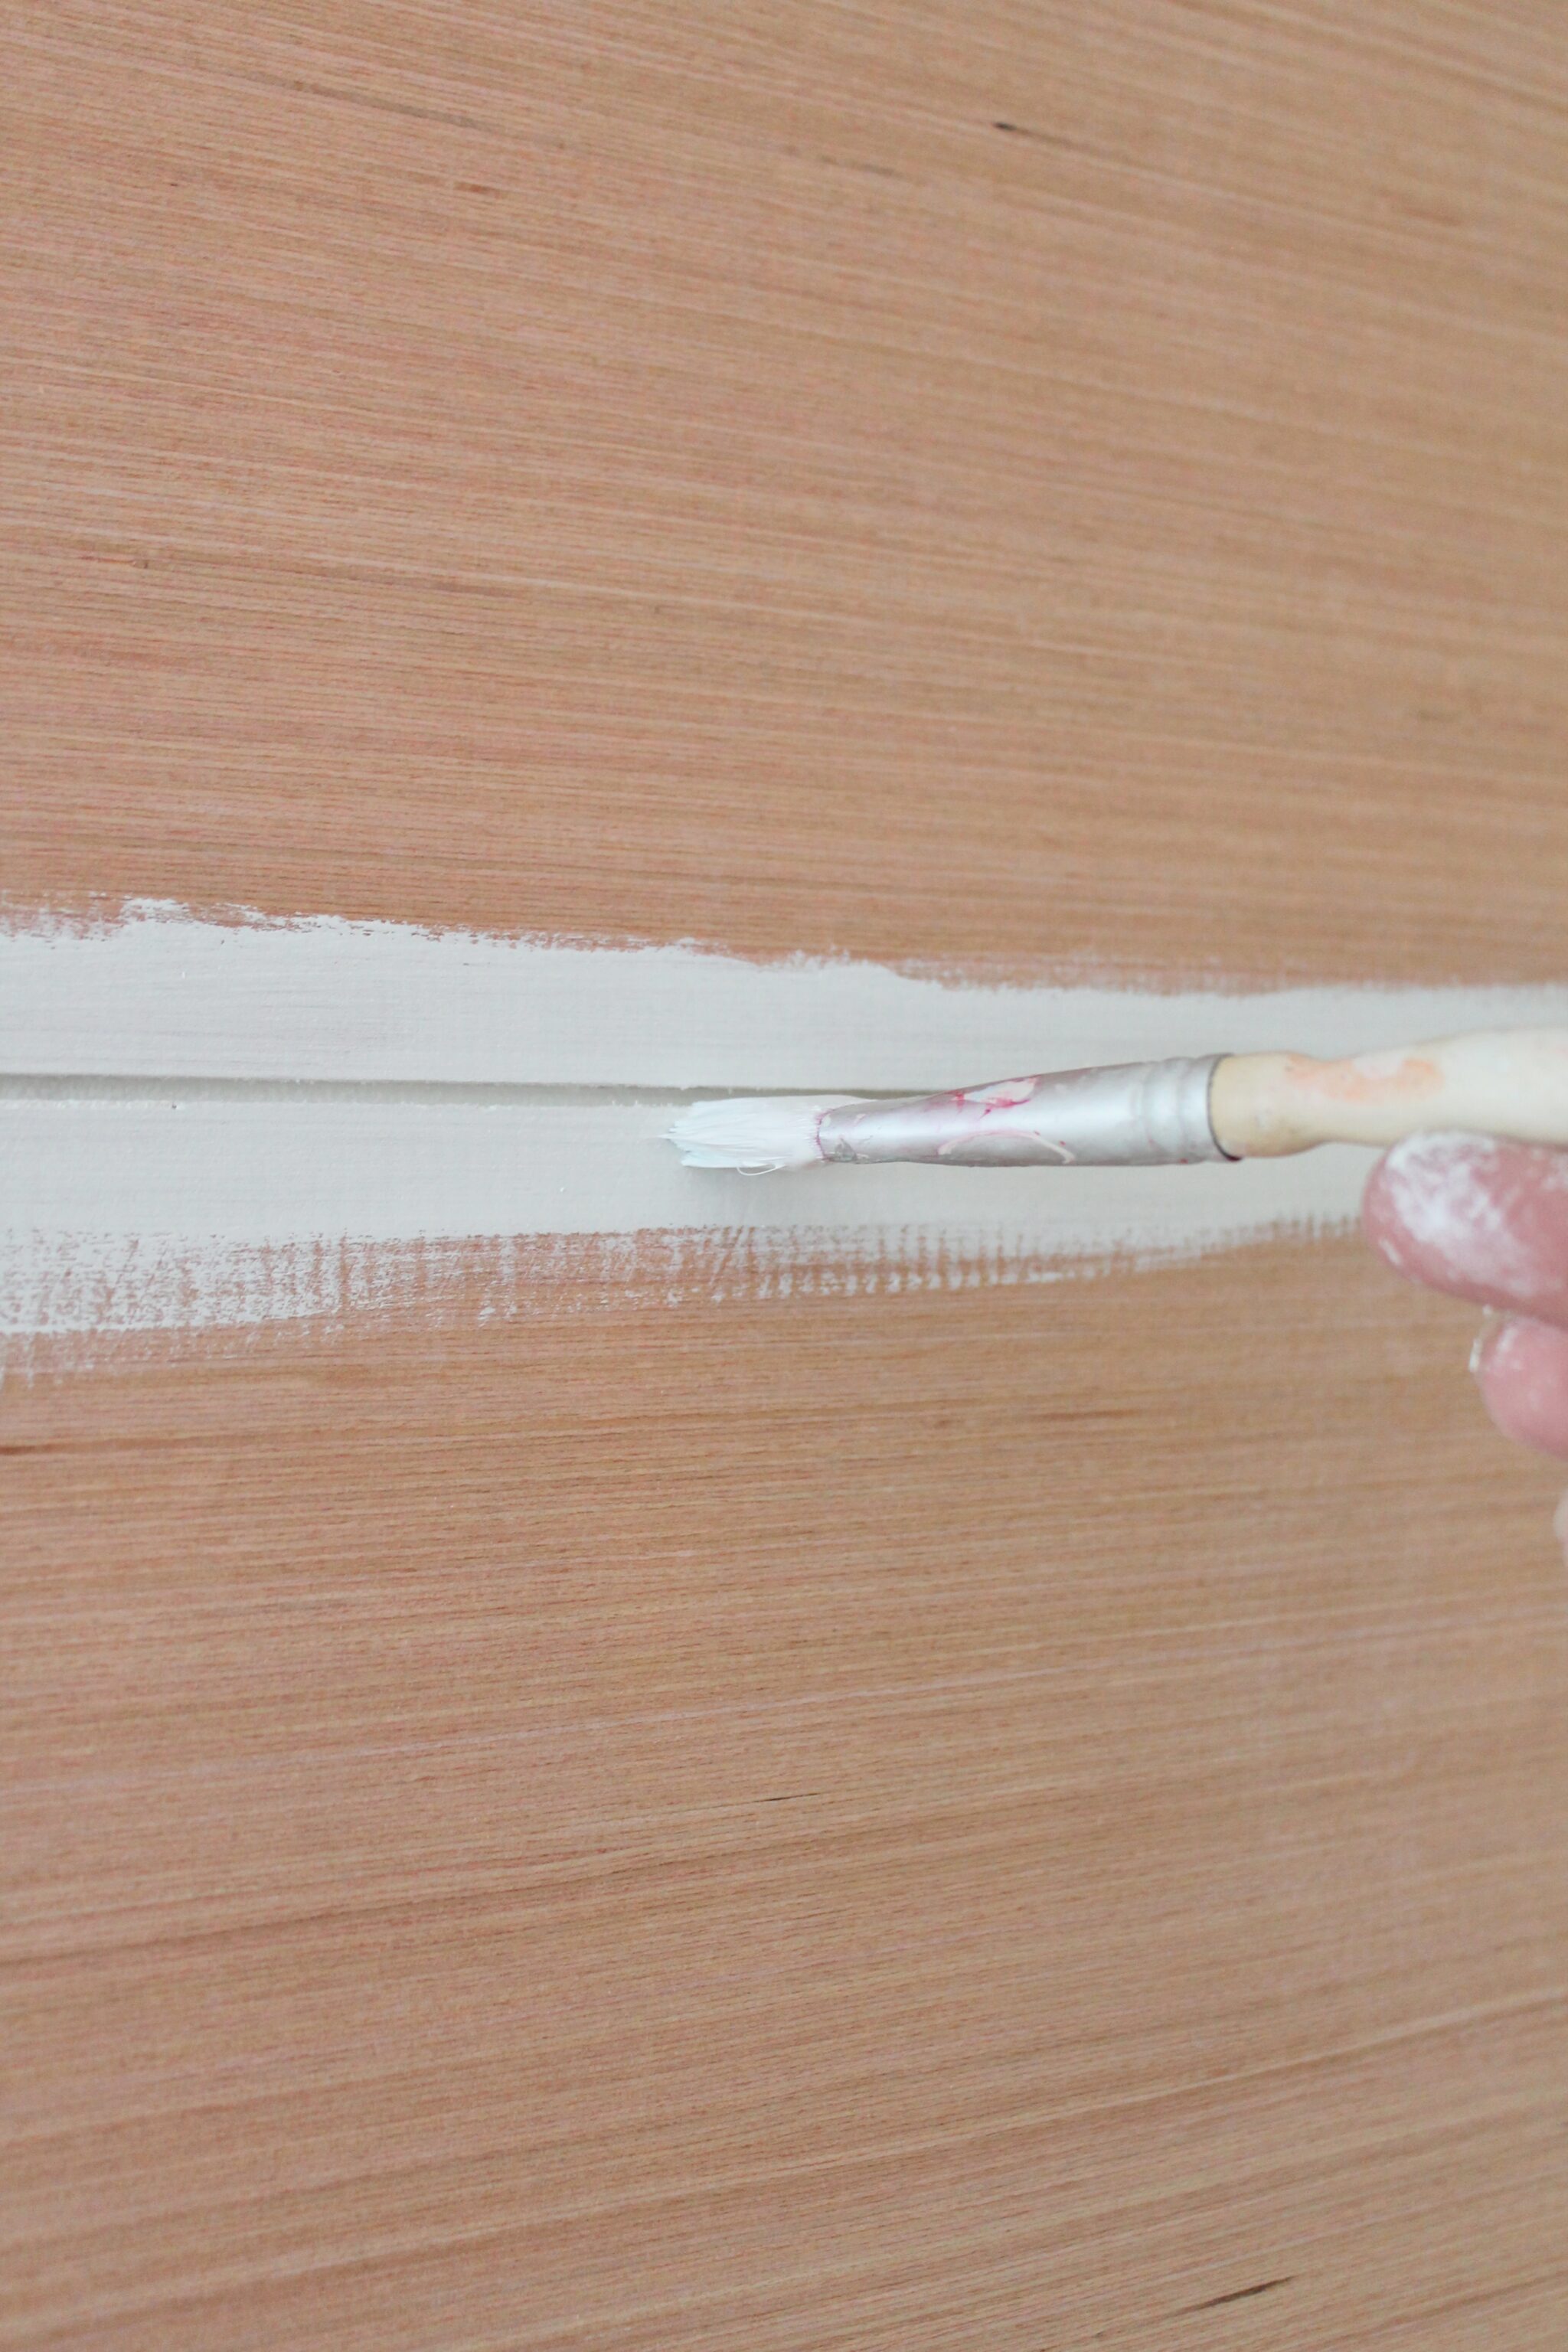 I love using the edger to paint small areas, I did 3 coats. After the first coat it goes fast.
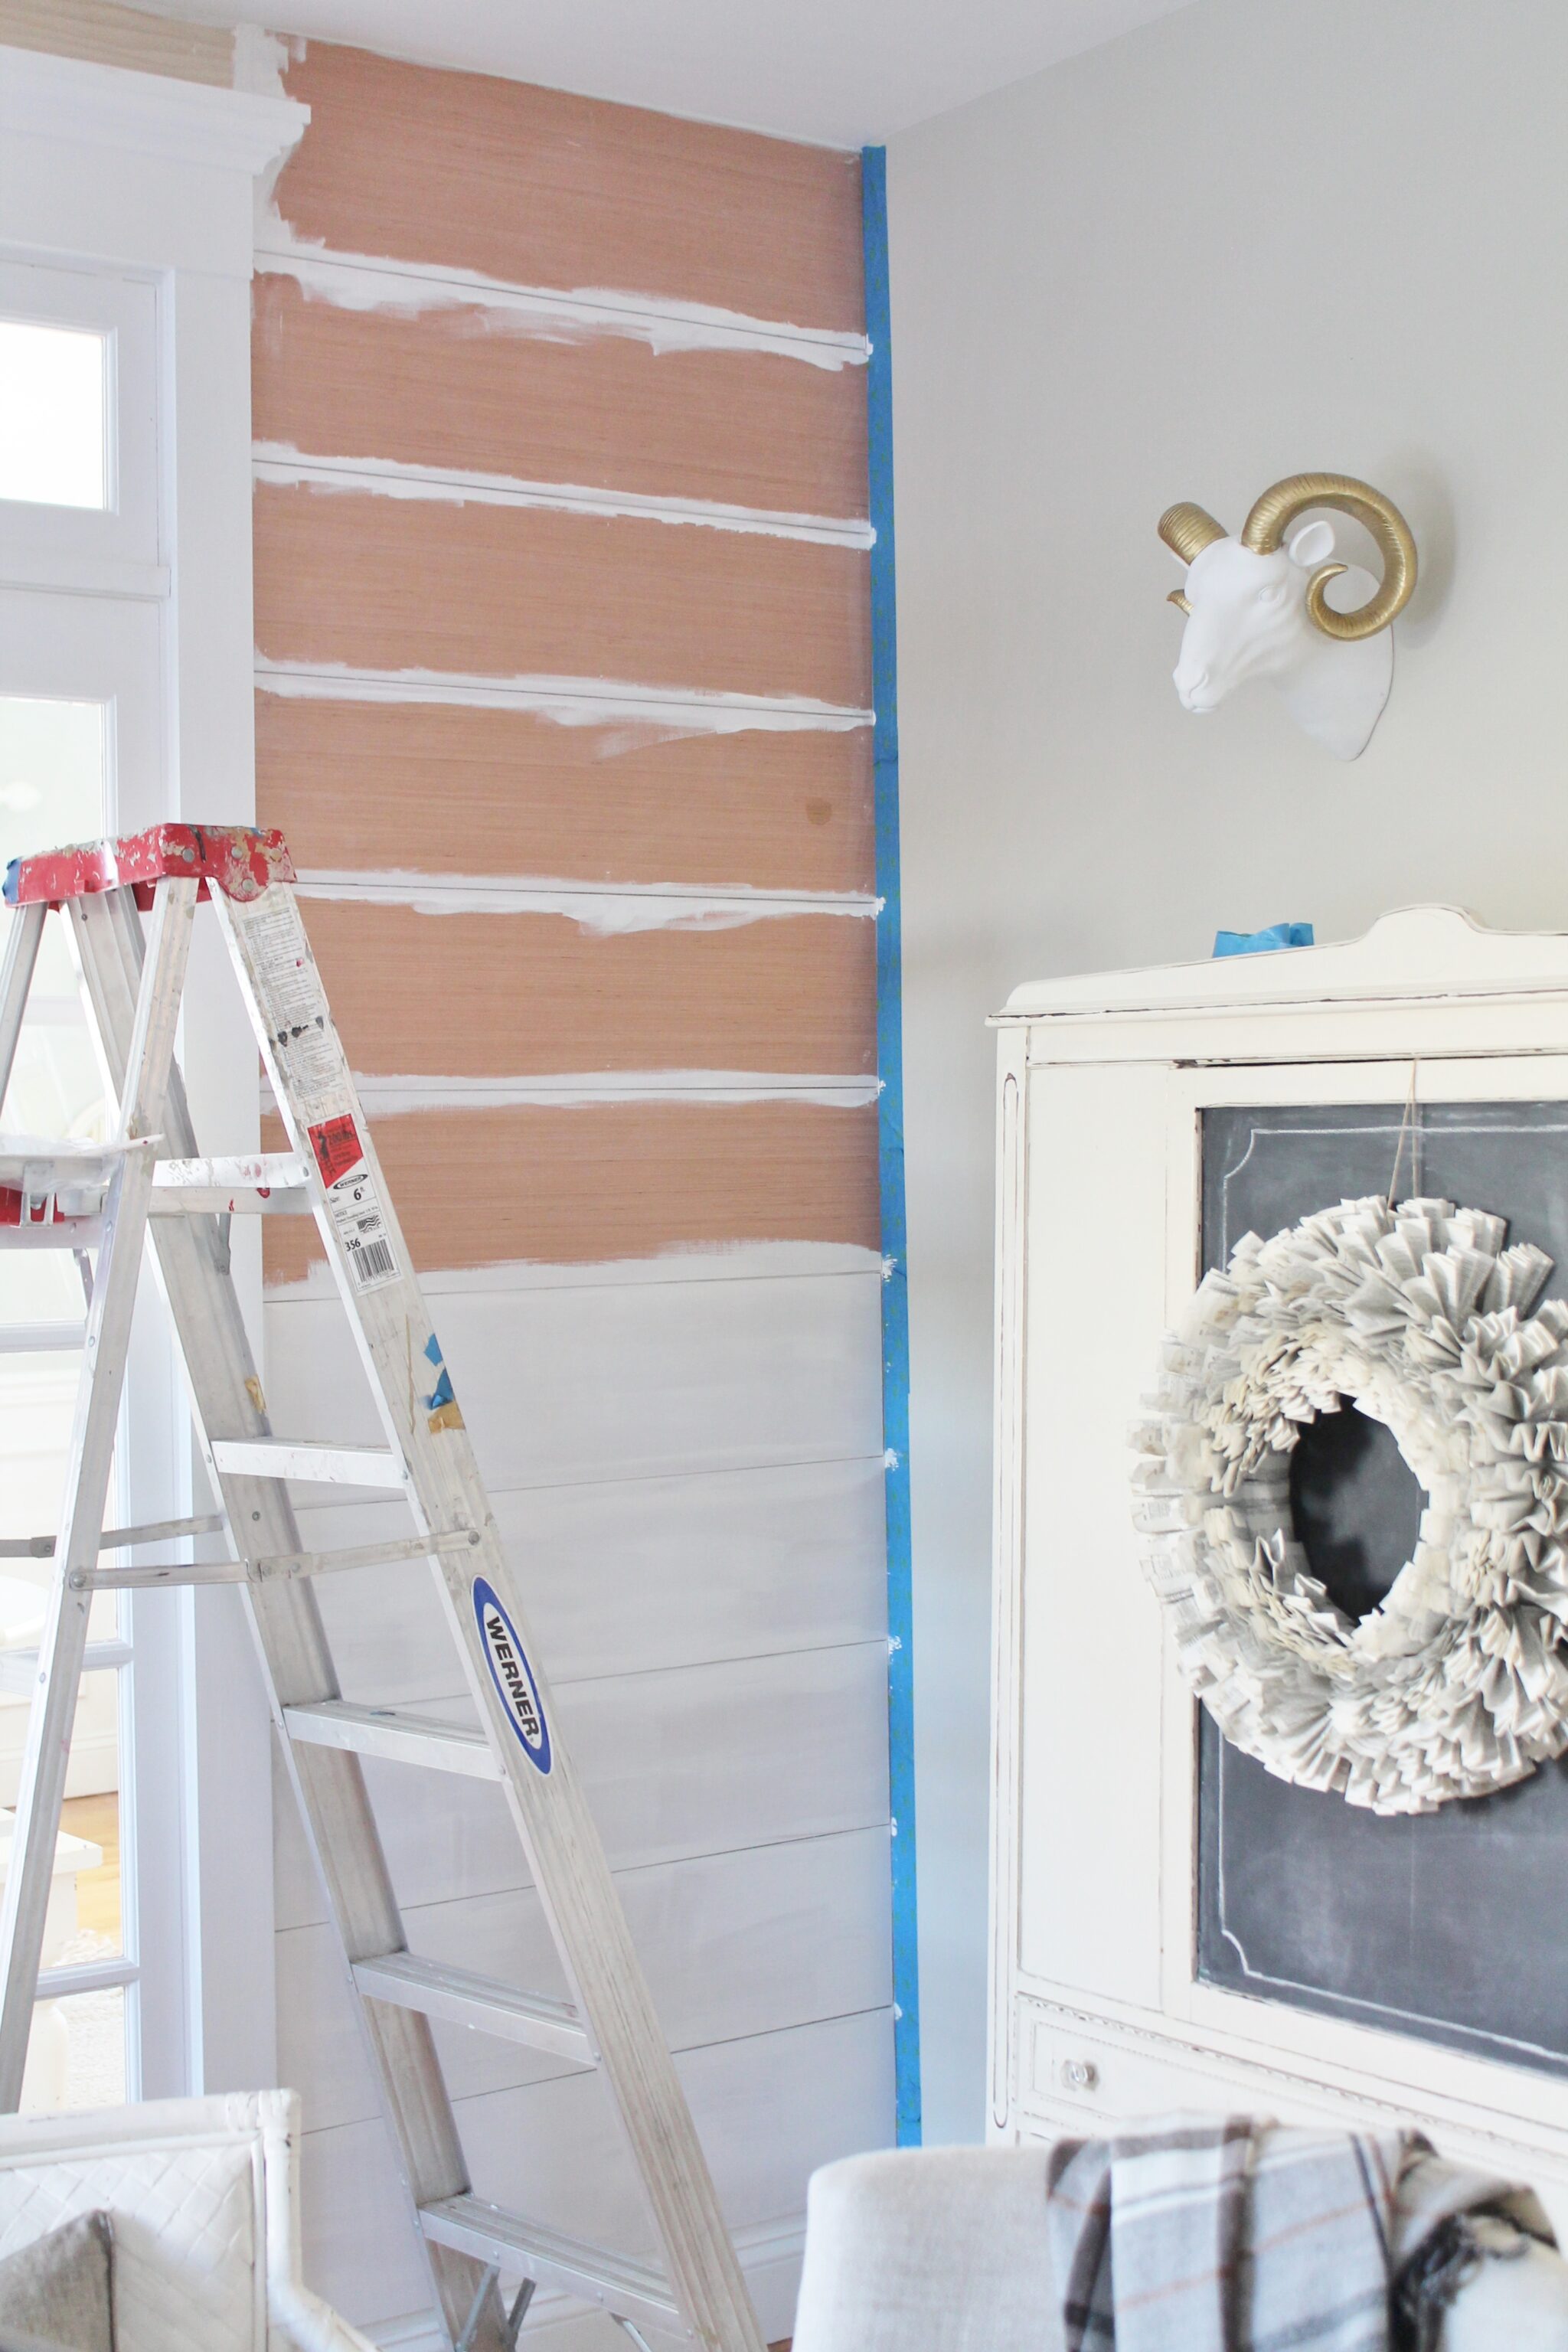
Tada!!! It looks like an entire new space. I will be showing you more of the kitchen & color soon. For the amount of money I spent to get the farmhouse look I couldn’t be happier with the result.

This was all me, so if I can do this, then so can you {big smile}.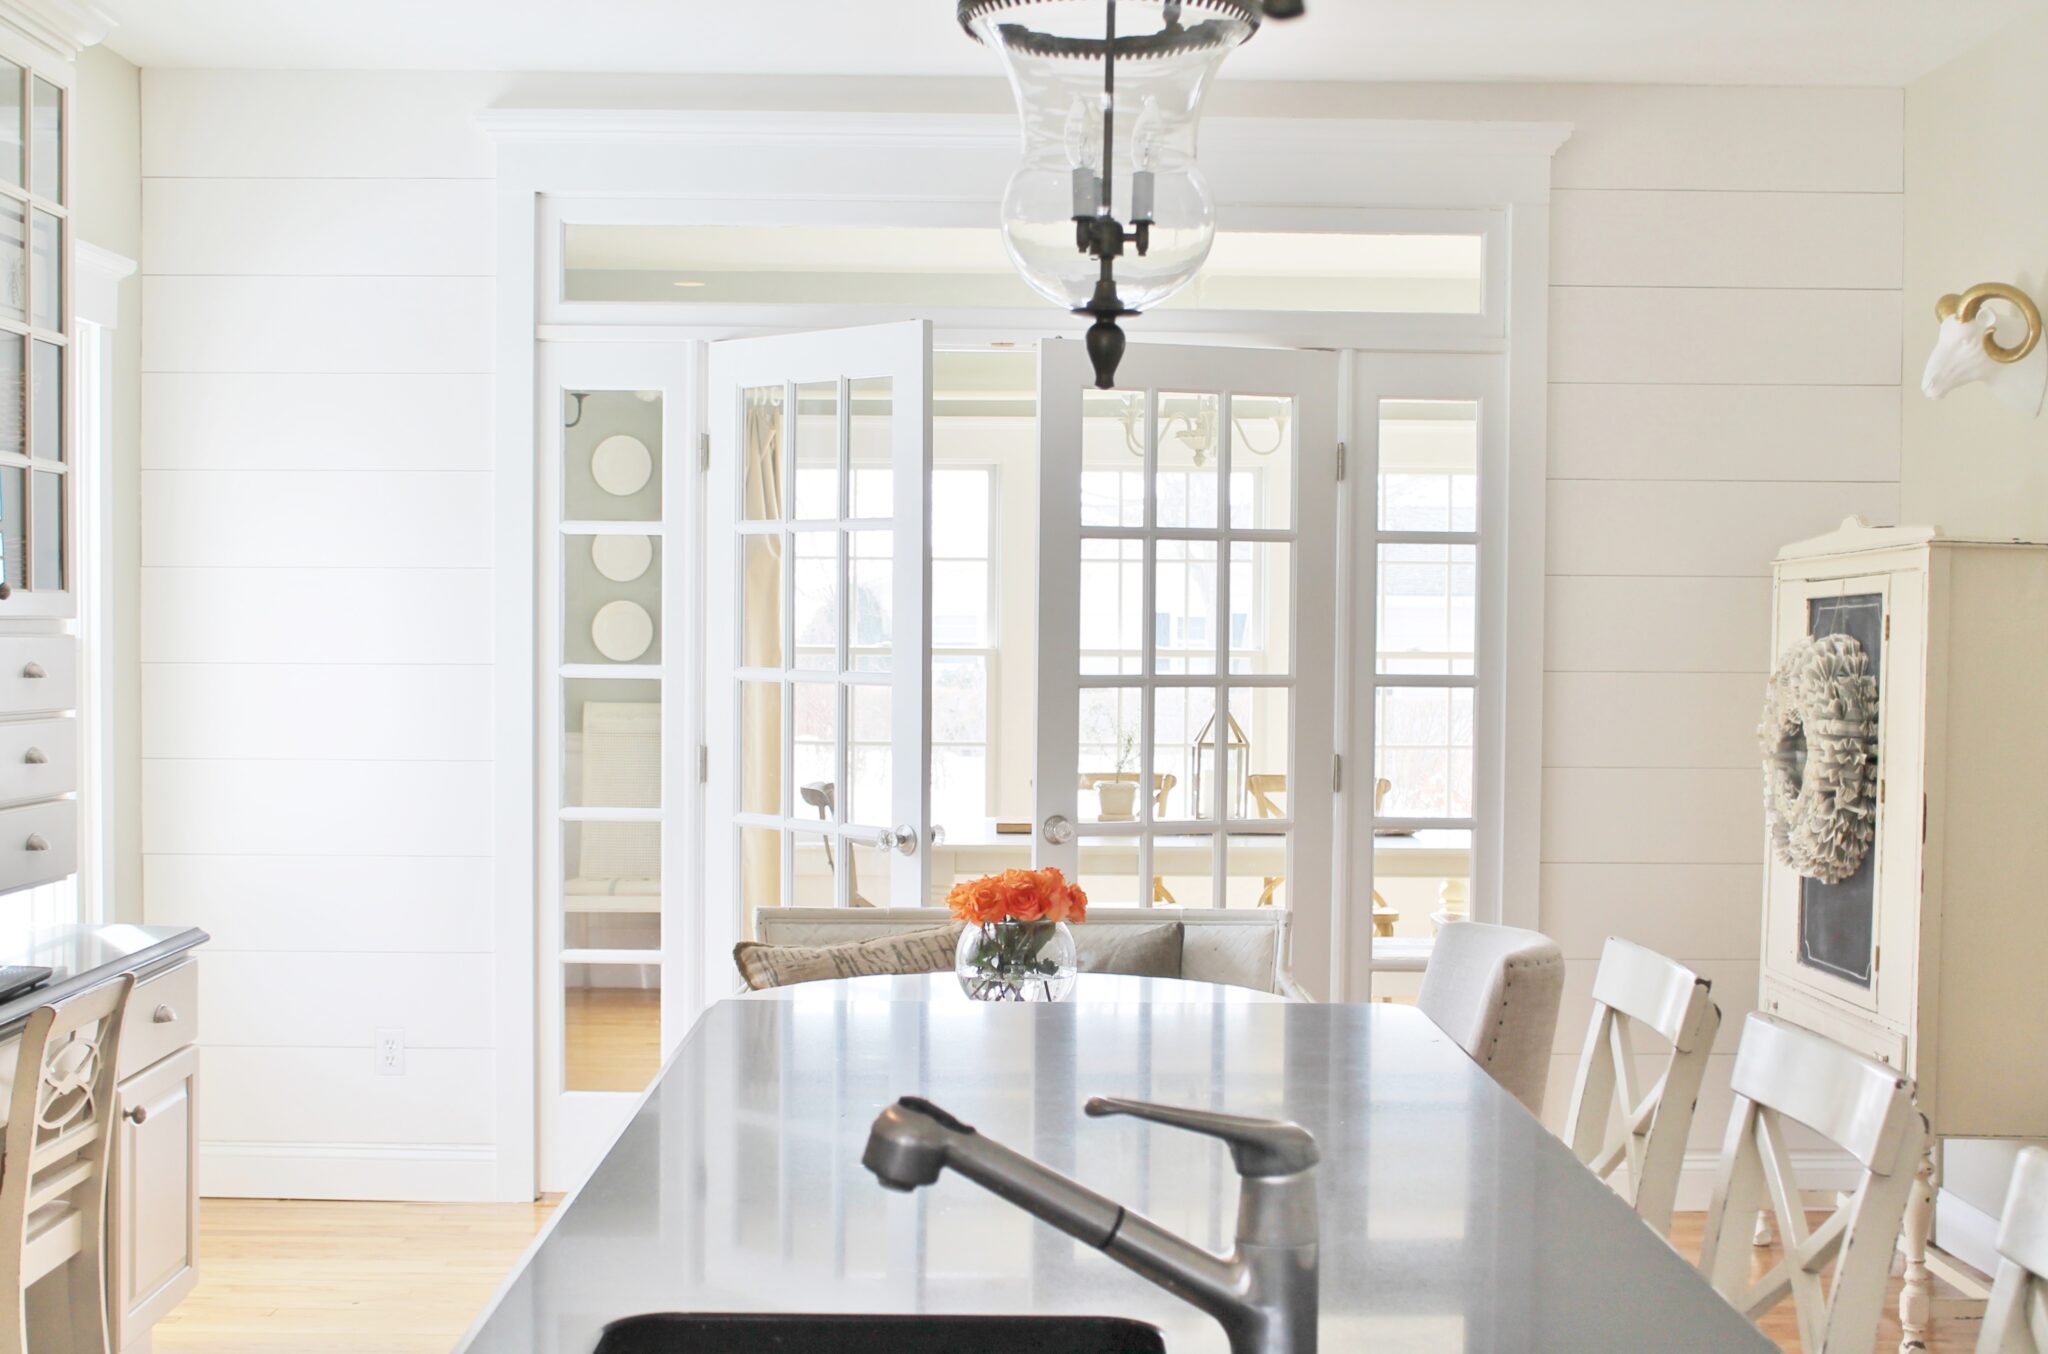


I will be making some changes in my dining room soon. You know how that goes, you tackle one thing & it leads to more {smile}. So stay tuned!
*********************************
On another note, there is still time to vote over at BHG for your favorite bloggers in 6 different categories, I think the decorating category is towards the end. Thank you all so much for your continued support! Just click HERE to vote.

Have a beautiful day!
Way to go! It looks Amazing! I can not get enough of the plank walls. And I Love the new colors so much! Fantastic!
Thank you Emily!!! Cant wait to see yours!!! Jen
Absolutely PERFECT! I want to do this exact thing in our home. I want to do the long wall in our foyer (small foyer)and the adjoining wall in the kitchen. I love how you showed everyone your pre and post photos of the project. I am a very visual person and seeing how you did your wall is invaluable to me….THANK YOU! KUDOS on a great job! Patty from Colorado
Thank you so much Patty! I am loving the change too!! Have a wonderful weekend! Jen
Looks amazing! Would you mind telling me the name of the template tool. Have tried searching and no luck.Thanks so much.
Hi Sue,
I am not sure, it didn’t come in a package but it was 7.99 I think, it was with all of the drill stuff. You can also take a picture from your iphone & take it to Lowe’s:). Good Luck! Jen
I love that!! Great job! You make it look so easy. The wall does look better!!
Thank you Shawna!
Beautiful! Can you tell me if the Valspar Oyster paint was flat, eggshell or satin?
Thank you! I did satin in the Oyster:). Love the color!
I am in awe…I have always wanted to do this in our master bath…we have the old claw foot tub…I thought it would be so perfect. And your post makes it seem achievable!! Yay! I always find the guys at HD and Lowes so helpful…just really great people. I hope to get this project going soon.
Jane xx
Awe thank you Jane! They really are, love those guys! I wish you luck!!! Happy Friday!
Jen…you did that??? Bravo!! That’s amazing and looks gorgeous!! I love your home and can’t wait to see more!! : )
Thank you Peg!!!
Brilliant! Thank you so much for sharing! I think I shall now be brave enough to do my dining room wall and perhaps my staircase walls as well, thank you so much for sharing!
Thank you Tracey!!!
You do great work!
Like all your work, it’s so lovely. I have trying to work up the nerve/energy to try planking a wall myself and this post is really encouraging. Especially interesting to read how you dealt with the doorway molding. It’s also reassuring to see that it looks wonderful on just one wall, which is what I had been thinking about doing.
Thank you!
I love your planked wall, very farmhouse. My great great grandparents had that same type of wall in their farmhouse. The suggestion that Lowe’s made with the template tool for you to handle the special cut around your doorway was fantastic. You made this look easy. Nice Work!!
Looks awesome! We are in the midst of doing some work on our powder room and I plan on planking the walls. Thanks for your tutorial!
This looks so amazing, Jen! x
Thank you Danielle!!!
This is amazing, Jen! I’m pinning and sharing on my FB page today 😉
Hugs, Jamie
Ohh Jen you are making me want to do a plank wall even MORE now!!! I’ve been wanting to do one for years now, and this is so so so beautiful!!! Great job!! XO
I’m wondering if the cut edges of the plywood had those little gaps in them, and if so, whether you had to fill them, or caulk. Looks really nice.
I love it!!!
Thank you!!!
This is so awesome! I love love love horizontal plank walls and this looks like a way I can HAVE them! I’m all about doing things on a budget and love to add character to boring walls, so this project will fit in perfectly! I’m so excited to have stumbled onto this and thank you!
Thank you! It made a huge difference in the space:). You can do it too!!! Jen
Love this! Watch out though…it becomes soooo addicting:) We should really just have planking parties:)
Thank you Allie! I know, I could see it everywhere in my home, I just love it! Have a great week!
Looks amazing … adding such fun character! I’m getting ready to attempt this over our mantel and have taken notes of your tips!
Thank you Becca!!! Have a nice weekend! Jen
I never thought of using plywood for my planks. I’ve been pricing out ‘real’ planks for my mud room ceiling and gasped at the cost. I’m definitely going to use plywood. And it’s thinner and easier to use. Thanks for the post.
Glad it could help Lisa! Have a nice weekend! Jen
This is fantastic! I’ve been wanting to do a planked wall in our mudroom for a year now, and have felt intimidated by the process. I’m wondering… what does the texture of the plywood look/feel like in the room? Does it look kind of “diy” in person? Also, I was wondering if you made sure to nail it into a stud, or does that not matter? 🙂 Thanks!
HI Dawn,
Thank you so much! No it doesn’t look DIY at all. And to be honest most people these days are choosing to use think plywood because it is cheaper and more forgiving to work with existing moldings. Yes, whenever possible I nailed into a stud. I hope that helps. Have a good weekend! Jen
love this! did you remove the base trim or did you but it right up to it? thank you
Hi Shannon, the trim is right against the molding. Thank you!!! Jen
It’s not easy at all. But I love it
Wonderful tutorial…very helpful! I have looked at many planked wall tutorials online and yours is the only one I have seen that specifically shows painting in between your boards. I’m not certain if others didn’t paint in between but yours does seem to have a softer, seemless look. Thanks for sharing!
Thank you Allison, good luck! Jen
I am getting the courage to tackle this plank wall idea in my pool bathroom. Question: I noticed in one of your pics, it looks like you kept the electric socket plate on and cut around it when you hung the planks. Did you use the dremel saw for this to sut around? Or how did you do that ? Thanks so much,
Amber
I did Amber use that small tool for that as well. Good Luck!! Jen
Hi Jen, what length did you keep your boards?
Hi Monica, they were 9 ” 35-36″. I hope that helps:).
If you have a wall longer than your 8′ piece of plywood, would you just piece boards and caulk in between to make it look like one long board? Say a 12′ wall?
Yes Cathy, just caulk the seam:). Good Luck!! Jen
Hi Jen,
I think I have my husband is on “board” for this project over the holidays! We are just curious…what kind of wood did you use? He thinks it looks like wood laminate? Is this so it lays perfectly flat? It looks beautiful!
happy Holidays!
annie
THANK YOU SO MUCH FOR THIS!!! this is the easiest tutorial i have sen yet!!!! question tho if you have a minute?? I would like to but my outlet cover on the outside of the plank wall. tips?? any reason why u did inside/